Progress continues on the playroom to study transformation – I’m trying to get it all done before the kids go back to school in late August. One of the major changes I wanted to make was to have a wall of shelving that would contain books, art supplies, games, and a modern TV for the kids to view videos on occasion.
You may recall the laminate entertainment center that used to sit in the space – a fabulous piece but always a little bulky. It jutted out into the room, but that was necessary to hold my old college television and my kids would watch their VHS movies on it. We decided to donate that piece of furniture to the Alma Project family room so I went in search of some new shelving for this space.
I wanted to something streamlined, modern, narrow, but wide too and I most definitely did not want to spend a fortune. Enter the IKEA VITTSJÖ shelving unit, $70 bucks each! It comes in black metal with glass shelves, but I wanted to transform it to suit our home, so I painted it white and substituted dark wood shelves for glass – here it is.

The unit when assembled looks like this.

But I thought white with wood shelving would be better fit for our home. These transformed inexpensive shelves are now perfect for this space !

There is just enough room for educational books, artwork, and some greenery.


The magazine file folders are get this – painted! Seriously. It’s cause I’m cheap resourceful like that. I already had the set of four orange canvas ones from a few years ago (I think I found them at The Container Store?) so I painted them with a craft paint – reinvented for pennies!


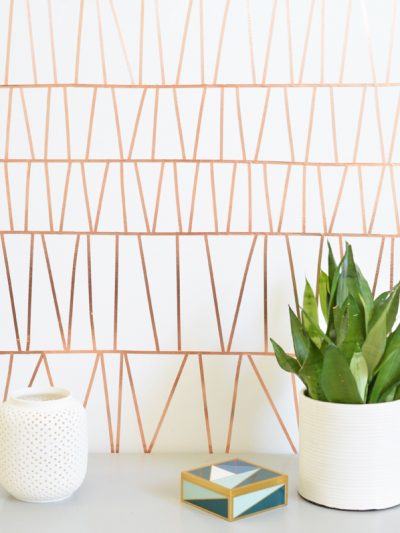
That cute green oversized clothespin is adorable, I know! I found it at Pottery Barn Kids five years ago, sadly it’s no longer available but I say bring it back in all kinds of colors because it’s not just a decorative accent, it can hang on the wall and hold art, love that.
Hedgehog, otherwise known as Mr. Prickles, is running joke in our home. Long story short, it’s the one forest animal our daughter stumped us on last year in a 30 minute game of “Guess The Animal” making us “furious!” and every time the kids want to make us mad they say “Hedgehog” and then get tickled to death. Mr. Prickles has a place of honor in our home – acrylic watercolor purchased from Dimdi on Etsy.

This is a good time to talk about those shelves – they are made of birch plywood. I didn’t like the idea of glass shelves in this space and I’m smitten with the white + dark wood combo (see these end tables and my personal Pinterest board dedicated to the subject) so I decided to replace them with stained wood shelves.
I headed to my local Lowes because it has a pretty good selection of wood. I could have cut up a piece of regular ol’ ½” plywood but I opted instead for the prettier birch. I have to tell you I stood there debating over cutting up the $30 piece of of inexpensive plywood and spending $75 for nicer birch (4’ x 4’ sheets) for half an hour and ended up choosing the latter because I liked the grain so much better.
Lowes offers free cuts for their wood so I had their guy cut my ten shelves to the size I needed. I also grabbed three cans of Rust-Oleum spray paint in semi-gloss to turn the shelves from dark to light.

I used my leftover stain from the X base table – two coats – then added one coat of Minwax Polyurethane in ‘Satin’.


Plywood has unattractive edges, so the best way to disguise them is to cover them with iron on edging, use wood putty, or take the easy route and paint the edges with some dark brown paint – a solution I’m satisfied with in this circumstance since the edges aren’t that visible anyway because they mostly sit inside the shelving unit.

Both shelving units are secured to the wall with these earthquake straps- the same ones we had on the old entertainment center.

The final result from staining the birch plywood is a nice contrast between dark shelves and the white painted frame – it plays well with the adjacent dark wood table and white window seat.

I love how integrated the smaller flat screen TV is…

… five bazillion points if you can identify this movie.

I really love how I can display a rotating art gallery on top. Picasso said it best, “Every child is an artist. The problem is how to remain an artist once we grow up.” The butterfly art is from IKEA but the rest are *masterpieces* created by the children.


And that’s the story on how a plain ol’ IKEA shelf became the perfect fit in our house!

The whole project including two shelving units, new wood shelves, and spray paint cost me $225 because I spent the extra $$ on the nicer plywood, but I’m crazy loving this new sleek modern wall of shelving in our home!


Want more ideas for personalizing the Vittsjo pieces?
Take a peek at this follow up post (think color, rustic, and glam!)
,
.


It all looks great! You never fail to impress with how you turn something ordinary into something gorgeous! Love the idea of forgoing the glass shelves and using wood. Also really love the idea that its OK to buy something new and paint it to fit in better with your home…now if I could just convince myself to do the same thing!
love this! I’ve been searching for a bookcase for our family room to house both books, magazine files and decor. And here you did it perfectly.
looks great!
Spaceballs!?!
I love the white finish with the dark wood! Maybe I’ll do this in our home someday, so fresh and modern!
This looks fantastic! The white with dark wood is such a nice combination. You made the right decision going with the more expensive plywood too (: your work is sooo inspiring!
Just the other day I saw the giant clothespin at our local JoAnn’s, in the unfinished wood.
I think I will have to go get one!
Also, LOVE the rug!!
What is the color of the walls? That matches very well too, and I love it!!!!
Hello Ani, all the paint colors in our home are here:
http://www.centsationalgirl.com/2010/09/the-paint-on-my-walls/
Kate
Is the movie Spaceballs?
Please, oh please, tell us where you got the rug!!! I’ve been looking for a modern rug in those exact colors for months!!!! LOVE IT! :)
LOVE it! I’m going to be redoing my daughters room very soon. The room is huge and is also her playroom. You’ve given me lots of ideas!
The movie is Spaceballs, right???
Looks great! Love that rug…..where did you get it?
Fabulous! I love how light and airy the shelving units feel while still holding a ton of stuff! Always an innovative, impressive “hack” from you! Looking forward to seeing the rest of the updates and the whole room.
I think the movie is Spaceballs!! And I have had my eye on that shelving unit too! Love how you re-invented it!
AMAZING! One of these days, I hope to try one of your Ikea hacks. Jus moved from city life in Houston to country life in Franklin, TN, so no Ikea near me, but planning a trip soon! Thanks for all the inspiration!
I saw a hack on these shelves but they did the in a gold for a more regency look. I love your take on it as well!
i love the stained wood shelves. i stained our coffee table & a mirror frame. i love the contrast that stained wood brings to my home – it’s kind of rustic, which i like the look of. nice job & ya just can’t beat ikea! wish we had one closer to us!
I love love love the bookshelves, and have been considering some new ones for my sewing room. I follow you on Pinterest and coveted the industrial set you pinned, but not the price. Yours are a great DIY example of how to research, save money, and make it your own!
Gorgeous! Gorgeous! Gorgeous!!! Kate you really are amazing. I love the Ikea hack sooooo much. And that new rug…beautiful!!! Thanks for always sharing. :)
Hi Jen (and others) the rug is from here, great colors and great price!
http://www.overstock.com/Home-Garden/Catalina-Green-and-Ivory-Outdoor-Area-Rug-710-x-10/6233344/product.html
Kate
I love the rug and can’t wait to hear where you got it!!!!!!!!!!!
You have inspired me yet again. I think I will do one of these in gold in my formal LR. My question: Do you paint prior to assembling or after?
Thanks
Hi, Kate. What a transformation! Did you paint the metal after it was assembled or did you paint the pieces individually and then put them together?
Hi Holly, we assembled the shelves first then spray painted them outside on a tarp.
Kate
I love how you redid the shelves to fit your home and I love the rug too! Michael’s has some of those big clothespins. I just bought one there for my daughter’s room!
I recognized that movie right away! Star Wars!!! I’m a huge Star Wars nerd…
Anyway, LOVE what you did to the Ikea shelves! Everything fits in so perfectly!
A great hack! You could always use the glass shelves on top of the wood for extra protection…I can see the worry using them as the sole support for heavier objects and the worry of kids pulling them over. I’m just always putting wet things on every horizontal space and poly never seems to be enough!:) The white and dark wood combo has a very clean, yet grown-up feeling about it. I’ll definitely have to visit your pinterest page.
CTD
Great hack! I bet the crowd on ikeackers.net would love this. Good timing, too – we’re making the annual pilgramage to the IKEA in the next state next week.
Deliberating in the aisles of Lowes over which wood to buy takes up too much of my time as well. It’s never an easy choice. Great mod. Looks brilliant!! Can you tell us what movie that is if no one guesses right?? That’s going to bother me all day!!
Hi Johna (and all) – that’s a scene from the original Star Wars just before Darth Vader arrives on the Rebel ship but it looked so much like Spaceballs I cracked up! Glad everyone else saw the “resemblance” too!
Kate
This is so adorable! You did such a great job on revamping it. I think where you have the shelves right now is fabulous! Have you seen other bloggers who revamped the same shelves…there is one where she turned it into gold shelves it looks so chic as well (bijouandboheme.blogspot.ca/2012/06/house-cleaning.html)
Thanks for the link How2Home, I’ll check out the gold version!
Kate
It’s like you got into my head and figured out exactly what I wanted. Seriously, I was looking at those ikea shelves just yesterday wishing for a wood shelf and not glass. I am SO going to do this, thank you!!!
Looks amazing… how big is that TV? It fits perfectly!
Hi Moni, the TV is 19″ – the space is narrow so the screen isn’t too small from across the room!
Kate
So clever Kate. The room is really coming together and it has been fun seeing all the updates!
Looks gorgeous, just like everything you do. My continually pressing question is how do your keep your life organized, how do you keep all of the balls in the air? You’ve got so much going on with blogs, kids, myriad projects…how do you keep it all straight? I wake up, and so often things are so busy that I don’t know where to start…
Hi Kathy, don’t be fooled, that’s just one organized wall of our mostly messy house! I’ve got dishes in the sink and laundry piles, but whenever I feel overwhelmed, I just try to remember to tackle things in small doses, one step at a time. :)
LOVE this!! I would have never thought to put the dark wood as shelves- genius!!
Bah, so SO smitten with this IKEA hack! Beautiful job, Kate.
SPACEBALLS???
Oh, that’s so funny – I just scrolled up to see if anyone else said that – NEV- A would have thought it was the original Star Wars!!!!
OH how funny! I got two of the smaller version of the bookshelf a couple of weeks ago from Ikea and sprayed them gold but kept the glass inserts. I love those earth quake straps, great idea! I was wondering how I was going to secure them to the wall, especially now that I have a one year old grandson, securing it is a must.
What a great job! I can’t wait to see the finished reveal. Our playroom (officially the living room on the original floor plan) is also getting morphed into a multipurpose room — study, music room, second family room geared towards the kids now that the kids are getting older, so I’m paying close attention to your design choices. I would love a floor plan reveal when you finish also–my greatest design struggle. Thanks for bringing all of your great ideas to us!
Kate, I love it! I like that it’s not all white. Great job and great bookcase styling. Kristin
Beautiful!!!!! And huh, earthquake straps. Didn’t even occur to me but I guess I’ll need to know about them when I move. :)
My mind is swirling with possibilities to transform a set for my studio in my own color scheme! Yet loving what you did with the white and wood.
Genius idea painting those IKEA bookshelves and changing the shelves! Everything looks great. And I love the kid’s artwork framed on top of the shelves.
I’m intrigued with the earthquake staps. Being from the south, this is not something we are familiar with; but I can definitely see opportunities for their use. Could you please provide a source for the ones you used? I did a Google search, but only found the metal cables.
Oh, and by the way — LOVED the IKEA hack!!! You are amazing!!!
Hi Renee, thanks! They are Quakehold straps, found at home improvement stores, also great for avoiding toppling for high furniture that kids might try to climb on.
http://www.homedepot.com/buy/tools-hardware/hardware-fasteners/quakehold/white-quakehold-furniture-safety-strap-42455.html
Kate
Love this! I recently saw these shelves painted gold, and I’m really digging your white version too. Have also been thinking about doing these on an entire wall, but have been hesitant that they’ll make the room look shorter… Just wondering how tall are your ceilings in that room?
Great question Gwynne – we have 9 foot ceilings so there is room for display of art or other decorative objects above!
Kate
Kate,
I’m a big, big fan of your site and work. Your latest Ikea update is lovely. My questions: how did you secure the shelves to the unit itself–do they just sit on the metal? Are they sturdy enough to remove and replace books often? I’m trying to find the perfect shelving system for the writing room I’m creating for myself.
I too wonder how you do it all…would be interested to see “A Typical Day in the Life of Centsational Girl.”
Hi Liz, thanks so much! The shelves when cut to the proper size sit right inside the brackets that are fastened to the unit – I took my shelf to Lowes and we used that as the template to cut the plywood shelves. Our 1/2 inch shelves are sturdy enough to hold large stacks of books and magazines. To visit a day in my life, read this post!
http://www.centsationalgirl.com/2012/02/a-typical-day-in-my-life/
Kate
Long time lurker, first time commenter. Awesome hack! Thanks for showing us an easy to accomplish DIY that doesn’t look slapdash and cheap (but certainly wasn’t expensive.)
As a East Coast gal, I had NO idea about the earthquake strips.
Not sure if this is a silly question (I don’t know a lot about woodworking)…
Why did you need to paint the edges of the plywood – versus just staining them as you did the rest of the shelf?
Hey Ginger, the edges of plywood show the striped layers of pressed wood, and they don’t stain well as a result – so it’s necessary to cover them.
Kate
I’m not sure if I should be proud or not that I knew which scene that was in Star Wars!
Hi, I absolutely love this post. I’ve been looking for a media center/bookcase solution for over a year and i think this may be it! I’m completely new to DIY and this may be the stupidest question ever, but I was wondering what did you use the cans of rust-oleum for? I tried to follow your process step by step and couldn’t figure out at what point when you stained the wood, you used them.
Many thanks!
Rozi
Hi Rozi, the RustOleum was the white spray paint used to transform the metal to white.
Kate
Great work Kate!
I picked up a similar giant clothespin in royal blue from Michaels a few months ago… it was in their $1.99 bin, score!
OMG – that redo is awesome…think I am going to try it myself…IKEA is an hour and half away so need to wait for the kiddies to go back to school. xoxo you are awesome!!
Good choice with the birch! I love how it turned out and it looks sooooo good with the white. I love the blue bowl with the colored pencils also, very pretty room. How long did the stacked books stay neat and tidy after you took your pictures? hehe. I’m guessing 5 minutes :)
I love that you’ve showed this. Many people are afraid to paint new purchases, but see how great it looks!
Also, they sell those big clothespins at JoAnn Fabrics in different colors, so you can get more :-)
I love the combination of white shelving and dark wood. That wood is beautiful. Thanks for sharing!
Hi, Kate! I’m out of town and haven’t been on my computer. I just had to comment on this project. What a great hack! I love the new look and the way you styled the shelves. Makes me want to head to IKEA as soon as we get home. ;) Can I also say how cool it is that your kids watch VHS tapes? I’ve collected a bunch at yard sales/thrift shops for pennies and my kids love to watch them, especially the Disney ones. :)
I have been looking for the perfect solution for a bookshelf and I think this hack may be it. Thanks so much for the inpsiration!
I need to know where you got that rug!
Beautiful work! How did you hide the cords between the TV, DVD player and outlet so well?
Is the movie Spaceballs?!! Do I get a bazillion points?! :)
Hi Kate – a lovely makeover! What did you end up doing with the glass shelves that came with the unit? I’m curious about if you found a cool way to repurpose those!
About that cute green oversized clothespin – I was just in A.C. Moore craft store the other day and saw plain wooden ones this size and even larger. They were pretty cheap and could be painted. Your clothespin looks so cute on the shelf, I think I might have to get one!
I have been a follower of yours for a while now. I absolutely love all of your creations! Question: where did you get the baskets shown in the shelving unit?
Hi Shannon, the white baskets are IKEA and the blue cloth ones are from Michaels!
Kate
I totally adore the oversized clothes peg!! So cute! Pity you can’t find it anywhere.
Here from Ikea Hackers. I’ve been considering what to do for shelving in my new home office. You’ve given me some great ideas, thanks!
And yay Star Wars! :-)
Really wonderful transformation.
I must know more about that RUG! Please Please Please share your source for that rug. ;-)
Hi Heather, the link to the rug is in the comments!
Kate
Those shelves look great. Quick question. Did you assemble the shelves and then paint them or paint the pieces and then assemble?
Assembled then painted Donna! Much much easier that way :)
Kate
Any idea how much weight these can hold w/the glass shelves (& w/replaced w/wood)?
The site doesn’t mention………
Thanks!
No idea Jo_Ro, but mine are holding up a lot of books with the plywood!
Kate
Wow! That’s pretty. I thought for sure I would buy one of those units and paint it gold, but now you’re making me think about the white route. :)
I saw that you painted your orange canvas magazine files…!
I have some canvas-y totes in my closet that are black, and I’d love them to match more along the lines of my powder blue/gold/cream scheme… (Which was inspired by your closet re-do!)
I never thought of paint — until now! Would you recommend acrylic over fabric paint? I’d love to be able to spray paint them after priming since they are bigger… Thoughts?
I love your blog! I’m always so blown away by your creativity. I made a sad attempt at copying this, but on the round coffee table instead. I can’t get the paint to stick, it flakes off if you touch it. Did you sand or prime the bookcase before painting?
Hi Nancy, I didn’t prime, but I used RustOleum spray paint, I’ve found on metal the adhesion is excellent – did you use the same or different brand?
Kate
Star Wars, Episode IV
@Kate – I used Krylon Premium Metallic spray paint. I think I will need to get a can of the RustOleum and give that a try. Thanks!!
Spaceballs! And so cute. I am so impressed!
Hi Kate,
Can you tell me where did you buy the straps used to secure the shelves? I don’t like in earthquake country, but I have a 1.5 year old grandson and, well….he’s kinda like an earthquake. LOL.
Elva
Hi Elva, look for them in the child safety and child proofing section, the furniture straps are there!
Kate
Hi,
I love this project and was thinking I might do something similar for my bedroom as a bookcase in gold, although I love the white! I think the plywood would be better to hold more weight, but wanted to know what the length and width of the plywood you got cut is to fit the dimensions of the shelves? I know you said the thickness was a 1/2 inch (correct?), but I wanted to know the other dimensions so I could have the plywood cut at a Home Depot or somewhere. Thanks!
Hi Kelly, bring the laminate shelf with you and if HD or Lowes has a table saw and will cut it, they will use it as their template – that’s what I did!
Kate
I tried this with the smaller (20″ wide) Vittsjo shelf and found that the plywood was not strong enough to hold my books without significant sagging at the midpoint of each shelf. Consequently, we decided against trying this with the 39″ wide Vittsjo unit. I would only recommend this conversion project if you don’t plan on using the shelves as bookshelves and are mostly focused on using them to display lightweight decorative objects.
Hi Alison, thanks so much for sharing. What size plywood (depth) did you use? Would love to know!
Ours are holding up just fine without any sagging, there is a mid section support and we have some shelves that support pretty heavy books.
Kate
We used the 1/2″ plywood that you mentioned in the tutorial – was the birch that you ended up using thicker than that? With the 1/2″ plywood at a maximum width of 20″ we found that the shelves sagged up to about 3/4″ at the midpoint, enough to be noticeable at a distance.
This is so fresh and inspiring. Thanks for sharing. I have similar shelves that I’m off to “dress up”.
Della
LOVE THIS!! Great job..I would have gone with the birch too. and the movie….SPACE BALLS!!
i LOVE this hack and just bought all the “ingredients” to put this together except I cannot find the white spray paint (Rustoleum one) in semi gloss, here in Canada i just seem to find the “Gloss” or “Flat” which would you suggest if any or another brand?
Thanks!
Hi CB, you can go with any white spray paint, but make sure it’s one that works on metal, otherwise you’ll have to prime first!
Kate
Hi!
My boyfriend and I plan to give this a shot at our new apartment. We would be using the same size Unit that you used in the tutorial. After reading the comments I have some nervousness about shelf sagging under book weight. You mentioned that your unit has a center support for each shelf. I just wanted to double check that they came with that bc when I look at the picture on the ikea site the center supoorts dont appear to be there…its possible they photo shopped them out to make the glass shelving look nicer but I just thought I’d ask before I dove into this project.
Thanks so much!
Hi Allie, they are definitely there on the larger pieces, but not the skinnier ones. There is a 3/4″ metal bracket that sticks out underneath the Vittsjo shelf to support it on those larger units I used.
Kate
Additionally, what size did you get the ply wood cut?
Thanks so much!
Cheers,
T
Hello Thomas, I used the existing shelf and took it to Lowes where they used it as a template to cut the plywood to fit exactly.
Kate
The shelves look amazing! What a great “hack.” How has the white paint held up?
Yes Korrie the paint still looks great!
Kate
Spaceballs.
how is the quality of this IKEA line? I love your ideas!
So far, it’s really great Paige, shockingly good for mass produced – IKEA does it again!
Kate
Hi! I plan to spray paint mine too soon. My question is, using that kind of spray paint, did you just spray it on the metal? And how many layers did you do? :)
Hi Julie, 2 layers of paint, and I used RustOleum directly on the metal, no priming.
Kate
Love it! Where did you get the rug from by the way?
Thanks!
Alright thanks! I actually decided to prime mine just to be sure. Using the compatible rust-oleum primer spray.
day 1: prime
day 2: 1st layer of paint
I noticed on one area (one bar actually) there is some micro cracking. SHould I sand just that area, then prime and paint again? I was hoping since it’s just micro cracking, maybe I can just paint over it :p
This looks great and simple to do! I do want to add that I have seen the over-sized clothes pin at AC Moore (it’s in the unpainted wood section).
Great Job on your hack!
you can find those giant clothespins now at Michaels Arts and Crafts Stores—sometimes they are a seasonal item so call ahead to be sure but they’re huge, colorful, awesome (and paint well if needed!)
This idea is so awesome! I have been looking for a new shelving unit and this seems like the perfect solution. I looked up the unit on Ikea’s website for size dimensions but they don’t give a dimension for the shelves…just the entire unit itself. What are the measurements (LxWxH) of the “cubbies”? Want to be sure before I make the drive to Ikea and purchase. Thanks!
Hi Nicole, IKEA does lists their dimensions, here they are (for the shelves we used)
Width: 39 3/8 ”
Depth: 14 1/8 ”
Height: 68 7/8 “
one of the opening scenes from Star Wars. The original Star Wars
Awesome Lisa, you got it! Lots of folks thought it was Spaceballs! :)
LOVE this look! I have been attempting to track down your area rug on the web–can you tell me where you bought it??
Thanks!
Hello Lolo, here’s the link to the rug:
http://www.overstock.com/Home-Garden/Green-and-Ivory-Outdoor-Area-Rug-710-x-10/6233344/product.html
Kate
Michaels’s craft stores have giant clothes pins like that right now for I think only $3 a piece
Hi Emily, I don’t know the exact dimensions, I just used the existing shelf that comes with it as a template, so whatever the measurements of that IKEA shelf are, those were the measurements of the new shelf.
I love this IKEA hack! I am going to do it soon, once I get to an IKEA store (4 hours away). What size tv do you have? I am going to buy a tv for this shelf and am not sure on the size for it. I love how it fits nice and doesn’t look out of place!
Hello Heidi, the screen measures 14″ tall by 18″ wide.
Hi,
I’m wondering now that you’ve been living with these shelves for a while, are you happy with them? How are they holding up? I just bought two (they’re on sale for $59/each) and am having them delivered because i just can’t face a 3 hour round trip drive (if traffic is “good”) to the ikea outside DC.
Thanks.
Still holding up perfectly Oriah! Very pleased with them.
Kate
Great job with the shelves. I love the rug. Thanks for the link. They now ship to Australia!! Lucky for me!
This is gorgeous! How do you secure them to the wall? I want to do something like this but I am afraid I won’t be able to since it would be on an exposed cinderblock wall. Thanks for your help.