Hey all, hope you had a fun Halloween yesterday! My mister and I spent the weekend tackling a storage solution we’ve been meaning to get to for some time. Up in our little guest studio above the garage (affectionately nicknamed the ‘Garage Mahal’) we finally built ourselves a wall of bookcases to store books and other collectibles.
Years ago, we set up a makeshift media center in the space with some small wood bookcases and a coffee table to hold our dinosaur TV. We finally decided to donate that TV and change the wall to serve a different purpose. I’ve been thinking about IKEA’s Billy bookcases for years, but I was always disappointed with their 11” depth. In October, IKEA release a 15” deep Billy bookcase which finally sold me on the wall to wall bookcase project I’ve been thinking about for years. At last, it’s finally finished!
So long old media center . . .

. . . hellooooo built in bookcases!

I am in love! I’ve wanted a wall of built in bookcases for years, people, years! We finally made it happen for under $400 and in about 7 hours.
We started with four of these 15 inch deep Billy bookcases from IKEA:

We knew we wanted to reuse the existing baseboard along the front of the bookcase wall, so I carefully cut the existing caulking with a Dremel MultiMax and pried it off.

Next, we measured and then mitered the baseboard where the old baseboard piece would fit when set in front of the new cabinets.

The only problem in using the existing baseboard was it was taller than the height of the bottom Billy shelf. In order for the existing baseboard to sit at the same height, we had to elevate the bookcases by 3/4 inch. How so? We simply cut a plywood base with a Skil Saw for the Billys to rest on, perfect!

Once the bookcases were elevated, the baseboard trim fit perfectly in front.

I had to crack up at the IKEA assembly instructions and the little men they use to guide you through the process. Yes, thank you IKEA, two are better than one at assembling these Billys! Once you get the hang of it you can assemble each in about 20 minutes. I confess I was very surprised at the quality of the bookcases too, each cabinet weighs about 100 pounds and the shelves are all adjustable.

The spacing between the four cabinets and the walls turned out to be exactly 2 ¼ inches, which the same exact width of the trim I chose to hid the gaps in between each cabinet and between the cabinet and the wall. How lucky is that?

At any other width, we would have had to choose different trim or run it through a table saw, but luckily I found the perfect 2 ¼” trim x ¼” trim at Lowes to disguise the gaps to perfection, plus the greater width gives the cabinets even more of a custom look. We also added crown molding to the top for a finishing touch using the same technique I mentioned here.
The vertical pine trim was easily attached with a nail gun then primed with Zinsser (I always use oil based primer on raw wood.) I used paintable caulk to fill in any gaps between the baseboard, crown, and bookcase edges. Two coats of paint unified the vertical trim, baseboard, and crown.*

The final issue was providing access to the existing outlets on the wall, so to use them anytime in the future, I just notched their location on the back of the cabinets with a box cutter (not shown).
All four cabinets are reinforced with another long strip of plywood across the top that is the same size as the base piece of plywood. That plywood top is nailed into the Billy’s frame and then anchored to the studs in the wall with ‘L’ brackets so the entire unit is sturdy and there’s no danger of them falling even if little munchkins should be so bold and try to climb on them. The crown along the top hides both the plywood stabilizer and the brackets from view.


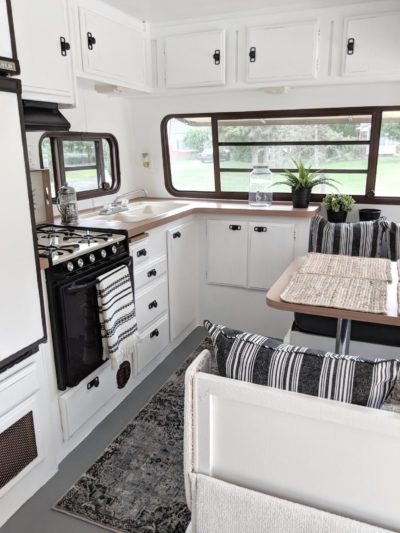
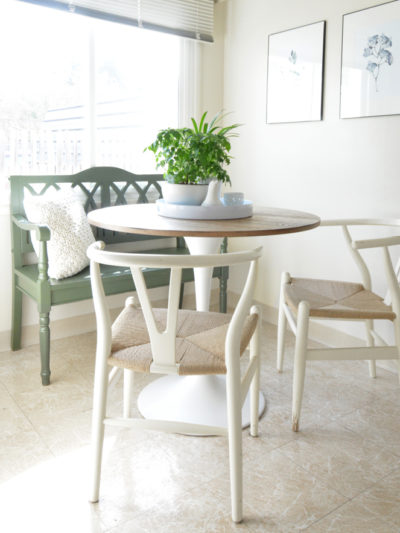
Now the real fun begins, how to make them function for us as storage but also look stylish. I’m thinking I’ll definitely paint the back and play off the blues, greens, and yellow in the window panels. Looking at the room now there’s too much white, but this wood pedestal table will help ground the space and provide dark contrast.
How do ya like this fun pair of accent chairs I found at a local second hand shop, aren’t they fab? I love them gloss white but I’m tempted to spray them a bold hue for a fun punch of color like this yellow barstool or this aqua chair.

I’ll be working on styling the bookcases later this week (following most of the tips from this article) and hopefully I’ll have something to show you soon. A blank canvas, how fun!

Cost: four 15” deep Billy bookcases at $69 each ($300 with tax), plus plywood, crown molding and trim: $65
Total = $365
Not a bad price for sturdy wall to wall built-in bookcases completed in a weekend.
* update: many asked about paint colors. The wall color is ‘Camouflage’ by Benjamin Moore and the paint on the trim on the bookcases is Valspar’s ‘Dove White’. Valspar’s ‘Cream Delight’ and ‘Ivory Dust’ are also very close matches to the IKEA white.
** update #2: if you’d like to see how they turned out when styled with books and collectibles, take a peek at this follow up post.
Thanks Apartment Therapy for the feature!!
.
.

love and envy:)
This looks amazing! My husband and I are actually working on a similar project – I’m covering the back of my Billy bookcases in fabric.
What paint color did you use for the trim? I’d love to add molding to mine but am nervous about finding the right white. Thanks!!
Now that’s amazing. They look completely custom…well they really are completely custom. You are so talented. Looks gorgeous.
Wow! Great idea!
Looks great! I’ve done a similar thing on either side of my bed with 2 Billys, albeit less permanent as I’m a renter!
I’m so excited to hear that they make the bookcases 15″ deep now. The transformation looks fabulous, as always. Can’t wait to see what you do with them!
Oh, I am about to cover the backs of my Ikea Bookshelves. Can’t wait for that enhancement to be in place. xo
This is just crazy! What an amazing job, and how meticulous you guys are…wondering when the day will come when I’d be able to do this. Can’t wait to see what else you come up with. An ardent follower…
Did you just put them on top of the carpet? What happens when you, hypothetically, remove the carpet to install hardwoods? You did such a beautiful job, and I’m dying to do the same thing in my library!
WOW! amazing! looks fabulous and expensive!
Well, it’s official. You are my official DIY Idol. ;) The built-ins are stunning, Kate. There’s really no other word. They look fantastic! Pinning this straightaway!
Kate! I was just eyeing the Billy this weekend wondering if it was solid enough for a project I have in mind (no IKEA nearby so it’s hard to judge the quality online). You just sent me over the edge…
Awesome work, as always!
xo,
– e
I’ve been wanting to do this for a long time! But using Ikea’s Besta series instead of Billys (I had no idea deeper Billys existed). Thanks for the inspiration!
These are FABULOUS! Truly looks like a several thousand dollar built in! Can
t wait to see the chairs painted and the bookcase styled. Thanks for all the wonderful inspiration!
I’m in love! You would never know these were from Ikea. I love how easy it can be to make “built in” furniture in home just by adding things like molding!
Fab! You’re so clever!
TDM xx
It looks wonderful! Thanks for the breakdown of what you did. We have a set of bookshelves that
need to be done that way too! I am sure that yours will be very lovely when decorated!
Amazing!!! I absolutely love, love, love built in bookcases but they are generally so expensive. This is a great affordable alternative. Huge fan of your blog.
Gorgeous! I’ve had my eye on those 15″ deep Billy bookcases myself–finally they are DEEP ENOUGH!
Looks amazing! And OMW, those chairs are fantastic.
This is gorgeous! Great job!
uh-mazing!
Looks terrific. I love your drapes, too!
Ikea is the best. I tried to stay away from there, but reality hit me. Why waste money when you can take an inexpensive piece of furniture and make it look just as expensive as designer furniture. I know your checking account is happy.
Fantastic work. Definitely paint the back. Love the chairs.
Fabulous -amazing improvement adding the wood trim the plain bookcases, looks fab!
Gotta love IKEA – looks fabulous. Can’t wait to see them full of your personality and style.
My best- Diane
Those are fantastic! You’d never guess they were Ikea.
Whoa! I love it! Pinning right now. :)
It looks great! What color paint did you use to approximate the white shade of the Billy’s? Thank you!
Hey Abi, and Devi (and others) the paint color I used was Valspar’s ‘Dove White’ #7002-7 but Valspar’s ‘Cream Delight’ #7002-14 and ‘Ivory Dust’ #7003-24 are also very close matches too!
Kate
There you go inspiriting me again! Wowzer these look great friend! Enjoy them!
That looks so great! I love the custom look with the Ikea price :-) Great job!
This is amazing! I’m obsessed with having a wall of bookcases, so I’ll definitely keep this in mind.
~Stop Me if You’ve Heard This One
I’m wondering what shade of white paint you used for the trim. Does it match the shade of white on the bookcase?
Great job!
This looks amazing! And I’m so jealous!
It does look great! I wonder also like the commenter above about the carpet and possible flooring change. We are going to do this in our library…however one or both sides would be exposed due to our very open floor plan….do you think that will look bad?
It looks amazing…thanks for sharing it!
Love them! They look so custom. This has been on my wish list for years too!
This looks great! I’d also like to know what color of paint you used to match the Ikea white!
Thanks!
Oh you did a FABULOUS job at this!!!!!!! I have been thinking of using some Billy bookcases in my family room. I need to show this to the hubs:)
this is fantastic. i’m absolutely in love with it. if it were me (which, of couse, it’s not) i think i would leave it pure white as opposed to painting the interior. the white is STUNNING. & i LOVE what you’ve done with the molding. how inspirational! i have an area of my home that is the perfect place for built ins, as well. i just wish we had an ikea nearby (i’m in eastern canada).
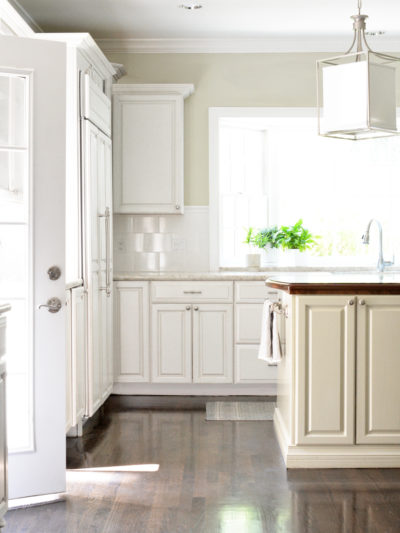
ps. did you use oil primer when you painted your kitchen cabinets, as well? if i remember correctly, you painted cabinets in a guest suite or something?
I am in LOVE!! I’ve been looking for a step by step for built in-s and you saved the day!!! Thanks so much!
Oooh! These are great! And so inspiring.
i think i’d paint or wall paper parts of the book case backings but not all. perhaps a fabric could work as well, then do cushions for the chairs in the same fabric to tie it all together?
This looks awesome! I’ve been wanting to do the same, but with a bench seat in the middle… and you make it look so easy!!! Love it!!!
WOW, those are beautiful! Great job on making them built-ins! Thanks for the inspiration.
What an awesome project! Socking this one away in the inspiration file to create storage in my basement.
Gorgeous! What a difference!
I’ve been looking for a project like this to use as a storage solution in my craft room. Thank you for the great tutorial, I’m pinning this straight away!
They look great, but it’s too bad the shelves couldn’t reach the ceiling. Would have really given it a more “built-in” feel.
OMG… I’m totally in love with this! You guys did such a GREAT job!
I love this and it’s something I have always wanted to do to in my family room. Maybe I will start thinking about doing it again . . . only seriously this time!
Go Kate! This transformation is incredible. I’ve already pinned this project. I wish you were my BFF so that you could help me make this. Thanks for the great tutorial.
Sorry I forgot to ask, but what color paint did you use on the walls. It goes so well with your Billys.
You are my idol. Love.
You would never know they are Billy cases — this looks awesome!
Awesome, you would never know. The best part for you is they are done!!!
Really beautiful and looks completely custom/expensive. Great idea.
Are you reading my mind!!!? lol We have just began talking about putting builtin bookcases in our living room!! We going to do ours a little different since we need room for a TV — but were using upper kitchen cabinets and then building / or buying pre-existing bookcases and creating a built-in look – we want floor to ceiling.
Ok, back to your project I’m in love with it!! Thanks for the tips on keeping the old baseboards! :) I’m on the fence about painting the back of your cabinets, but regardless I can’t wait for you to style it!
I’m a new follower and just have to say I love what you do! Beautiful work!
OMG these are gorgeous!!! This is why I love Ikea so much. I love that you can customize plain pieces at a great price….but no one would know that you spent so little on these “built-ins”. Great job.
Kate, may I ask what color is on the walls of this room? It looks like a gray color and I’ve been looking for the perfect color for our Great Room. Thanks! :)
Absolutey Grand! Time well spent on that project!
Have fun filling those shelves!
These are so great!!! I didn’t quite understand what you meant when you said you notched out the outlets? I didn’t see outlets in the pic. Can you explain a little more to me?
Wow! That looks fantastic! I wish we had a wall where something like that would work. Actually, we do have, but I’d have to find a new place for my beloved antique library table…so, uh, nope, not going to happen! But now you have me thinking about where I could do something a little different.
You and your husband did a beautiful job! I’d never guess they weren’t custom! Great job!!!!
BTW, I vote for painting the backs of the shelves! Or wallpaper them! I’ve seen lots of pictures of shelves that have been wallpapered on the back, and they look wonderful!!! Just another idea to make it even harder to choose!!! LOL!
Awesome job! This looks great!!
Thank you so much for this tutorial!!! I’ve been wondering how to ‘build in’ my own billy bookcases, and you answered all of my questions!
My jaw literally just dropped. Impressive!
Oh my word this looks AMAZING!!!!!!!!!!!!!!!!!!!!!!!!!!!!!!!!!!!!!!!!!!! I’m blown away and totally obsessed. It looks fantastic. Great job!!
OMG I can’t wait to see what you do with them! <3
Thank you!!!
They turned out fabulous! And it gives me great inspiration for my own Billy bookcase redo (which you can see in my magazine mirror frame photo that I’ve already turned one of them on their side with the intent to build out the others to create a wall-to-wall unit).
http://bluevelvetchair.blogspot.com/2011/10/oversized-mirror-frame-recycled.html
Thanks for the share and re-motivation needed to get ours going!
Michael
We have three Billys and I’ve been trying to get my hubby to approve doing something like this for literally years! He’s always vetoed it because I think he can’t visualize it like I can – your pictures capture the beauty and functionality I’ve been trying to describe. I cannot wait to show him! :-)
HOLY CR@P!!! THIS is why I love you so much! Beautiful work – I’m wracking my brain for an empty wall in my house but sadly, I can’t figure out a single place I could do this. :(
Wow, this has quite the impact! It really has changed your space in a good way of course:) Love it!!!
love this! i have a wall of these in my office and i’m thinking about the next evolution of them. did you paint the entire shelf? or did you just paint the wood that covered the seam? they are a little off white so i wondered. great job!
Can’t wait to see how you style this! I have a wall of Billys in my dining room and it’s always a challenge to keep them useful AND beautiful! I’m showing this post to my husband, who would like to make them look more built in. Thanks!
Is there anyway you can tell me where you got the fabric/curtains for the window next to you fabulous built-ins? That fabric is exactly what I’ve been looking for.
Great tips on trimming out this beauty. After our reno I’m hoping to have a wall of shelves in my bedroom now, thanks to you, I’ll know how to “build” it. Jo @ Let’s Face the Music
Those looks amazing! If you hadn’t told us, I would have been convinced they were custom. Such a great project!
Amazing Kate!! That wall looks fabulous and now all across America Ikea will be selling out of the Billy!
Love this project! A few questions:
– is there trim at the ends too, against the walls?
– can you share what the top looks like? I’d love to see how they’re anchored in a hidden way
– can you share pictures of the “notched out” holes for the power outlets?
This is great! I would love to do this in our spare room!
wow, that looks fantastic, can’t wait to see them styled.
What color did you paint the trim to match the billy bookcases? Or, did you take a shelf and get the paint matched?
Thanks!
Kristen
How fun, Kate!! I love how it turned out, fab job. This is exactly what Layla & her team did on the house redo here in GA. Great idea on the Billy’s. Great way to do it on the cheap. Now, I’ll have a fun built in to look at when I come for a visit NEXT year! :) xoxo
Looks fabulous!! We did something similar in our family room, a whole wall of shorter bookcases which we finished with an MDF top, molding and baseboard. We actually used beadboard backs for the bookcases instead of the paper backs that came with the Billy to dress it up a bit. I love how it looks! But 15″ backing would have been even better!!
Those look really impressive- such a great upgrade! Kath of Kath Eats Real Food recently bought a house and used Billy bookshelves for a built-in look, too. Great idea!
Wow I love I’m in love! Great job with the baseboards! This looks fantastic! Great addition to the Garage Mahal!
These are beautiful! No way would I ever think they were anything but custom made – love the finished look of the crown and baseboards. Thanks for sharing!
It looks incredible! You did a fantastic job for such a good price. I’m going to paint my built ins white now for sure!
These look fabulous! Thank you for sharing. I have a long wall in my basement that I’ve wanted built-ins on for years. This showed me that I can have expensive, custom-looking bookcases affordably! (Also, would you be willing to share the paint color for the walls?- I’ve scoured your sight, but couldn’t find it when I searched “paint” or “garage”. Thanks!)
Hey Erin, that wall color is Ben Moore’s ‘Camouflage’ – a really nice grayish green color.
Kate
Kate, once again your creativity has blown me away. We are in the process of adding bookcases to my sewing room (I finally have a sewing room!!!) and we are using billy’s too. You just made them so glamorous. I too have a question about the top of the bookcases. Did you attach the plywood at the top or just lay it on?
Keep up the fabulous work.
Hey Nancy, I really should update the post! The plywood on top is a long strip the same as the base we used and nailed into the tops of the billys (along the frame) to hold them up so they don’t budge or tip to the side, then that entire plywood top is bracketed to the wall with ‘L’ brackets for stability.
Kate
Really amazing Kate! Oh, and I don’t remember you having such hairy arms on the Nate Berkus Show!
Ha Linda too funny! That’s the mister doing the cuts, would be kinda scary if they were mine!
xo
Kate
Wow! Your bookshelf looks custom made. I love that you’re going to paint the back of them. I like that look. Your chairs are awesome as well.
No. Way. That’s amazing! You’re such an inspiration!
Wow! Looks wonderful, nice work!
Nice Ikea hack!
xo,
c
Before this post I sadly believed that built-in closets were the only off-diy-limits project!
This is SO great because every self-respecting diy-er needs sturdy storage to cram all those scraps and tools. The circle is full, diy-ing for the love and storage space of diy-ing… Thanks!
Ooohhh, Kate, I’m working on doing the same thing in my living room! Except we are using two 15″ D and two 11″ D. So funny!
this look’s fancy… AMAZING!
Looks fantastic! Did you attach the back of the Billys to the wall or are they sturdy enough on that plywood to stay firmly in place? Been wanting to do this for awhile – thanks for the tutorial.
I’ve got these Billy nits on my landing at home – they’re fab!
Wow! They are fabulous!!!
Wow Jesyka, cannot wait to see your cabinets, great idea to vary the two depths!!
Kate
I love the curtains in your “Garage Mahal!” It’s is exactly what I’ve been looking for to hang in my home. Can you please tell us where you bought them or which fabric you used to make them?
Hey Brandy! I linked to the window panels in the article, they are a fun bright green + blue paisley floral available at Pier One: Mine are doubled up on the window (four panels). They were on sale a few months ago when I bought mine, but it looks like they’re back at their retail price of $30. Here’s the link: http://www.pier1.com/Catalog/HomeTextiles/tabid/980/CategoryId/146/ProductId/32681/ProductName/Paisley-Print-Gardenia-Window-Panel/Default.aspx
Kate
what a great idea, looks so professional
Wow, what an amazing job! Just love this and all your ideas!
Awesome, Amazing, I’m so impressed – thank you for giving hope to all of us that can not call the “built-in” man to build for us!! Great job!
AWESOME!!! That is all I have to say! (wink)
One word…FABULOUS!
LOVE this!!! Thank you for the idea!! Just curious, I am thinking of doing these with the shorter version of the Billy shelf (42″ H) – would you still add the molding to the top of this?? What do you think?
Hi Ashley, that just depends. At a shorter height, they act more like a buffet or console, but I do like the idea of a single finished top. You’d have to find a piece of wood nice enough (plywood often isn’t) and reduce the trim around the edges to just the height of the top piece rather than full crown molding, but it could definitely work!
Kate
Thank you Kate! Letting go stinks…She did make me laugh though. She mentioned that I have a lot to look forward too. A new room to redecorate..ha! She knows me well :) I’m gonna miss her.
This is absolutely brillant! I would love to incorporate this into my craftroom. You post wonderful instructions too.
This makes a fantastic looking unit. We did something similar in our last house with our Techline units. I really hated to leave them, but once they were built in, that was it! I guess it will be off to IKEA soon because I am desperate for some storage. Great idea to reuse the existing baseboard.
I’ve always and forever wanted built in bookcases too (for my home office)! Your bookcases look amazing and repurposing the baseboard is genius Kate! I am inspired! The Dremel MultiMax is officially on my Christmas wish list. :)
Wow wow wow! That looks amazing.
Wow! Looks awesome. I’m not sure how I found your site but I love it! I’m jealous of everything of course… But your ideas and imagination are just great! Thanks for the inspiration!
This is so weird! I have the same exact wall color and trim and a whole empty wall that I have been waiting for months to fill in with the same exact Ikea Billy Bookcases! I’m estimating I will need 5 though and still, unfortunately, have a little space left over but not enough for another bookcase. I was hoping to make the built in look as well. Thanks for sharing! http://designfluff.blogspot.com/
That is totally amazing, we are doing the same at the moment – well, slow going, but getting there! We are using Ikea Besta units as hubby has huge collection of vinyl records and we needed the depth which unfortunately the Billy bookcases don’t have. Ours also will reach the ceiling and have some sort of coving put up there to hide the small gap. Now I’ve seen this it might just spur us on, and now I’m tempted with the Dremel MultiMax too!!……thanks
I’ve just noticed yours are 15″ deep, these must be new as they didn’t do them that deep when we started our project otherwise I would have chosen the Billy ones. Suzy
Amazing, I have just purchased 4 billy bookcases and just had them placed next to each other in the study. I will be getting my hubby to attempt this project. I can’t believe how great they look.
Great job! They look custom (and I guess they really are). BTW what color is that on the walls?
The shelves look fantastic. What a great idea, using ready made shelves and building them in!
Excellent idea Kate! And your build looks beautiful. Thanks for sharing.
Good Morning Kate!! This is fantastic !!!! I am sitting here at my desk, with the wheels turning in my head, trying to figure out where I can do this in my house! You always give such great ideas, and you are such an inspiration! Thanks so much for sharing!
Happy November !
Tilara
Beautiful job! congrats.
I love it!!! ‘Cant wait to see what you do next!!!
Love it. Want to do it.
Excellent idea Kate! Thanks for this…I hope to create built-ins in the future!
Amazing Job. You project turned out great! I can’t wait to see the shelves all styled and pretty. When you see projects like this, it makes you love IKEA even more. p.s. I vote for a bright color for the chairs!
Oh my gosh, I’ve been dying to do this but have been slightly intimidated! Yours came out so great that now I MUST try! Just need to choose a room… :)
Love Billy bookcases! You did a fantastic job and can’t wait to see how you decorate the shelves!
Yes, please, please, let us know, what paint color do you have there in the room? It’s beautiful! And I’m feeling so inspired by this project!!
Is it possible to still get your curtains? Or the fabric they were made out of? They would be perfect for my master bedroom!
We are thinking of doing this as well, inspired by this project. However, we wondered if anyone has had any luck in painting Billy bookcases. We would like them to match our current walls. Our experience painting another IKEA product was not successful; the paint would not stick.
Hi Toni, you can paint any laminate, veneer, or other glossy surface if you use the right primer. I talk about that here: http://www.centsationalgirl.com/2010/04/go-right-ahead-and-paint-that-laminate/ If you use a bonding primer designed for laminate products you’ll be fine!
Kate
I have wanted to do this for years but haven’t had the extra money. I can handle under $400. What would you do if it will be against a corner on one side but open on the other? Are they flush with the wall behind it and attached? I don’t want to see a gap when you are standing beside it. Maybe add another piece of molding?
Hey Tracy, I didn’t show, but the IKEA Billy has a notch in the bottom to go over most baseboard so that it can be flush with the wall, but you’re also right, any small gaps can be covered up with vertical cove molding
Kate
Where did you get your curtains? I love them a lot and would love to purchase them for my house.
Wow! They are quite an improvement….now you have lots of room for decorations! Great job. I spied the curtains from Pier 1! I have them in my Master Bath! Getting ready for that remodel reveal soon! I’m a follower!
super impressed. Love this idea!!
Great blog. It was either Ikea Expedit for the depth, or Ana White’s built-from-scratch bookshelves. (which my family raised eyebrows at). So now there is a simpler choice. Thanks Katie for all your great ideas.
Love built in bookcases and what a great way to get a custom look! We have them in the house we just bought. However, we needed to change out the (very dirty) carpeting and found when we went to rip it out that the bookcases had been assembled on top of the carpeting. This has proven to be a bit of a headache for us, had to disassemble the bottom moulding and cut the carpet to get it out from under as far as we could reach, then have new tacking strips installed. Do it yourself is always an adventure!
Absolutely AMAZING!!!!! Thank you for the affordable inspiration! We have been pricing built-ins and have yet to find a solution that fits our budget. I can’t wait to share this post w my husband!
Thanks so much for the advice about priming laminate and glossy surface. We are headed to IKEA!
Toni
these look great, just what i have been wanting to do in my living room. but i’ve got to ask, how did you get each bookcase fro $69?? online the 15” deep is listed as $99 each, which really adds up when you are buying 4. i loved how low cost it was, but fear mine would not be that price at all….
HI Deveney, are we looking at the same bookcase? My link to the IKEA bookcase (and what I paid) was 69.99, here it is!
http://www.ikea.com/us/en/catalog/products/10208467/
Kate
I would have never thought to do this! We moved about 5 months ago and our new bedroom is HUGE! Since we lived in an apartment before, we don’t really have anything to fill the space. We’ve been wanting to do something like this: http://pinterest.com/pin/173845314/ but the thought of building it all from scratch is daunting! Thanks for the inspiration!
How amazing! Looks like completly custom made! Awesome job!
They look amazing! So want to try this :) With regard to a shorter version, there’s a fantastic one made by Ashli at Maillardville Manor in her library. She has done both tall and and short versions in the past, both fab. http://www.maillardvillemanor.com/2011/01/bookcase-tutorial.html
Wow what an amazing idea! We cannot really do this in our rental appartement, but Ill save the idea for later! thnx!
I love this! Are you going to put a TV back in there? If so how?
Great question Barbara, the answer is no, because we’re getting a smaller flat screen and positioning it on another wall. BUT there is room inside for a flat screen TV that’s no more than 30″ wide, so it actually could work inside the bookcases too!
Kate
What a great project! Here’s a tip I’ve collected but have yet to use for painting the insides of bookcases a contrasting color – cheat with painted foam core:
http://recentlytheblog.blogspot.com/2011/05/bookcase-project.html
Love these! Trying to determine if we can do the same for some bookcases I got from an office store a while back. For the previous post about price difference it’s probably the finish – the bookcases are $30 less with the white finish than they are in the other finishes (birch, black brown, medium brown).
Just a question – do you plan on painting all the bookshelves and trim the same colour? Given that the Billy is laminate and not solid wood, I wonder how this doesn’t come off as laminate bookcases with some trim tacked on rather than built ins because of the texture and colour discrepancies between the wood and the laminate?
Love this! I am attempting to do this as we speak but I am lost! How did you get the molding on the top and bottom? There is a huge gap between the molding and the shelf because the bottom of the shelf is not totally flat.. Know what I mean? Please help me!
Hi Megan! There is a small gap (1/8″ or so) but we filled it with two applications of paintable caulk. You could also use very narrow trim!
Kate
I would tell you to pick some fun wallpaper and use it as a background on your bookcases instead of painting it. I saw it done on pinterest in a closet – I think it would add just enough color – to make it interesting and eliminate to get rid of some of the white – changing the chair color would be fun, too. I vote for a muted mustard yellow.
Just wondering, are the Billy’s 15″ deep or the 15 and 3/8″ the website shows? I really want to use these as I have been dying for IKEA to have something deeper than 11″ but the wall I want to put them on only has 15 1/4″ depth! I might have to break out the tape and start marking off furniture placement!
Wow Kate, You really “hit it out of the park” again with this fabulous project. Are you still planning on putting your TV on this wall?? Are you going to make a cut out for the outlet?
Warmly, Michelle
I am totally gonna copy you on these bookcases! I have so many books and unique finds to decorate with and never enough storage. My wheels are turning now in my head as to the perfect spot.
Thanks!
Hugs,
Natalie
Oh my goodness. Thank you, thank you, thank you! We moved into a new built 6 months ago and there are no built-ins flanking the fireplace. It just looks weird. But in pricing companies to come out and do it I realized there is NO way we can swing it in the near future.
I never thought about Ikea. This looks VERY easy. I just don’t know how to use them to flank the fireplace. It’s a bit more complicated that way, I imagine.
I’m still willing to try it though. Guess I’ll be doing some measurements tonight :)
Wow! They look great. What an awesome idea I may just steal it!!! Thanks :)
Thanks for the tutorial! We paid a couple thousand for ours! So, this is way cheaper.
Such a great idea!!! It looks SO good :)
genius. and. perfect.
I LOVE THIS! Wish my husband was a little handier to help me, and that IKEA made bookcases tall enough for our ceilings!
xo,
Angela
These look fabulous!
Question: did you install them over the carpet or did you remove it?
Right over the carpet Kristen!
Kate
Angela;
I live in a 100 year old house with mega high ceilings. Ikea makes these great height extensions for the 12″ deep billy, http://www.ikea.com/us/en/catalog/products/40197392/ , and you can stack multiple ones. This is what I am using for my home, and am building them up to the ceiling.
Thanks Kristen, yes I’ve heard of those extensions! Not sure if they have them yet for the 15″ deep ones so I’m going to check it out, thanks!
Kate
I did it! Thank you for your blog and inspiration, I wouldn’t have done it without seeing and reading this. I did mine under the carpet so that we can go hardwood one day. Also, I couldn’t reuse the baseboard bc it wasn’t tall enough so I didn’t even remove – except where the front baseboard of the cabinet had to hit the wall on the right and left corners. I didn’t use the backs of them and painted the wall navy blue. Also, we wired in sconces and hooked them up to a wireless remote switch. We absolutely love it! Thank you!
Tasha
http://pinterest.com/pin/38843615505796059/
By the way, I used the 12″ deep Billy’s and installation took one weekend. The majority of our time was spent figuring out our lumber. We needed something wider in between each bookcase so we hac to get 1×3 boards, used the same on the floor for baseboard. got creative with the top crown molding and cut it at an angle in order for it to match up better, since it isn’t an inch thick.
Hi there, could you tell me what the paint color match to the white Billy was?
HI Avigail, I listed a few at the end of the post!
Kate
Oh my gosh, this has been a must have on our list for years, and never in my life did it occur to me to do it this way! Thanks a million for this tutorial!
Thank you…this just might work for our library !
Thanks so much for this great idea! We started this project in our son’s room this weekend. It’s looking great! :) I’ve got a question about the painting. Did you sand the book case and shelves down before painting? Thanks so much!
No sanding Karen! I only painted the backs of the bookcases and the trim, not the actual bookcases themselves.
Kate
Use fabric starch to put fabric pieces in the back in various colors. Cut the fabric a little larger as it might shrink a little once it dries. Kinda like this post – http://littlegreennotebook.blogspot.com/2010/04/fabric-as-wallpaper-in-kitchen.html And paint the chairs – or dip the legs in paint for contrasting color.
Would you please share where you got your lovely curtains? Thank you!
Hi Stephanie, those are the Gardenia Paisley panels from Pier One!
Kate
hi kate. on the dove white paint, what gloss do you use (flat, eggshell, satin, semi-gloss, etc.).
thanks!
Thanks so much for the tutorial – we just finished ours! Love your blog!
Wow! I will so show this to my husband! Amazing!
You inspired me to try this in my family room. It is a work in progress. I am even putting lights on the shelves.
I love it! Although I can’t help but wonder about painting the back of the bookcases–I get the appeal, but won’t you be (a) adding a lot of color when you put books and other items on the shelves, and (b) covering over a lot of the painted area with the aforementioned books and other items?
Hello Tragic, you can judge for yourself, a lot of the paint color comes through even with all the books and decorative objects (mostly white and gold) – I think it turned out well, check it out here:
http://www.centsationalgirl.com/2011/11/bookshelves-complete/
The paint color used in this room is beautiful! What is it? :)
Hi Gigi, that color is Benjamin Moore’s ‘Camouflauge’.
Thanks for sharing this, neither my husband nor I are very handy around the house, but thanks to your tutorial we muddled through and now we have some lovely built-in Billy bookshelves of our own!
Ours have doors, which provided its own special challenges, but we prevailed!
http://home.kellbot.com/2012/03/17/built-in-bookcases-by-ikea/
I’m curious if you had any issues getting things to line up with the walls, our walls / floors aren’t even remotely square and it gave us a lot of headaches.
Wow. Had never seen these. Popped over after Chris posted about her “built ins”. Just fantastic. Talk about a huge savings compared to hiring someone for built in bookcases. So impressive.
This bookshelf looks absolutely amazing! I always admire people who can do such wonderful things themselves! Great Job!
Jyst pinned this on Pinterest since its the best ive seen! Nice job!
I have looked at this post 234827 times since seeing it – thanks so much for the inspiration! Would you recommend painting the backs of the bookcases before assembling? Just curious! Thanks again!
Hi Rachel, I don’t think painting the backs before is necessary but you sure could if you wanted to! I painted mine after.
Kate
wow this is absolutely amazing!!!! I have so many hardback books that are just dying to be displayed on some decent shelving for once (poor things). I think I might be able to tackle this job this weekend. Love this thanks so much!!
Do you notice a difference between the rest of the trim in the room and the trim on the bookcases? We bought bookcases planning to do something similar and they are not white. I have many other “IKEA White” pieces that dont bother me, but the contrast between the bookcase and the baseboards is so pronounced. I am dreading needing to paint each bookcase.
Hi Annie, it’s a preferential thing, we have Swiss Coffee trim which is a warm white so the contrast doesn’t bother me, but if it does bother you then yep, you’ll need to prime and paint!
Kate
OMG, this is so amazing! I pinned this like 6 months ago and was looking through my pins and noticed that this is my solution for my loft! I wanted to move my craft space up there and was looking at Ikea cabinets….which are decent priced but add up to a lot! I can’t wait to show this idea to my husband. Its so nice that the billys have a deeper shelf now and they also have extenders for the tops.
Thank you from the bottom of my heart ;)
Would this be sturdy enough do make a closet out of?
Yes Steffany, I think so, great for shoes!
Kate
I was just wondering: did you do anything about the small gap that adding a baseboard to billys creates? I was thinking about doing the same thing, but I can’t figure out what to do with the gap. What i mean is that the shelves, including the lowest one, are set a tiny bit deeper than the sides of the billy. If you attach baseboard to the fronts of the sides, there’s a gap between the baseboard and the lowest shelf.
Does it make sense? My English sucks a bit;)
Yep, makes sense MSH! I did two layers of latex paintable caulk to fill it in – it took two but I was able to do it! Kate
We have all of the supplies to do this! One question: once we remove the baseboard and install the bookcases on top of the carpet with a platform to raise the bookcases so that we can re use the baseboard from the wall, won’t the baseboard be higher because it will not be installed over the carpet? Does yours look funny where is meets the “old” baseboard that was along the adjoining wall? Am I just being too particular?
Awesome! I’ve wanted built-ins in my living room for 6 years but never bothered because I thought it was going to be too expensive. Thanks for sharing.
Hi, Love your bookcases! Did you use Valspar semi or gloss paint in white dove? I need to finish off mine this weekend.
Hi Janet, I’m pretty sure we used satin sheen on the trim on bookcases.
Kate
Hi Kate, your blog was really helpful to us; we just did our own IKEA built-in project (with Besta bookshelves, also 15″ deep, and with Pax closets flanking the bookshelves) in our living room. We painted the backs of the shelves/closets like you did (and also coincidentally had used Kelly-Moore Swiss Coffee for our trim color too, so your blog post was especially helpful!). We are totally thrilled with how it turned out. Thanks for the inspiration! In case you want to check it out, our blog post on the project is at: http://shirleyandchris.net/blog/2012/05/23/ikea-built-ins/
Thanks for the tip. We just finished our built in billy’s with yours as the inspiration!
Thanks!!!!
I love this idea, what is the wall color you used in this room??
Hi Brooke, that’s ‘Camouflage’ by Benjamin Moore!
Hi! We are purchasing some Billy’s this weekend but were concerned about the cardboard backing. Does it look like cardboard? Do you think it takes away from looking built-in? We are planning to do the built in thing as well but afraid that we will go to all that work and the cardboard won’t look good or last, especially if painted.? Thanks for any help!
Lea
Hi there. These look amazing!!! Can you tell me where you got your fabulous curtains??
I was wondering about cutting through the bookcases to make an opening for a large TV— entertainment center style. Do you think that would be possible without comprising the integrity of the shelves/sides?
Hi Liberty, all of the shelves are removable so you can make room for your TV by just removing one!
Kate
Kate, last night we put together our billys for this project, the billys are very IKEA white, our walls are white white, we have to paint them, they look yellowish, what should I prime with??
If you’re not a fan of “IKEA white” prime them with an adhesion primer, I prefer Zinsser Cover Stain, and then paint your color of choice!
Kate
Love it – and I’m considering doing the same, although I have a slightly larger wall! I have two questions for you:
1) Did you consider *not* using the backs that came with the Billy bookcases and just having them open to the wall?
2) Did you cut the carpet or put the cases/plywood down on-top of the existing carpet? It looks like you have similar Berber carpet to what I have…
Thanks for posting this!
Hi AJ, yes you could have them open to the wall, there’s a cutout on the bottom which allows the Billys to sit just about flush to the wall and you don’t need to remove the baseboard – we did because we wanted to reuse it but it’s not necessary. Yes we put the plywood down on existing carpet, didn’t remove our Berber. Good luck with yours!
Kate
I saw a pin the other day where a girl wrapped some foam board with cute fabric and placed it in the back of a bookcase- so cute and she could change it out if she wanted- you could use fabric, sheets, tablecloths, etc. to do that
Thank you for this tutorial. You inspired me to do it myself and my way. I made the built ins with billy, benno and Arstid. Without your blog I wouldn’t have done it.
I would love to know where you got your white chairs from!
Hi Kenzie, they were a thrift store find, wish I could have found four!
Kate
Thinking about doing this for a new studio space!Did you fill in all of the tiny shelf holes? I don’t notice them in your final photos, but in person I always notice them on these types of shelves…would love to know!
Nope, I didn’t fill the holes Jessica – I have the same holes in my family room’s real built ins, I think they’re common so you can adjust the shelves, and all the books or collectibles usually hide most of them.
I am just wondering what paint color you found best matched the white of the bookcases. I am not trying to match to my original baseboards, just the white that the Billy IKEA bookcases come in.
Thanks.
HI VK, I linked to a color match white paint in the post!
Kate
I LOVE the way your “built-in’s” came out! Your blog inspired us to go to Ikea today and create a similar look in our office:) Thank you for posting about the paint colors that match the shelf- That saved a lot of time! Looks great!
One more question, did you use the foam-type moldings that they have at the home improvement stores or the real wood type? Thanks!
Real wood Megan!
Kate
I LOVE this!!! I am now inspired to do the same thing in our bonus room! And I absolutely LOVE, LOVE, LOVE these curtains! Where did you find them?
Kate, when you said that you notched the location of the outlets with a box cutter, what exactly did you mean? I love this tutorial. I cannot wait to buy a home to put these built ins into :)
Hi Ritz, I meant we cut out the location of the outlet on the back board with a knife so we could access outlets!
Kate
I really, really love those built-ins! You definitely were lucky considering the width of that wall. Great project!
PS I love those IKEA guys too, and even though they recommend two people I have become the ultimate pro at assembling IKEA Billys or furniture in general! ;-)
Where, oh where did you get the curtains?? I am in LOVE.
Hey, great idea! I live in Norway and We have Billy bookcases too in our apartment. We have three pushed together, so I just thought I’d mention that you can screw them to each other, there by eliminating the gap. Although the idea that you put molding there was seriously inspired! Thanks for the inspiration!
I am so glad I found this page. We have a library and not enough shelves for all the books. I am getting ready to do this in the next two months, I but I am extending it with the Billy corner combo so that the shelves will wrap around into an L shape.
In two of the pictures, outlets (or coax cable or light switches) are seen that were covered by the bookshelves. Did you remove those, cover them, or otherwise deal with them? If so, how?
There is just one outlet behind the unit Mike, we did not cover it, we simply ran a power strip to attach all four lights from that one outlet.
Very cool! My installation was pretty much similar except we can’t adjust gaps between cabinets to one size.
Instead of wood trim I used roll of white veneer and hot iron – was very easy to apply and trim it after to perfection. After paint it looks like solid construction.
Sounds like a fantastic solution Yury!
Kate
Hello,
Very nice work! I am determined to do a built-in with Ikea Billy bookcases as well but I was wondering why you did not want to fill the bookcases all the way to the ceiling (with mouldings)? Is this because of your taste or just because it is more difficult to do?
It was a personal choice Clement, IKEA does have extenders so it’s possible.
Out of curiosity, how close of a color match was your (original) white crown moulding and baseboard to the IKEA white of the Billys? You mentioned painting the baseboard/moulding/trim around the Billys. Did you have to also paint the rest of the moulding in the room to match?
My husband and I have installed Billys inside of two closets that take up an entire wall in the room. We removed the sliding doors and have the Billys set flush with the front of the closet, so they are framed by the white moulding around the closets. Like this: _|¯¯|_|¯¯|_
We need to add additional trim/moulding to complete the “built-in” look. The problem is that all of my moulding, baseboards and crown moulding are bright Ben Moore White. The Billys are much more yellow. The room has a TON of moulding (and I prefer the bright white), so I don’t want to repaint all of it to match the Billys, but I really don’t want to paint the Billys either. I’m afraid I may have no other choice, but I was curious if you had any ideas or suggestions on how to blend the Billys without repainting everything?
Hello Jaded, I have that same issue in my kitchen, my crown and trim is a brighter white than the creamy colored cabinets – I say just go with it! If it bothers you too much you’ll have to repaint one or the other but give it a few weeks or months, you might find you’re okay with it.
Hi :)
Just wanted to let you know that I just loved this! I’d been looking for ideas all over the internet on how to create a library space for my mass of books, and this just inspired me, from 5000 miles away. So much so, that I actually did it! It’s turned out really well, I’m so pleased – Thank you.
Rachelle :)
Hi! I just wanted you to know that my husband and I just finished building these bookcases for his new home office space. It came out spectacular and nowhere can you tell the project was born from an Ikea bookshelf. The total for the project was only about $300. We painted the wall behind a really dark navy blue and sanded/primed & repainted all of the bookcases in bright white. I will mention that the wall we did it on was quite small. There was not enough space to put in three Billy’s but there was enough space for two. In the middle one we just added two custom wooden shelves cut to size. They look amazing!!!!!!!!!!!! Thanks again for the inspiration.
Fantastic Ana, so excited to read about your project, so glad it worke for your home!
this may be the solution I’ve been looking for for YEARS. Wanting built ins with paying thousands for them. GENIUS!!!!
question: I see you had some switches on that wall. did You just cover them?
I cut out boxes in the back of the cabinets where the switches were Mary to have access to them.
You are a goddess and I worship you. When you say the spacing between the four cabinets was 2¼ inches, does that measurement include the thickness of the side cabinet walls? In other words, was your vertical trim 2¼ inches wide, or was it actually wider than that? Given the shape of my room, we need to put a 2.5 inch gap between each cabinet, so our trim will have to be around 3 or 4 inches wide, and I worry that that is too wide and will look strange. Thank you.
I don’t think that will look strange Michelle, and yes the total width including the thickness of the cabinets was 2 ¼ inches.
Found you on Houzz and immediately loved this project and had to do it! I considered using the Billy bookcase extensions and making these go full height of the room, but opted against it. I want to use the top space as a shelf for plants or decor.
I blog for a living and have never spent so much time on a single blog post as this one. Absolutely incredible information and I truly appreciate the detail. I re-read the post a dozen times to plan and then follow step-by-step. Every time I thought I had a question, like about the anchors, the paint, or even the chair, I continued reading and you answered them.
I wasn’t sold on the darker blue paint and then I saw your post about the paint colors on your walls http://www.centsationalgirl.com/2010/09/the-paint-on-my-walls/ and am totally going to steal your lighter blue concept!
I like the product placement of the Zinsser Cover Stain Primer in the photo which helps me know exactly what to get.
I think I spent more time at Ikea buying the bookcases than it will take me to finish the entire job!
Thanks CentsationalGirl for your hard work on this post. And thanks @JadedSabre for the comment about the built-ins for the closet – great idea.
The price of these Billy Bookcases in the deep (15″) size sure has increased from Nov 2011-July 2014! In less than three years they went from $69 – $99!
OH NO! I came across this post and was dead set on this project – unfortunately it appears that IKEA no longer sells the 15″ size :(
I have a question. Now that it’s been over 6 years, have you had any problem with setting the bookshelves on carpet? My husband is nervous about doing this in our home because of the carpet. Thanks!
No problems after all these years!
Do you know if IKEA still has the 15″ deep billy bookcases? I can only find the 11″ deep one, and I’d really much rather prefer the 15″ deep ones. I wonder if you know if I can get it somewhere else if IKEA doesn’t have them anymore?
They no longer carry the 15″ deep Billys to my knowledge.
Hi stumble upon this many year later. It looks great!
Question: Did you also put trim on the side walls? How did you get rid of the gap between the side bookcases and the walls? It looks flushed and seamless
Thanks!
Now it is a hundred times better, the whole interior has improved very well, although I know that you had to put in a lot of work …