We bought this fixer house as an investment because it’s what we love to do, take old dated spaces and modernize them. We chose Vegas because I have a ton of family there including my parents who live down the street and you can buy a fixer upper home for a decent price unlike real estate in the Bay Area where everything is $500+ a square foot, housing prices are crazy ridiculous here.
Fixer uppers don’t scare me, in fact the uglier the better I say. (Just today we wrote up an offer to purchase a home down the street in even worse condition than this one and I can’t wait to get my hands on it, more to come.) So when we walked through this home’s kitchen this was the first impression.
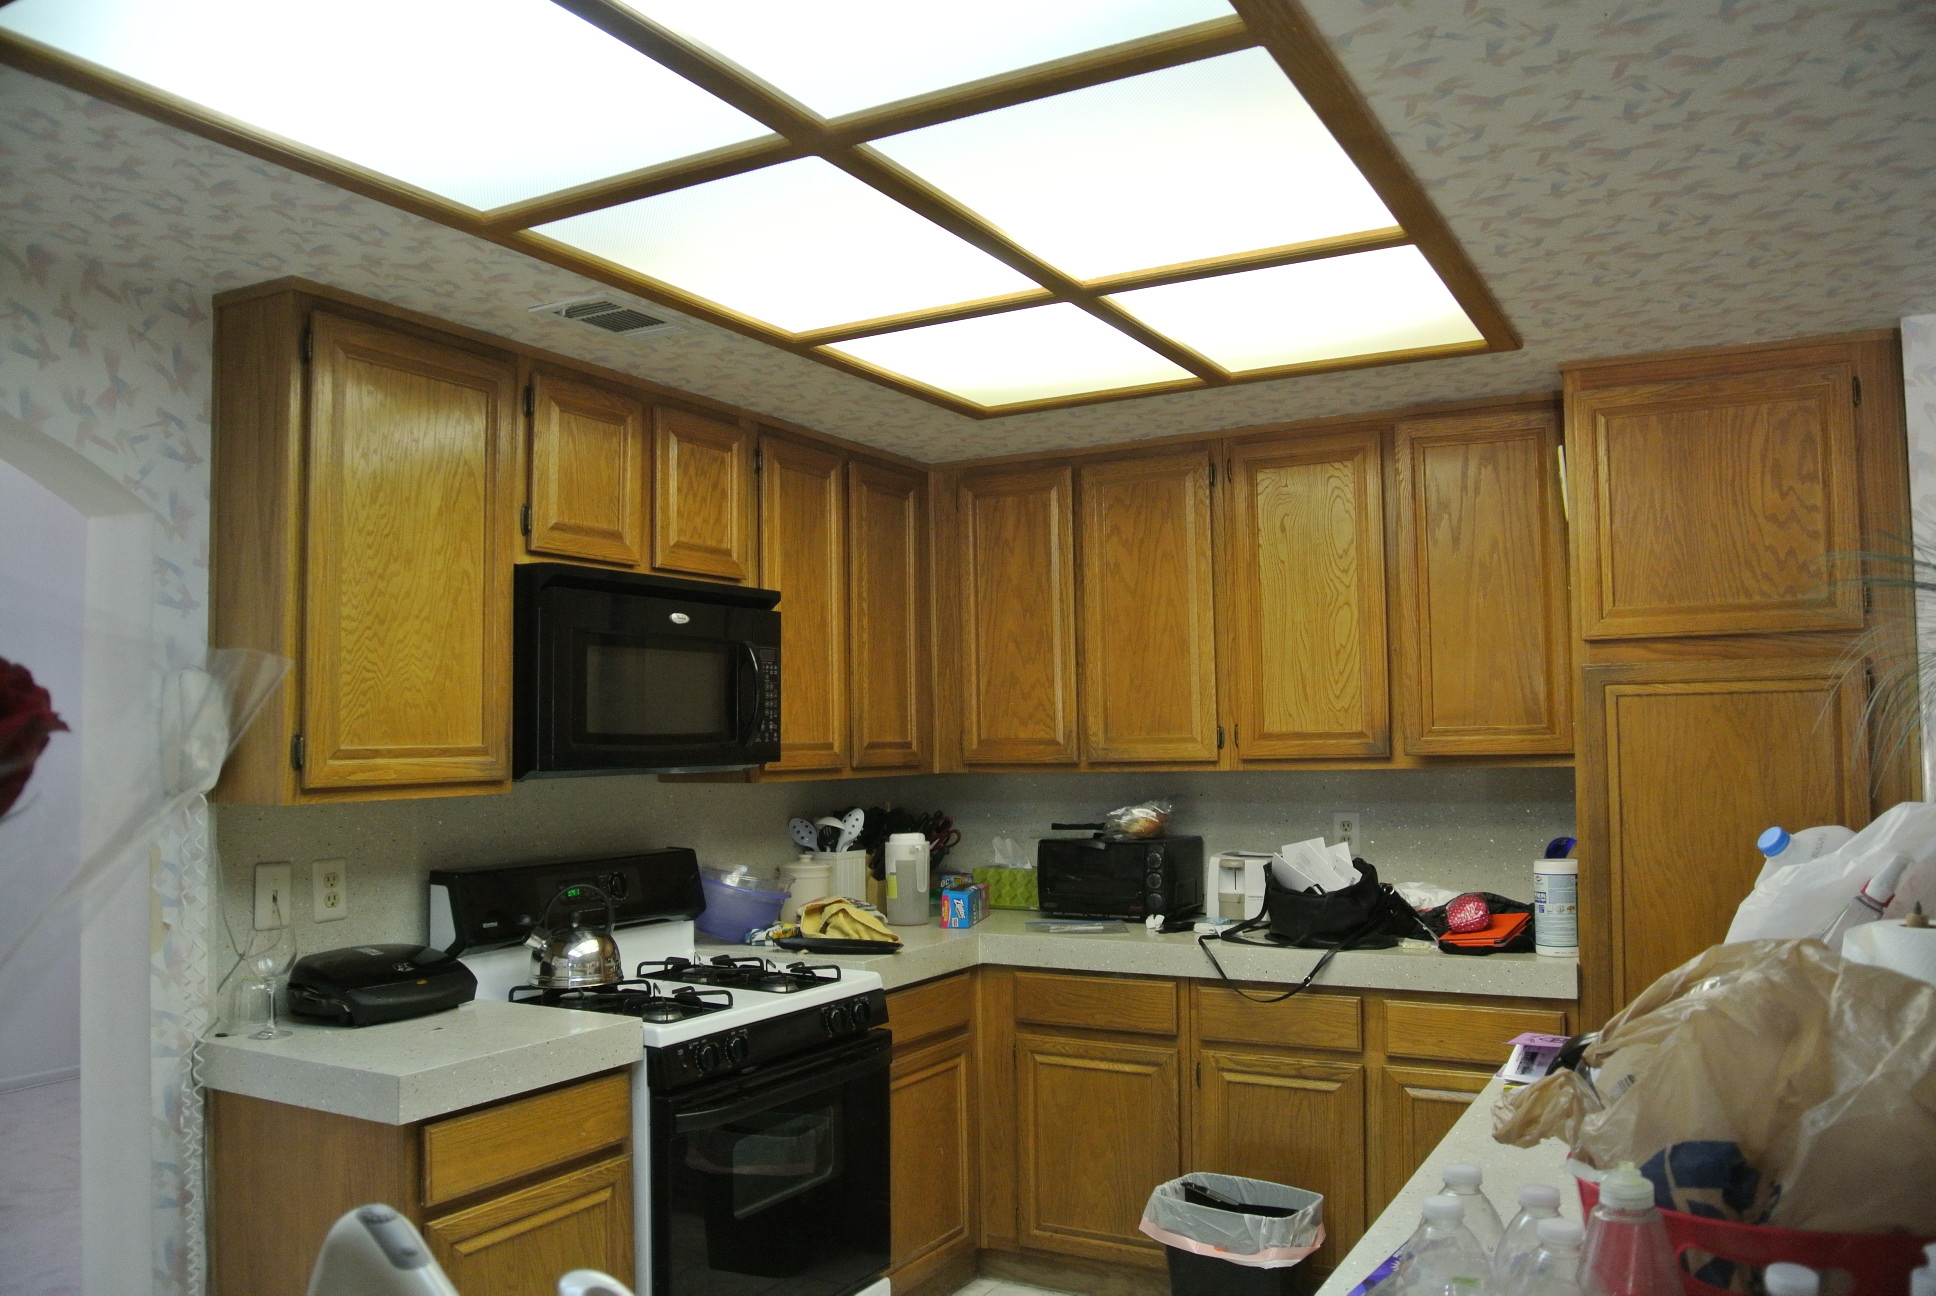
I’m not judging the mess, the sellers were in the process of moving out so it was a disaster zone and everything dated back to 1989 but I could see the potential of a major renovation.
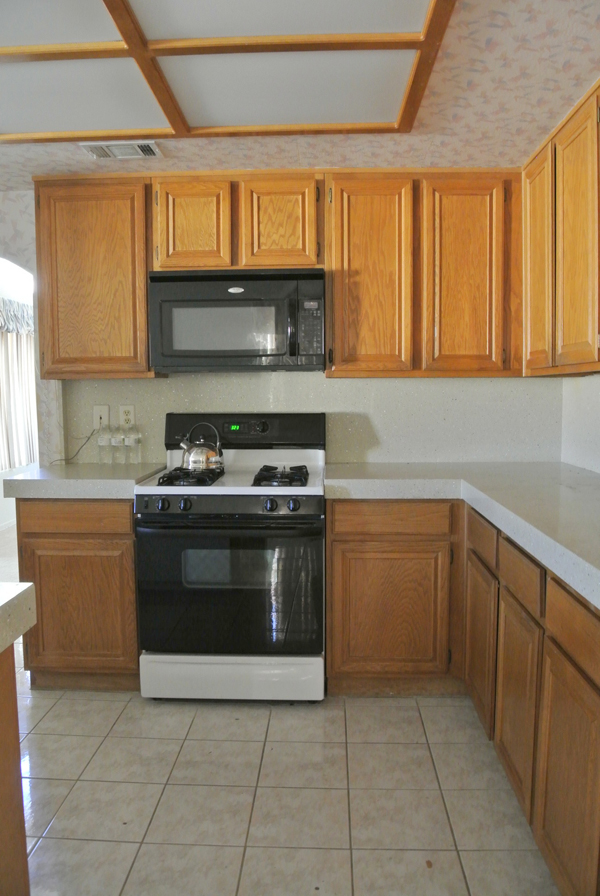
I liked everything about this house when we bought it except the kitchen. The layout was not my favorite and I cringed when I first saw it. I prefer the classic L shape, U shape, or galley kitchen, and always with a window. This one had an awkward angled peninsula with a raised counter I found bizarre but I welcomed the challenge and knew it could be so good with a remodel.
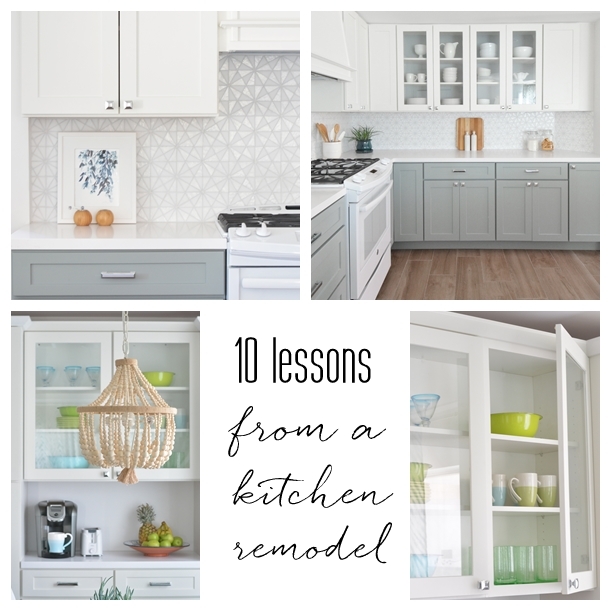
Lesson #1: Any kitchen can be beautiful with vision and quality materials.
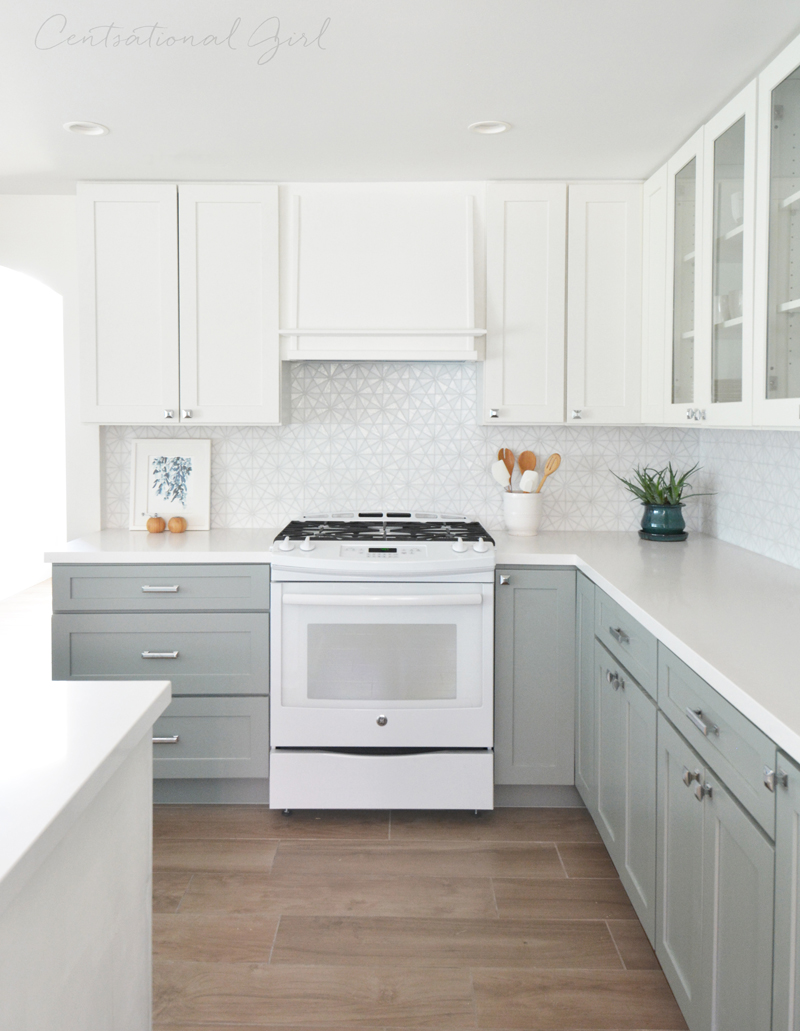
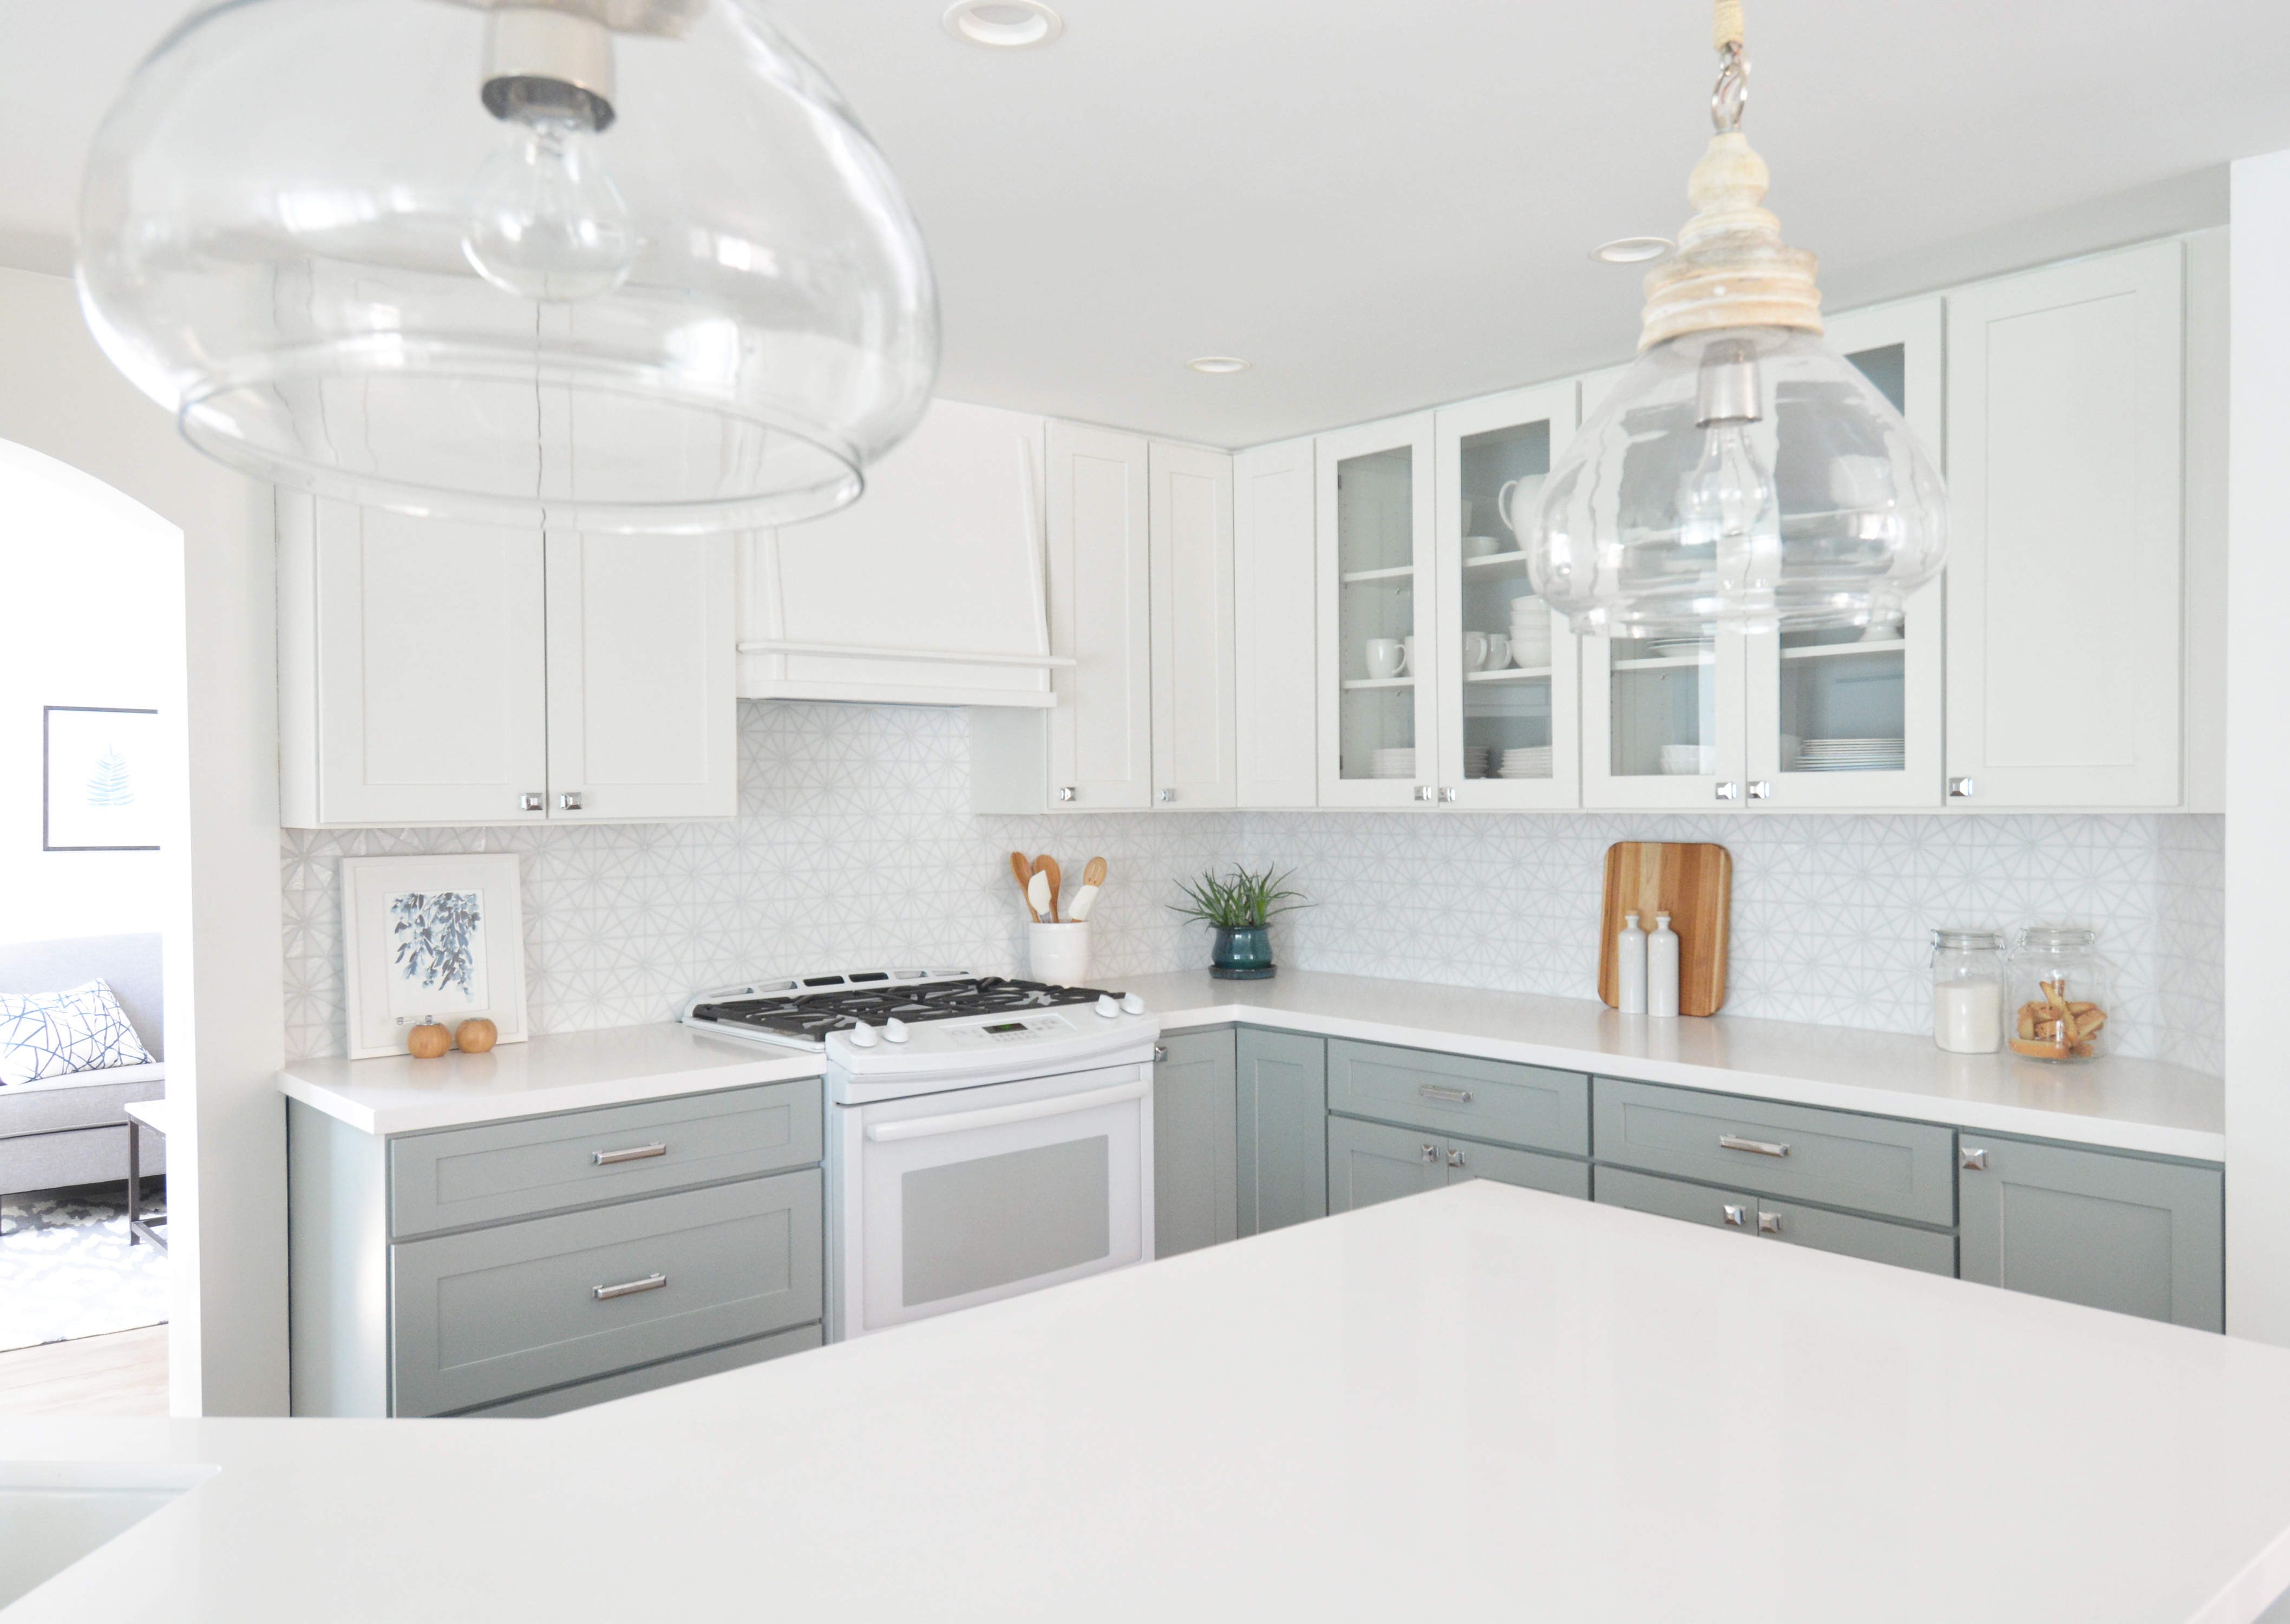
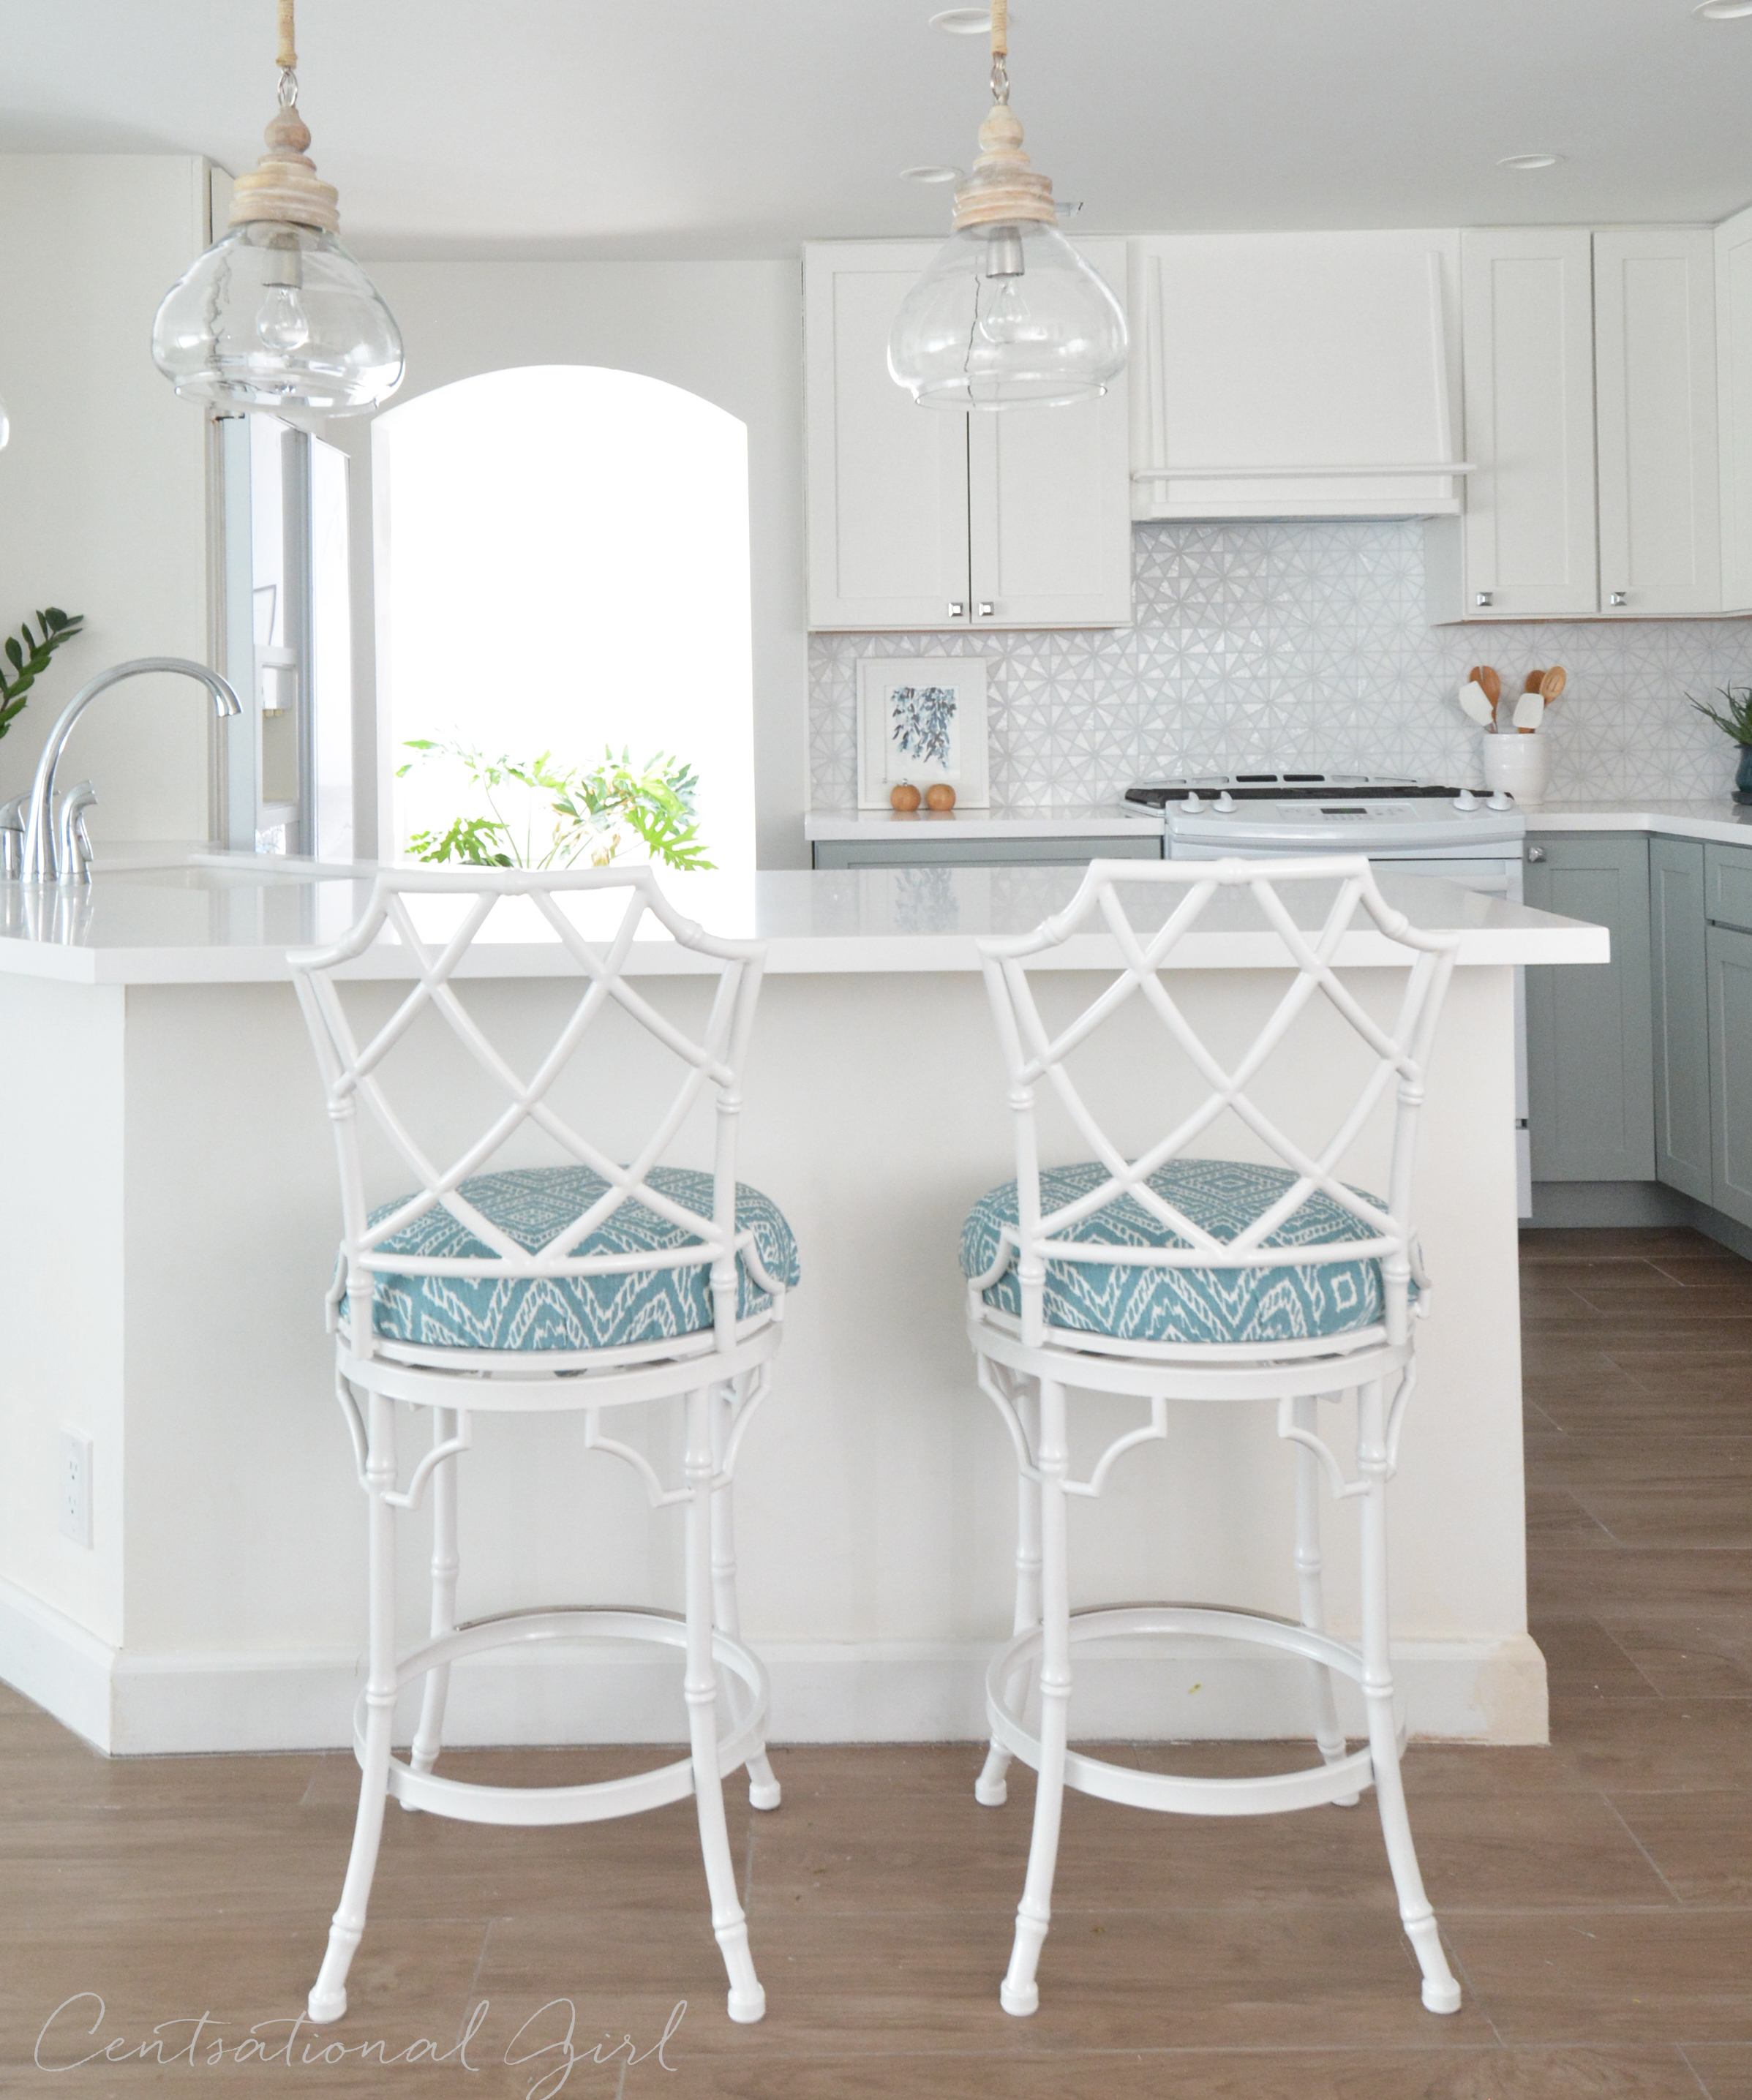
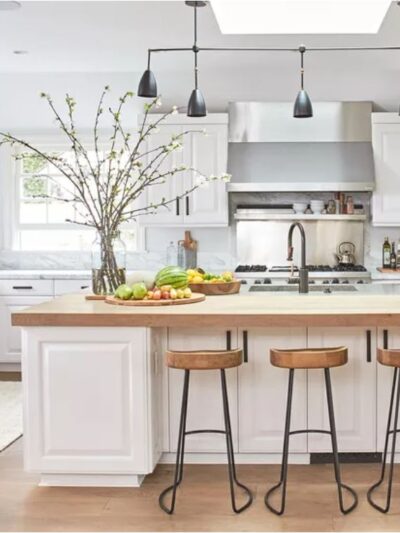
See this post for the full kitchen tour. This kitchen remodel includes Shaker style cabinets and quartz countertops, also white appliances since they’re clean looking, complement the white cabinetry, also won’t scratch as easily with renters living in the home. The hardware is polished chrome, the floors are porcelain wood plank tile (see all sources below.)
#2: Prepare Yourself for Inconvenience.
For several months the kitchen had only cabinets and a refrigerator, no sink, no oven, no microwave, and makeshift plywood counters that we sat all our stuff on which I cleaned off solely to take this picture.
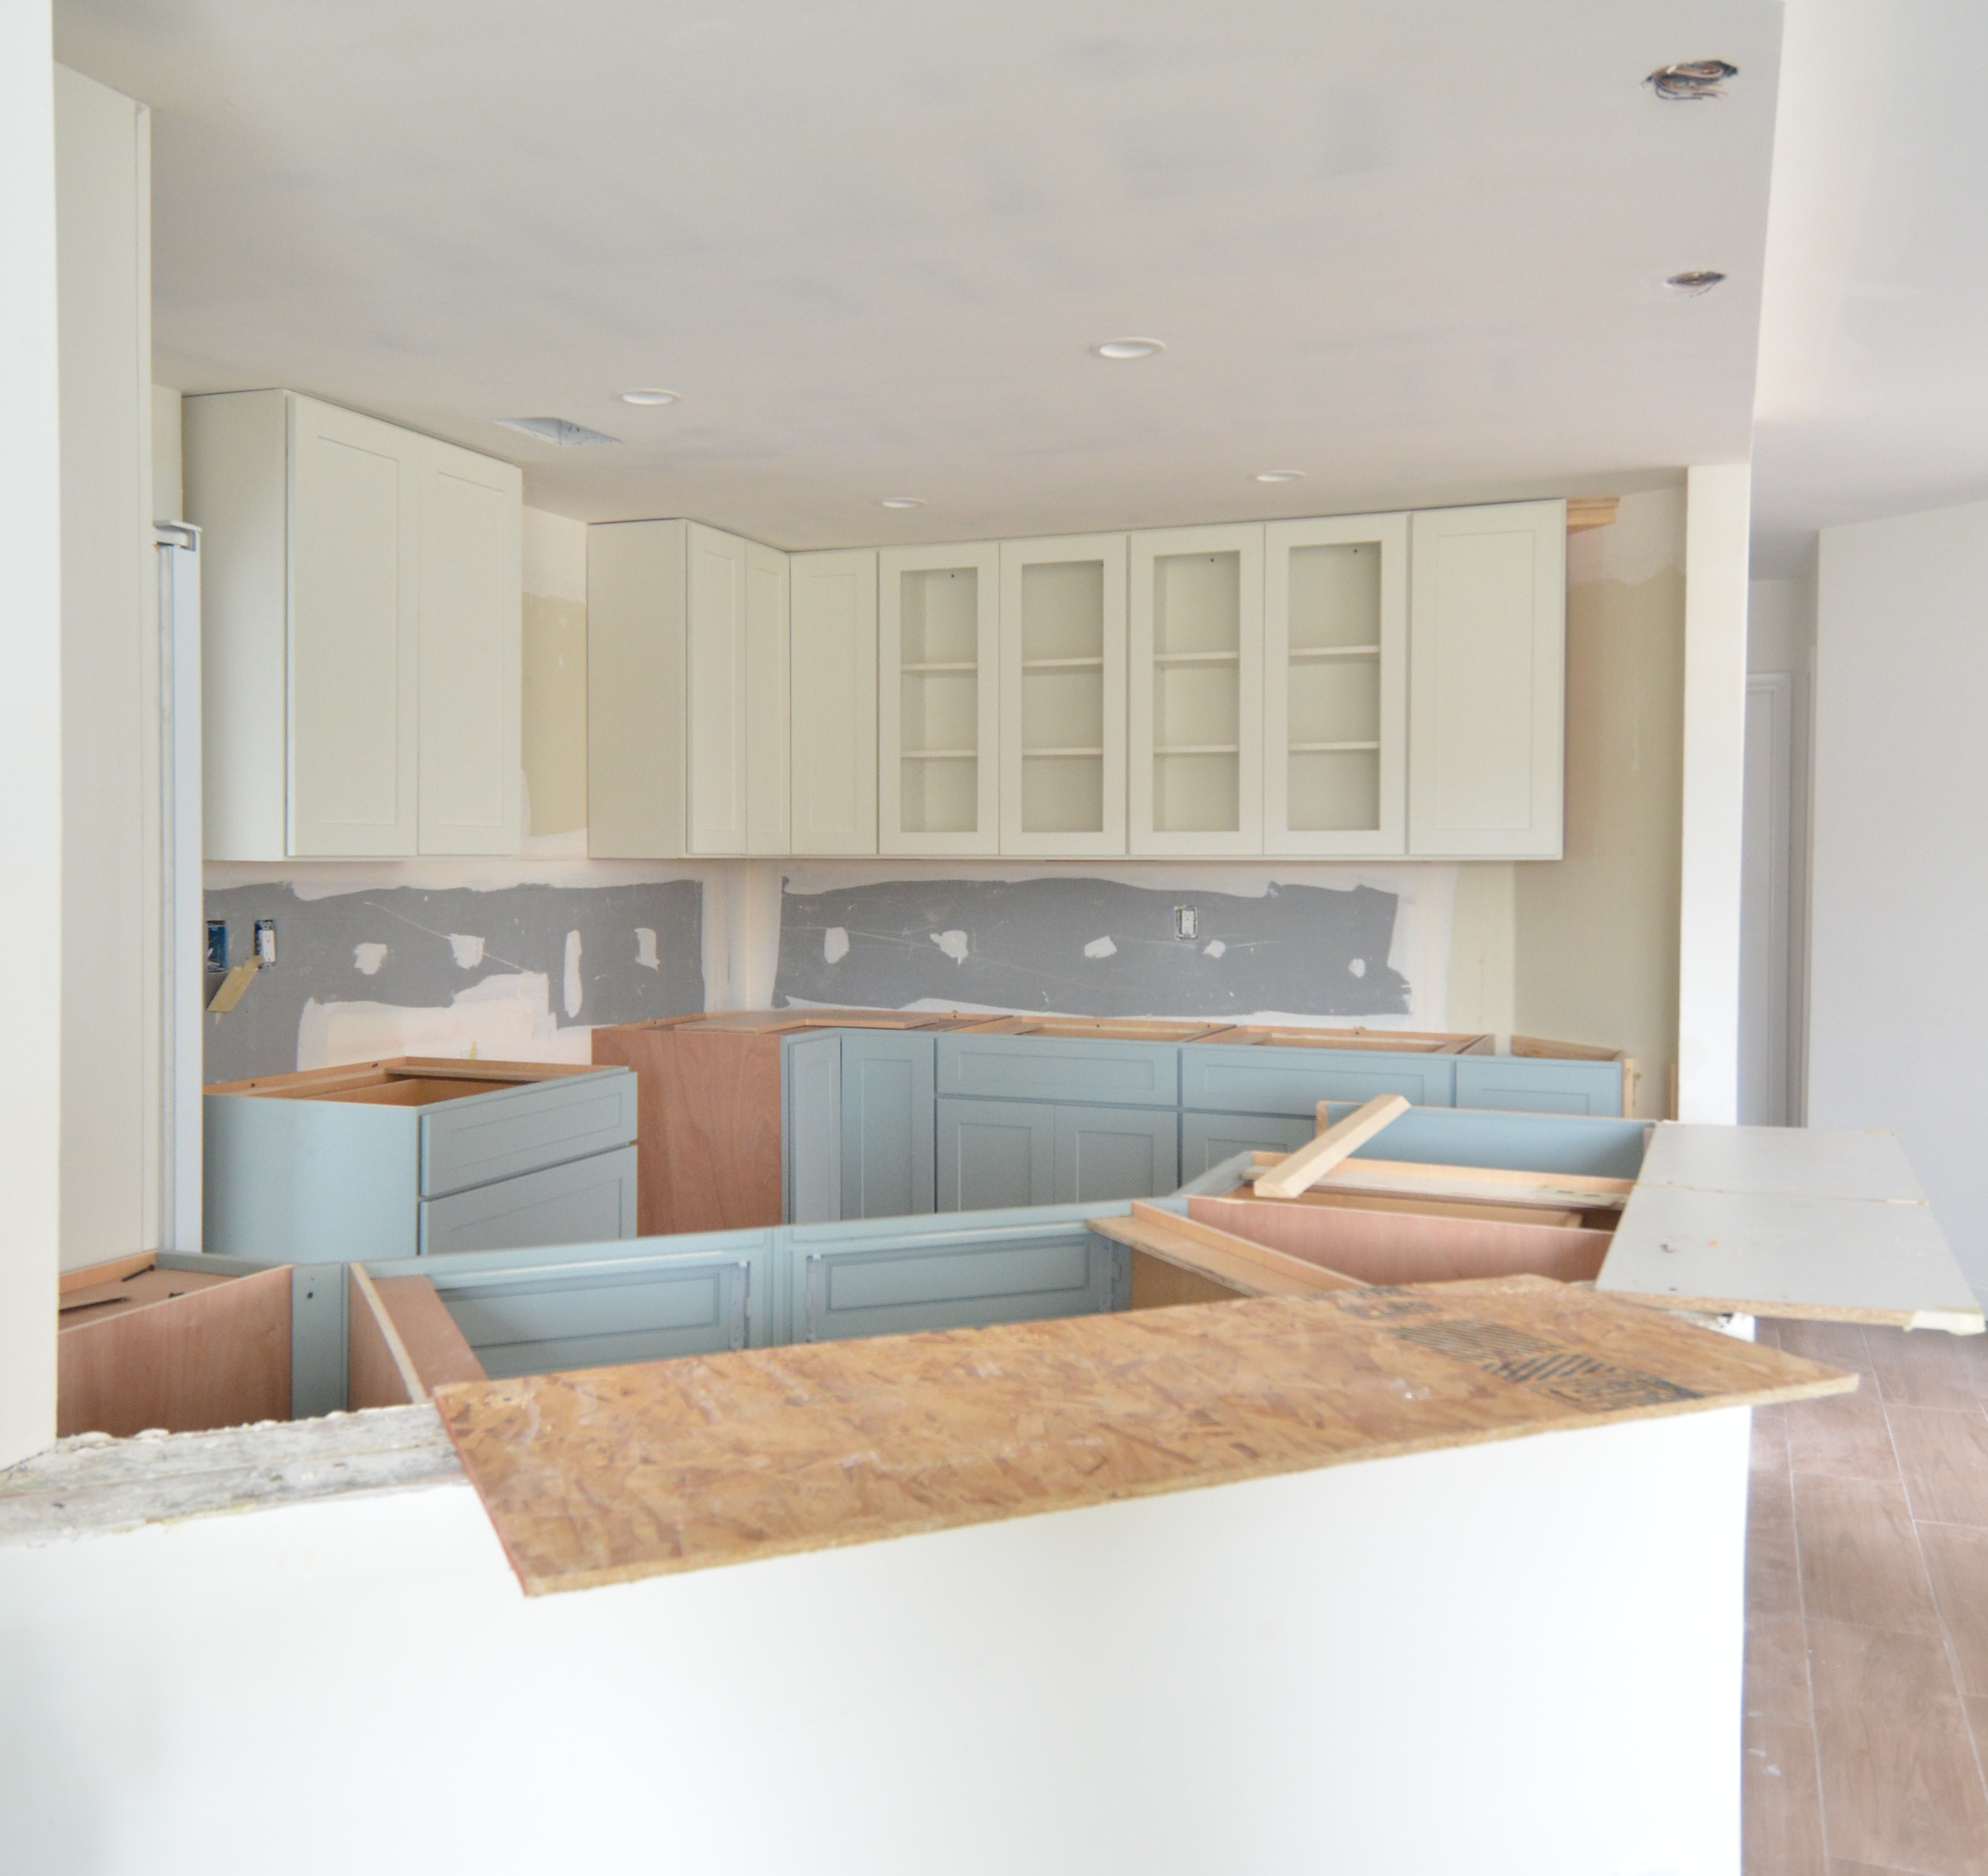
We ordered a lot of takeout. We ate a lot of raw food. We stored dry goods on a fold out table. We hit up Mom and Dad down the street for hot meals. With any major kitchen renovation prepare yourself for weeks if not months of having no appliances – you can do it you’ll just have to get creative. Use your BBQ. Buy a toaster oven, etc. Lots of people I know set up makeshift kitchens elsewhere in the garage to get through the process.
#3: Always Over Budget by 15-20%
We had a specific budget with this kitchen, it included the savings for partnering with Cliq Studios for discounted cabinets and buying a used refrigerator, I splurged elsewhere (see #7 below). Know there are things that will happen along the way will be unexpected and cost money to fix.

Example: by working with semi-custom cabinets in fixed widths, once they were installed I was left with a wider open space on the right of the cabinets where the old pantry used to be on an angled wall. Despite the precise measurements I sent to my kitchen cabinet designer, this was a complication.
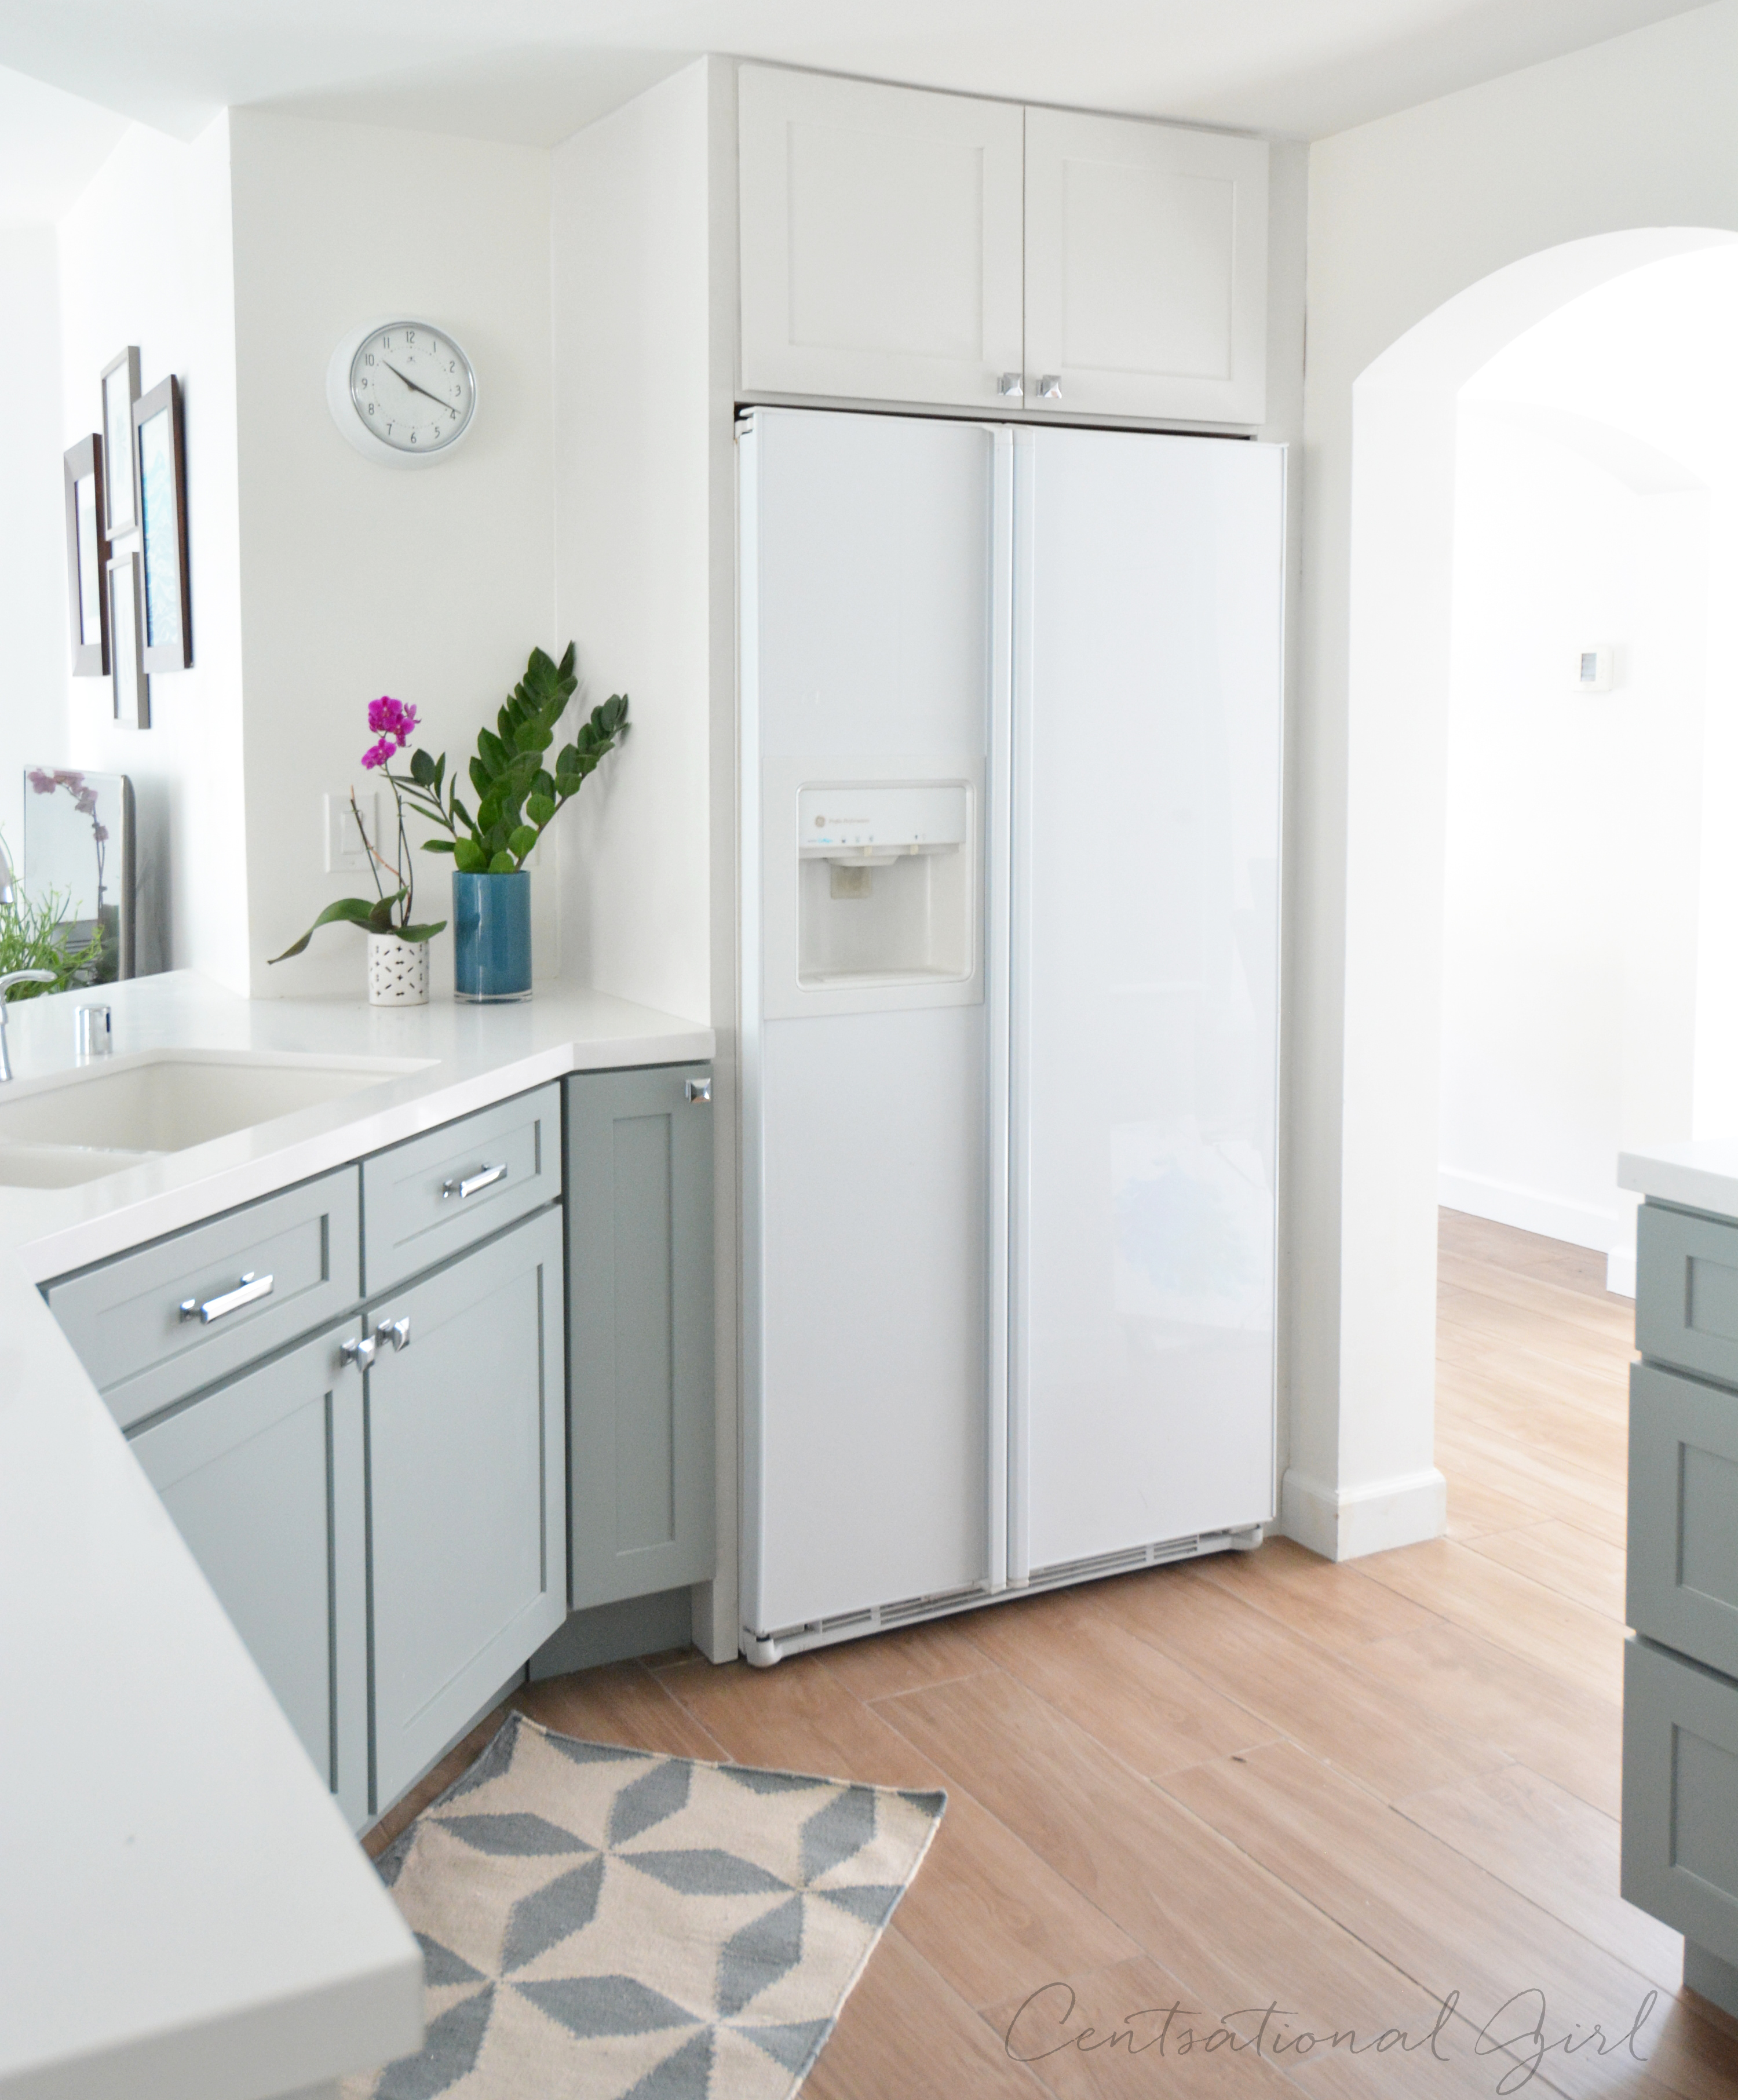
The arched entry to the kitchen on the other side next to the refrigerator is thicker so I hired the same sub who retextured the walls smooth to reframe the wall and make the wall meet the lower cabinet to solve the problem.
Reframing it resulted in additional labor costs and also required paying for patching the tile floor that we cut into by widening the wall and recessing it a few inches. However the result was a a clean edge that met the cabinets so I didn’t have to add side trim and now it looks more like a custom fit.
#4: Know When to Hire Professionals.
We’re not afraid to DIY but when it comes to big jobs like cabinet installation we hired a professional finish carpenter to do it for us since precision was key, read about the installation here. We unboxed the cabinets and moved them into place, but paid the extra money to guarantee a perfect fit by a finish carpenter. This space we learned had the wonkiest uneven floors and walls, and a professional made sure with shims and precise measurements all the cabinets were flush and level.

We also hired professionals to install the hood liner and the tile backsplash, we’ve done a lot of tile backsplashes in our lives but since he was on site to cut and install tile in the master bathroom, we paid to have him do the same in the kitchen too.

Note the awkwardness of the venting situation above. When we ripped into the kitchen soffit and had to rebuild it (see #3 above on over budgeting for unexpected things) we discovered a main water pipe ran right through that space directly above the range. Because I had made the cabinets on the left of the range 6 inches wider now my hood liner was forced to move over 6 inches too so we had to install an elbow in the ceiling and use flexible ducting to allow for venting around the pipe. The new hood liner hides it but this was another unexpected situation where we turned to professional help.
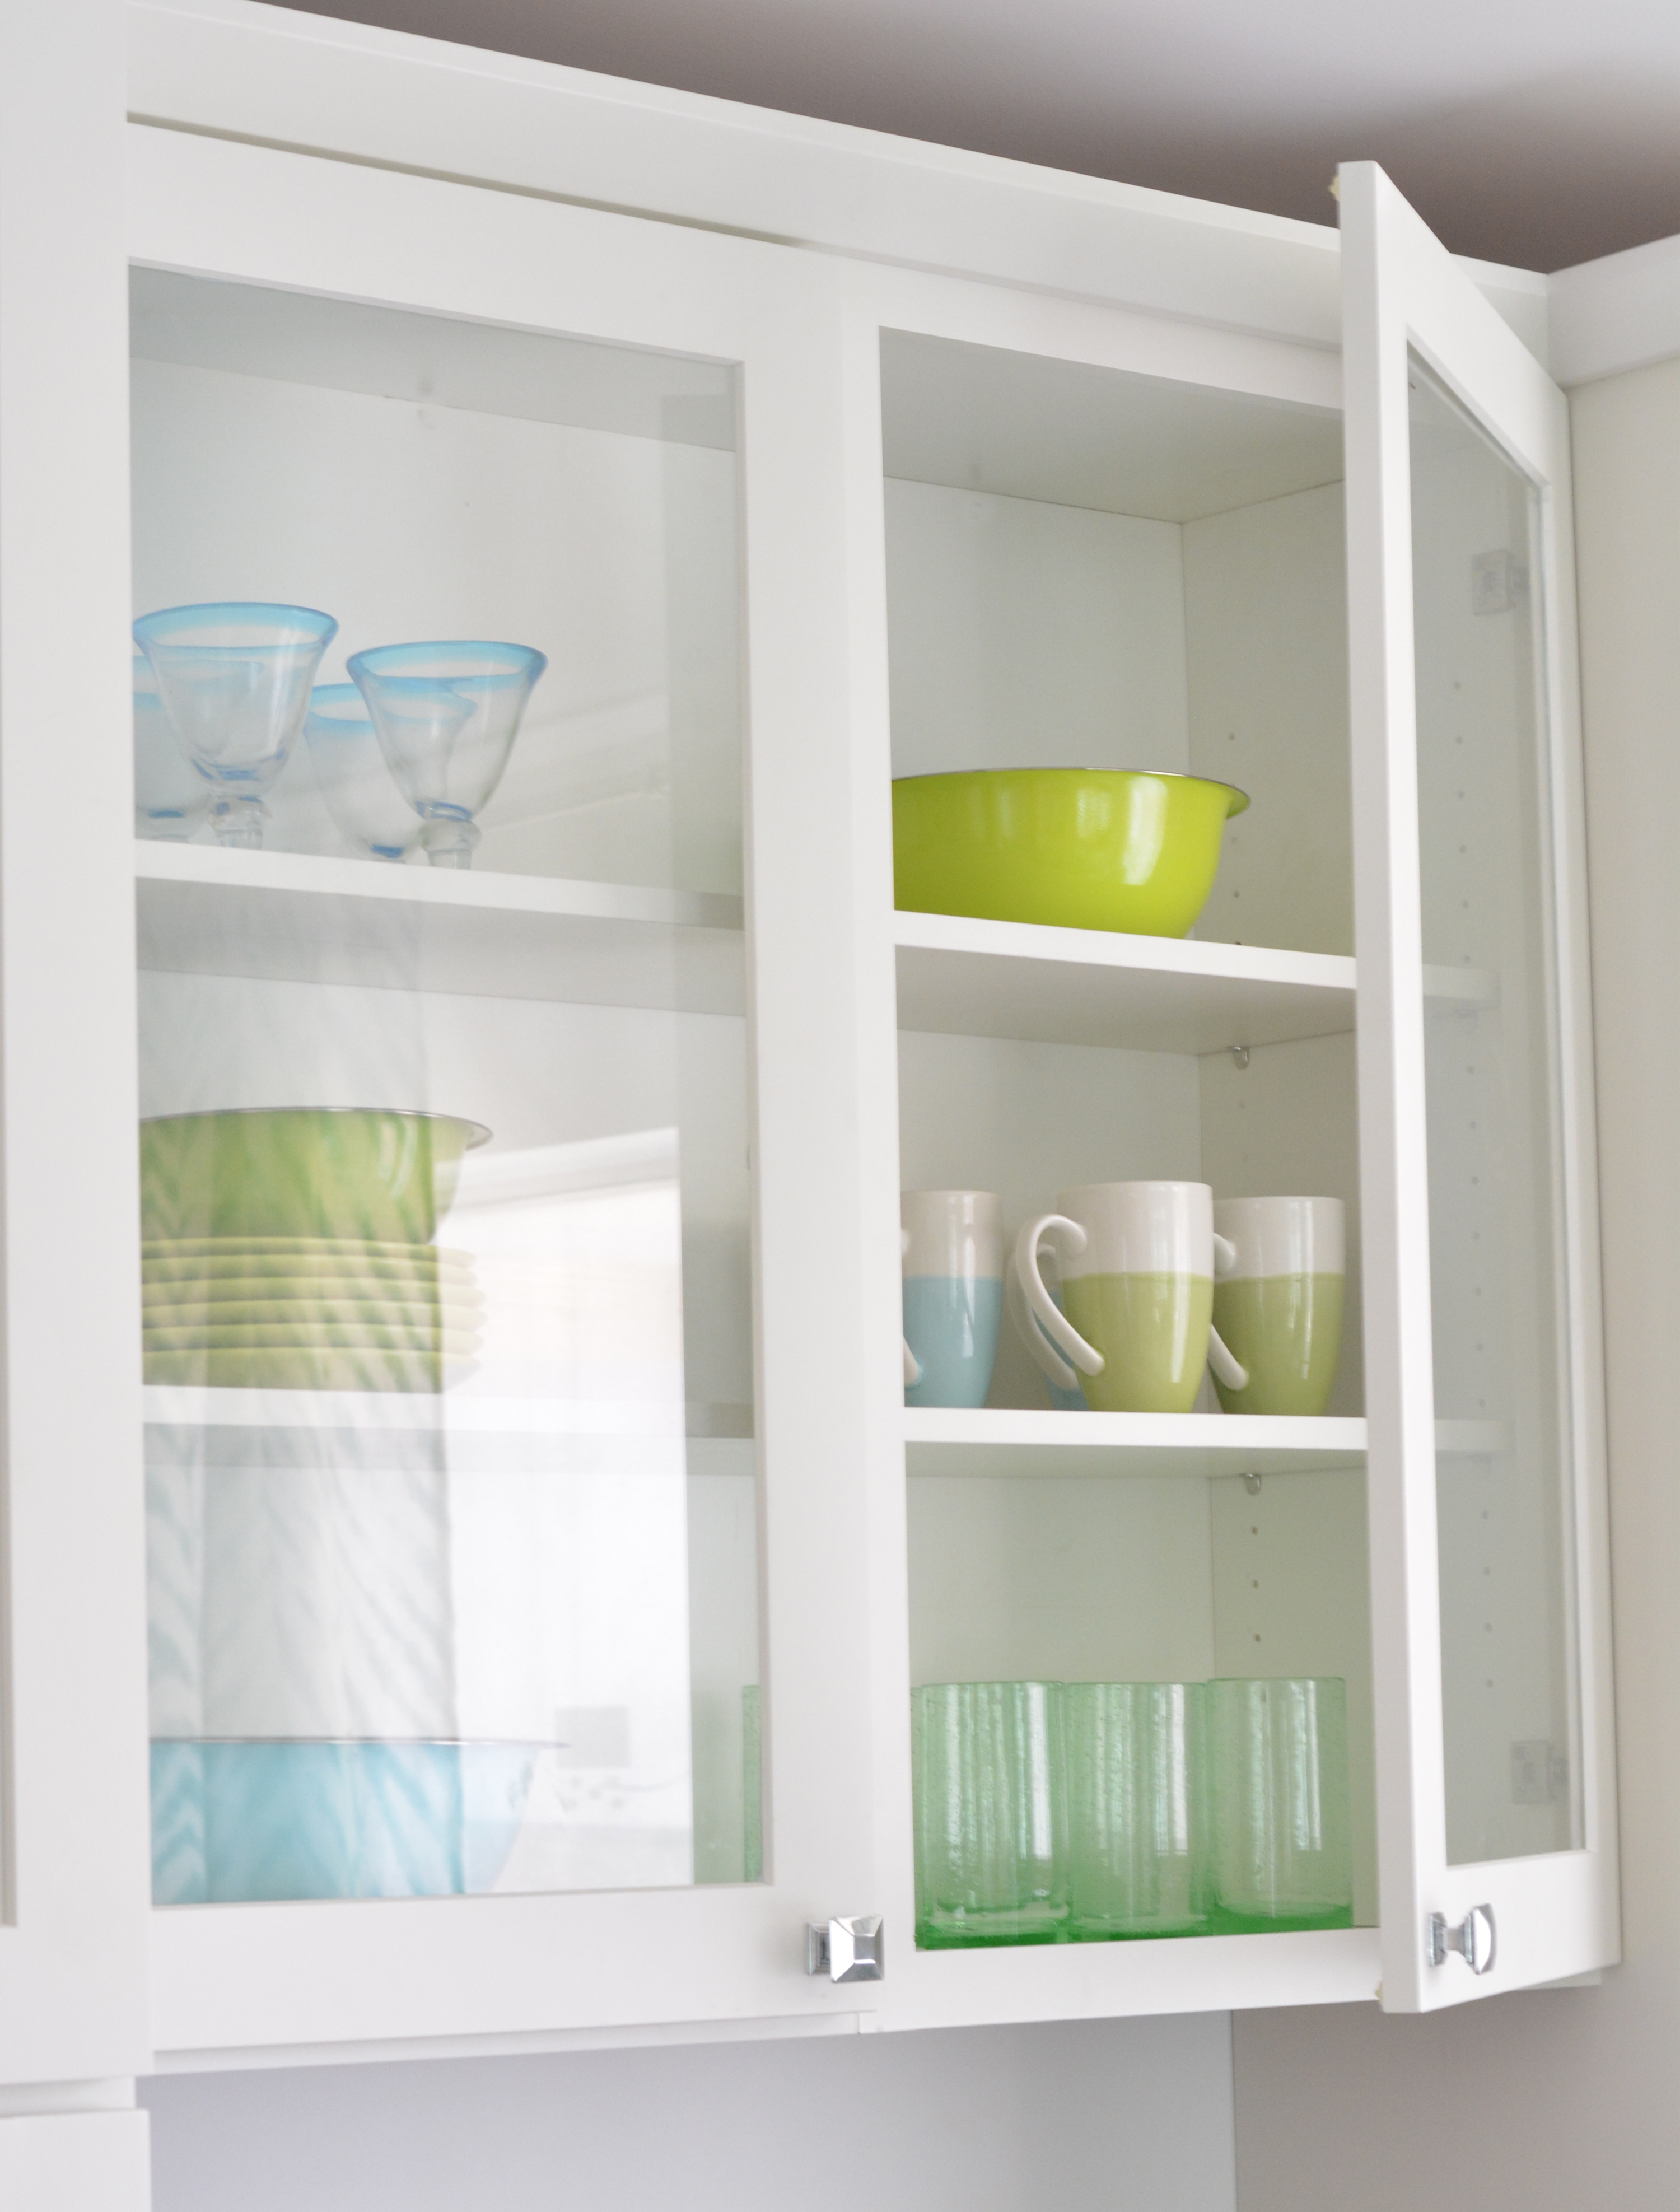
But then there were all the little things that we opted to do ourselves, like buying glass from a local merchant and securing it with silicone on our own, also installing light fixtures and hardware, etc.
#5. Have a Lighting Plan.
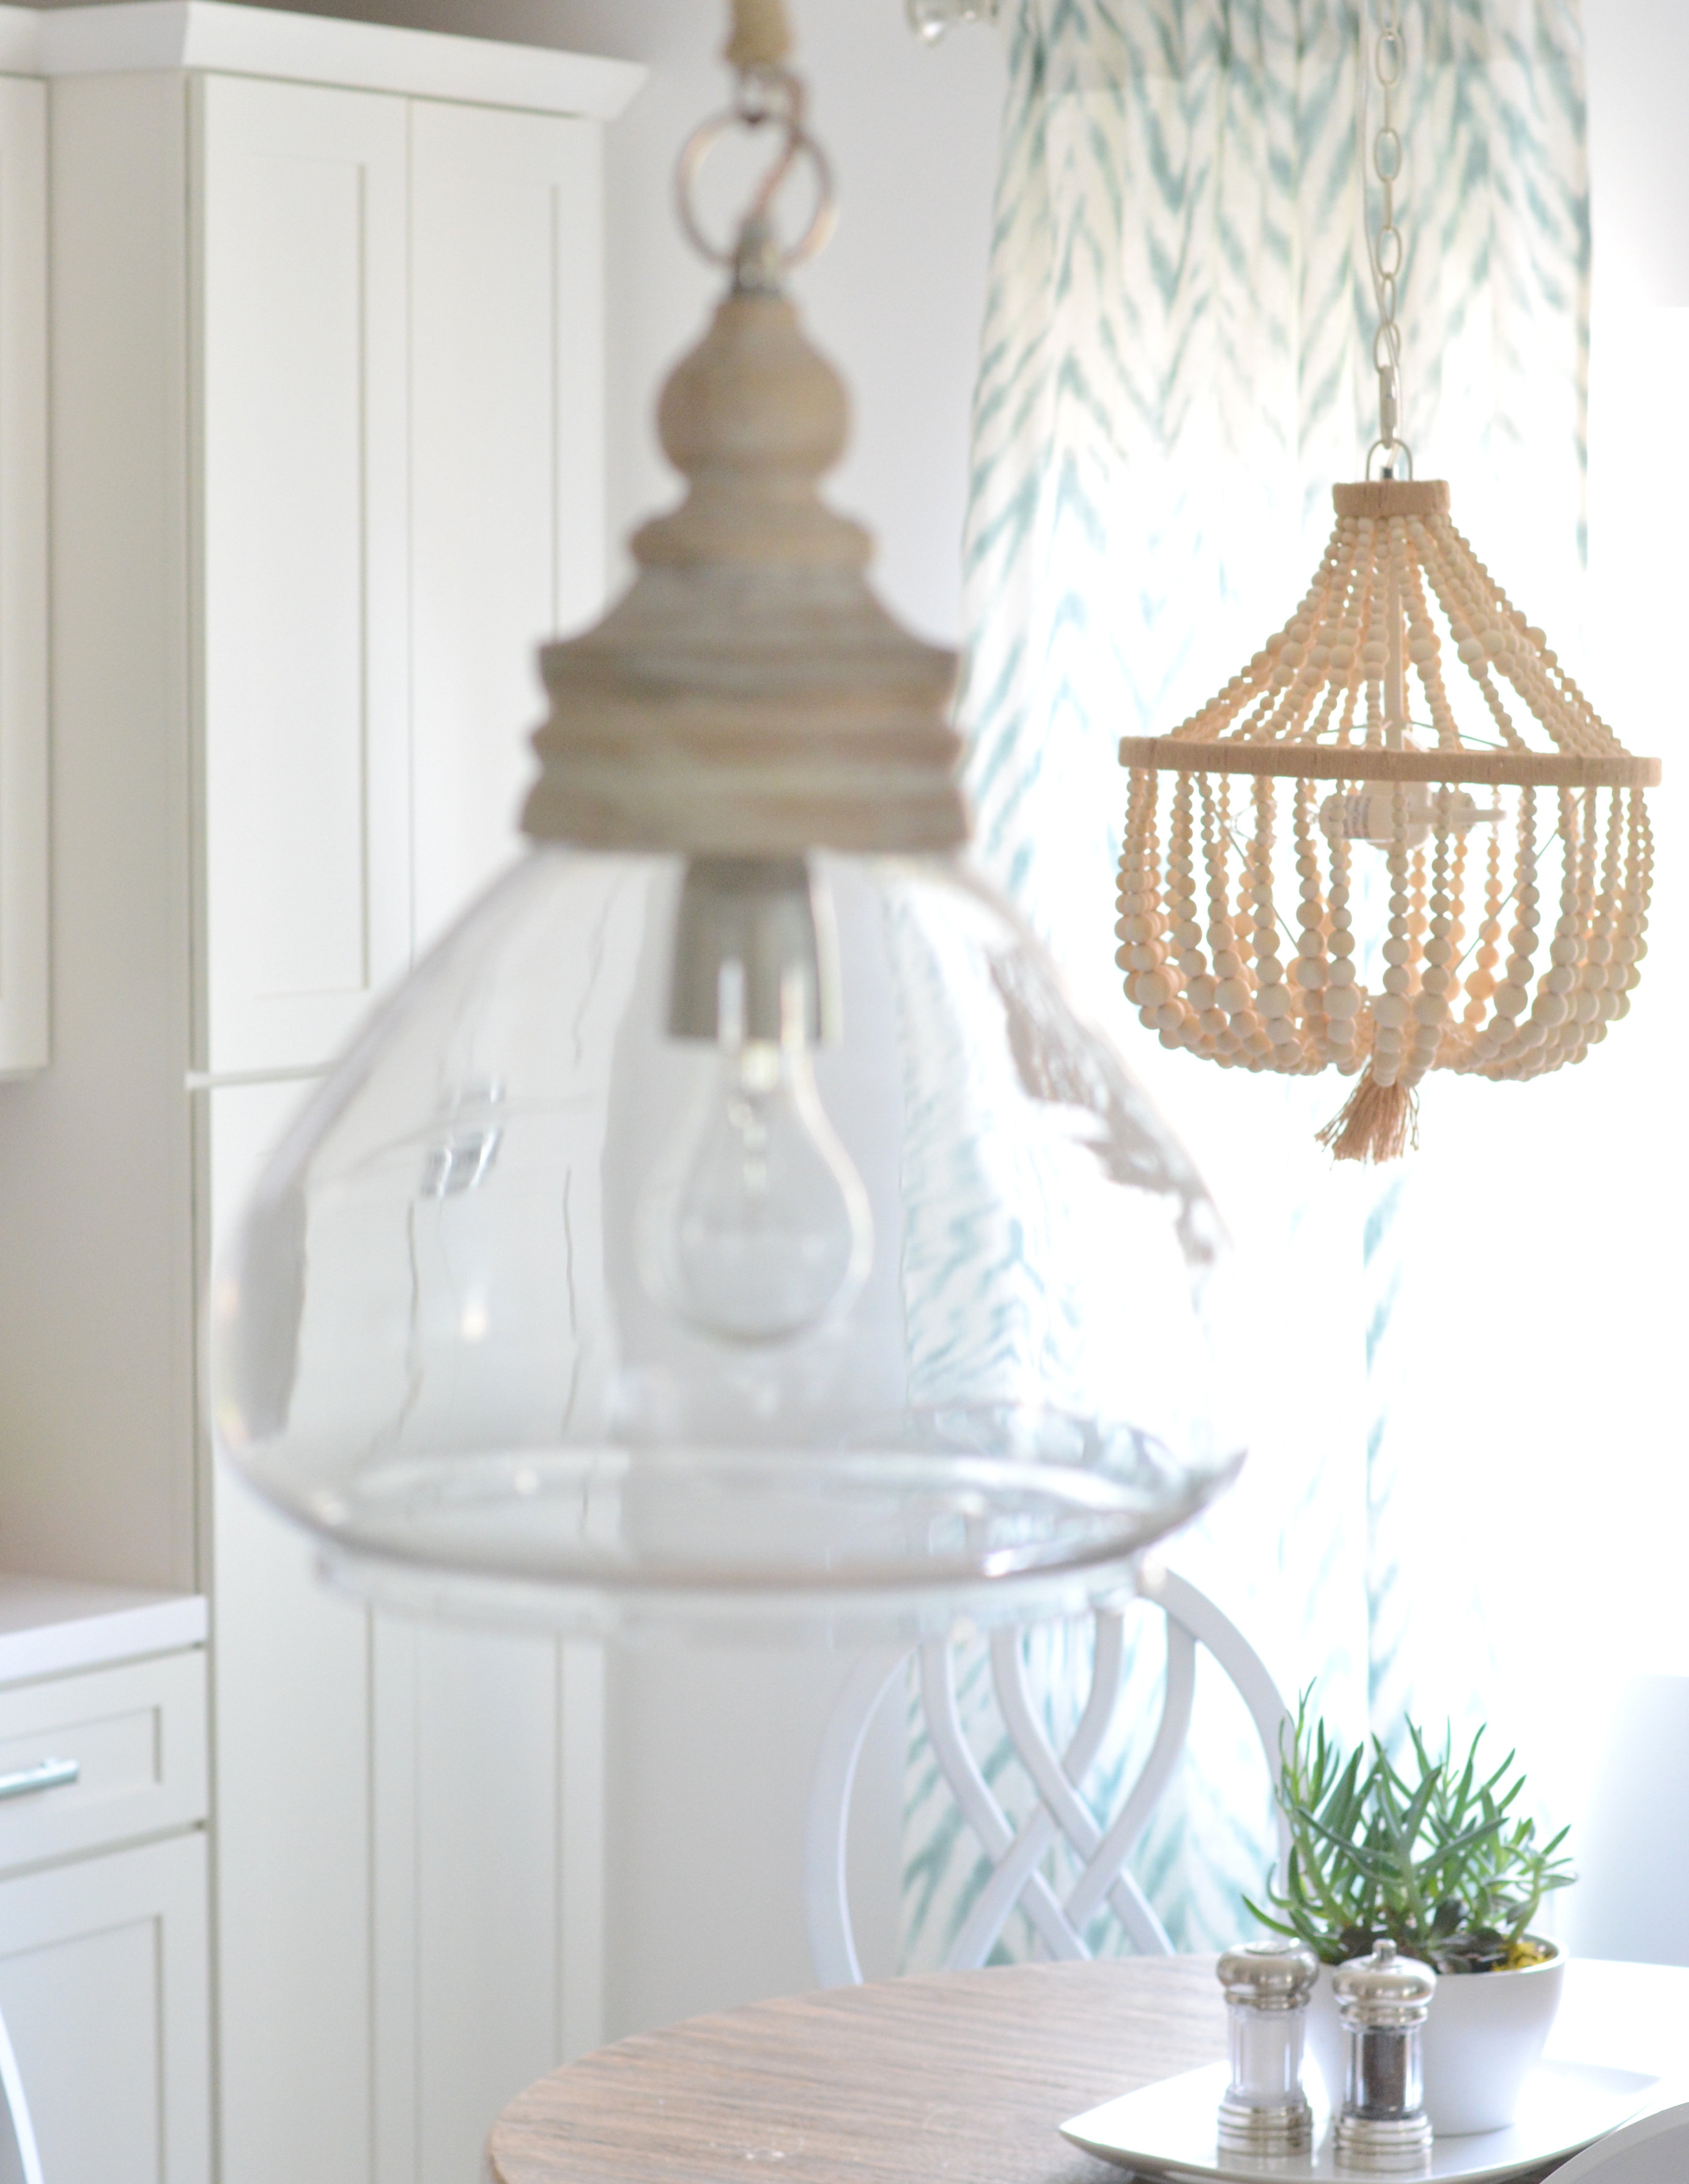
Older kitchens often don’t have multiple sources for light like modern ones. This kitchen in its original state had only one box florescent as a source of light. I replaced them with recessed incandescent lights on dimmers and also added three pendants over the peninsula, also on dimmers for varied sources of light. (In our California kitchen remodel from many years ago which is a larger space, I also added under cabinet lighting, a separate light over the sink, and lights inside the glass cabinets, also worthy of consideration!)
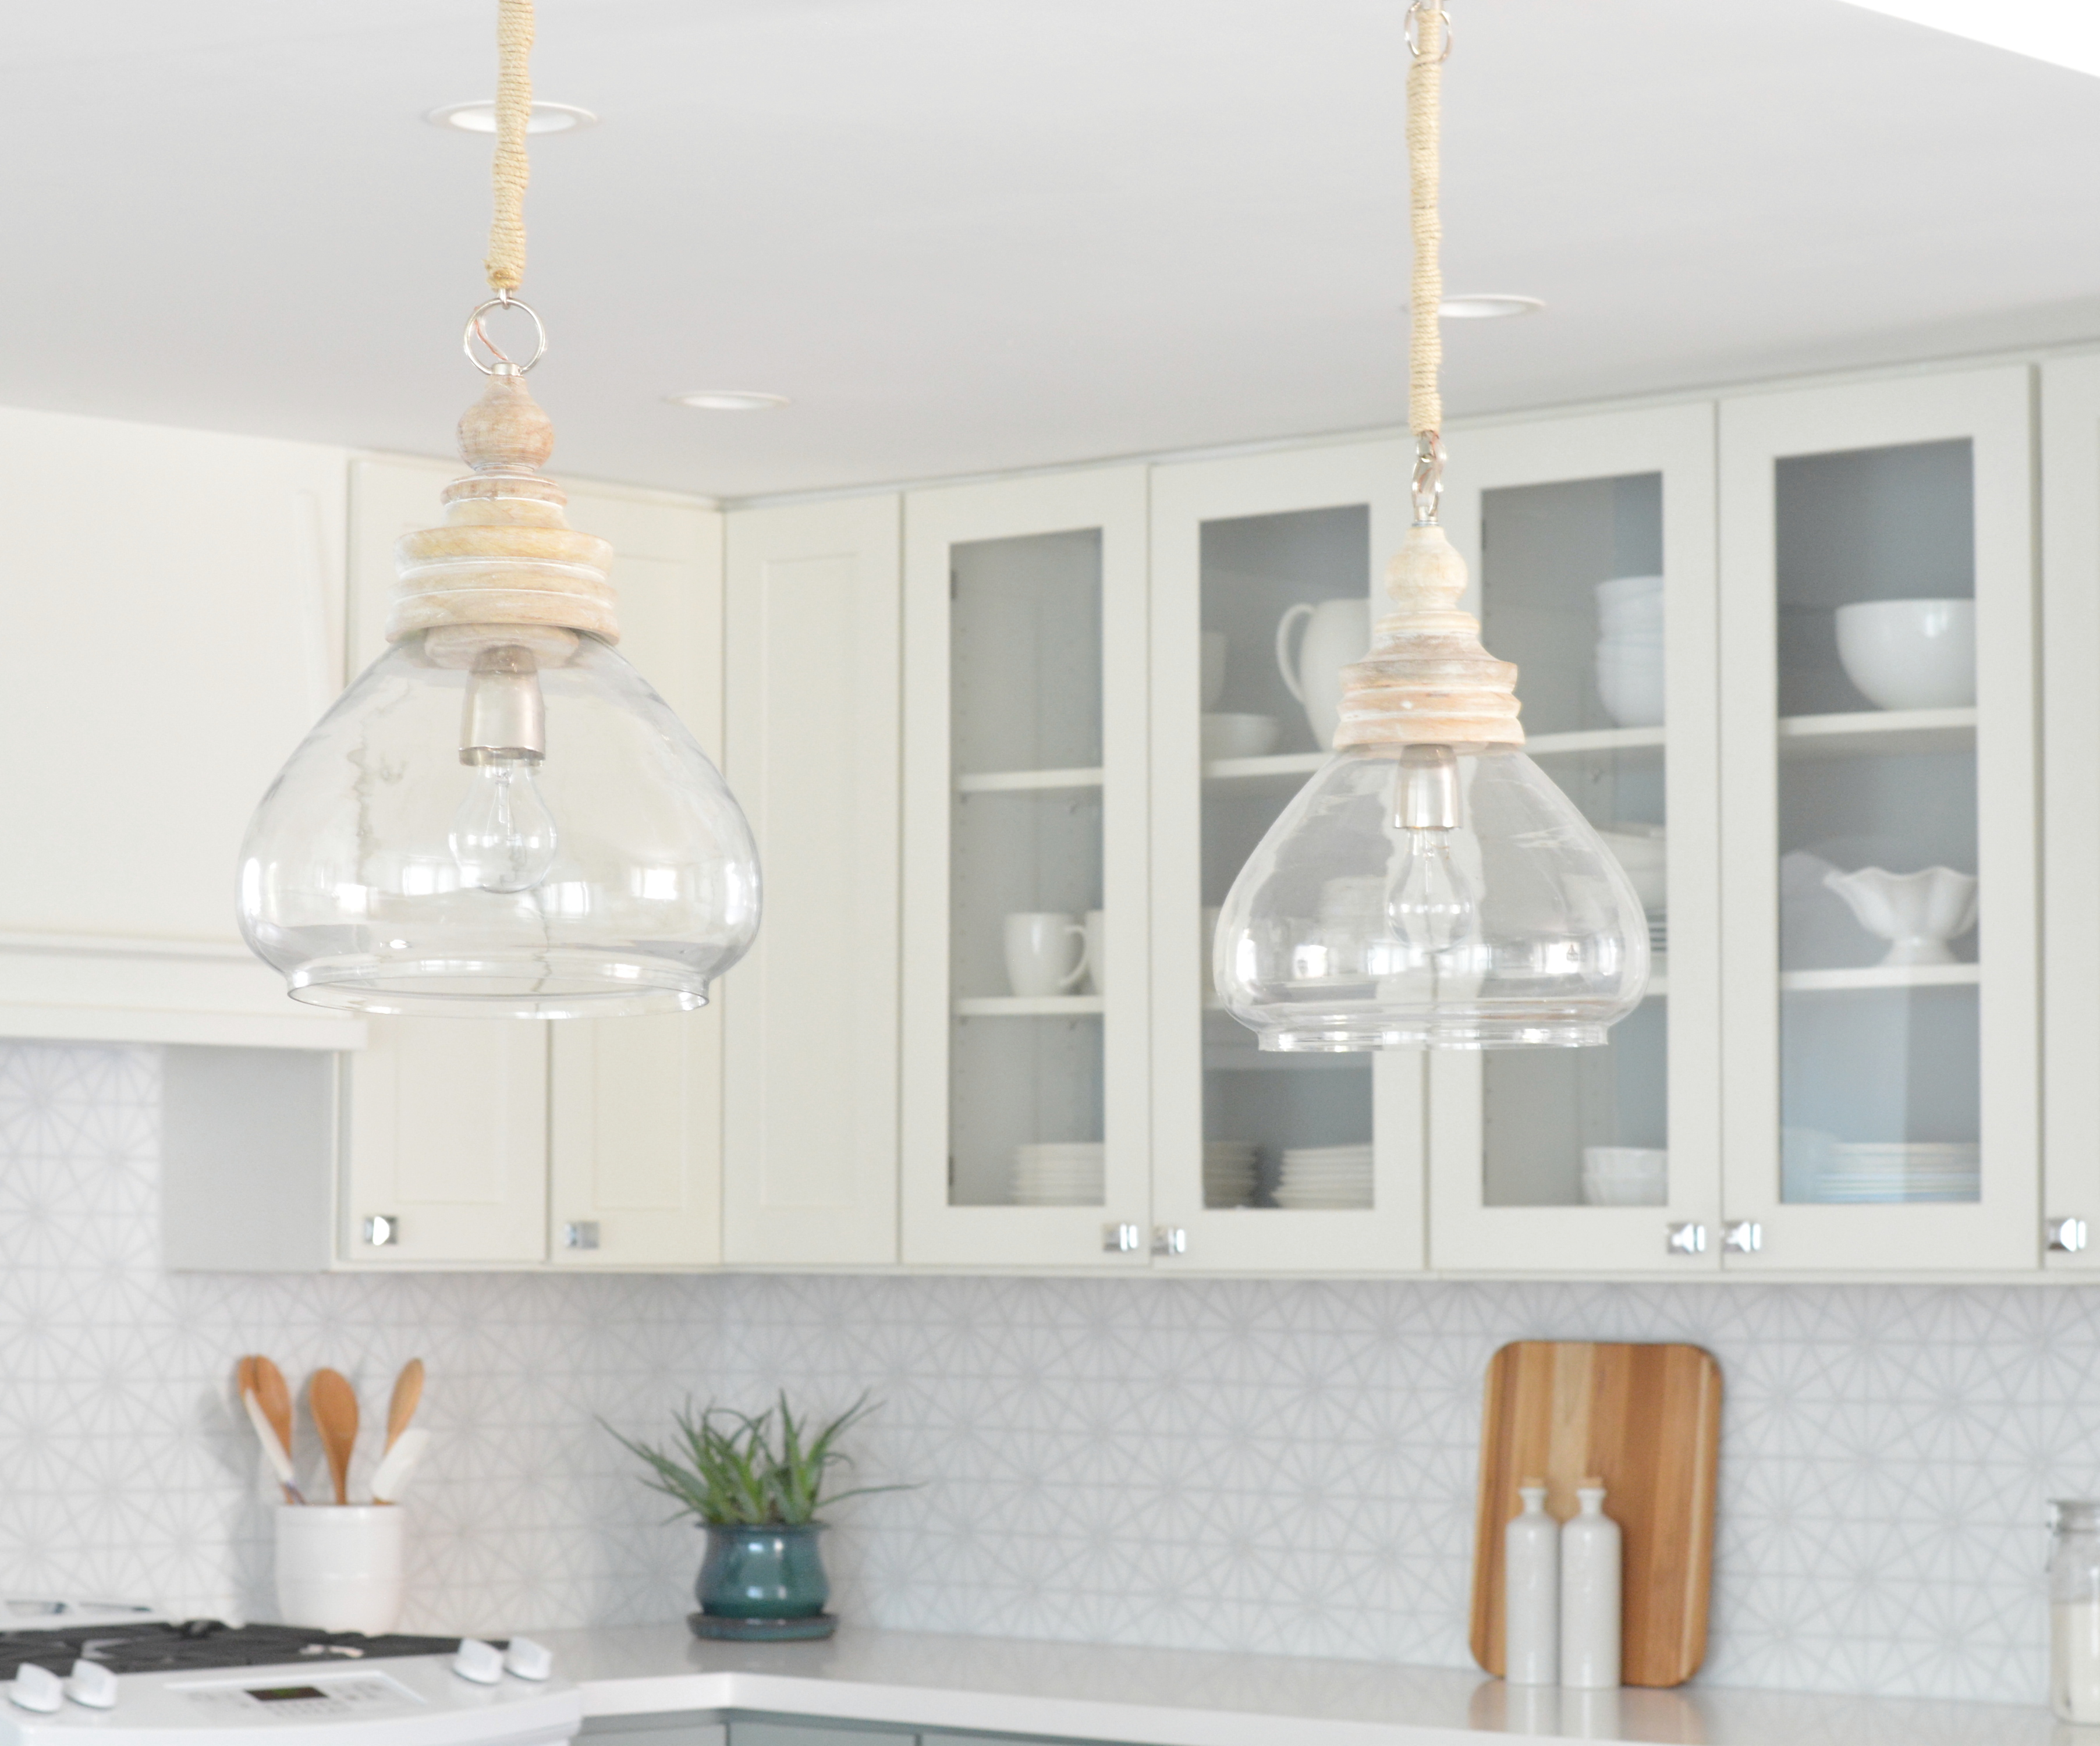
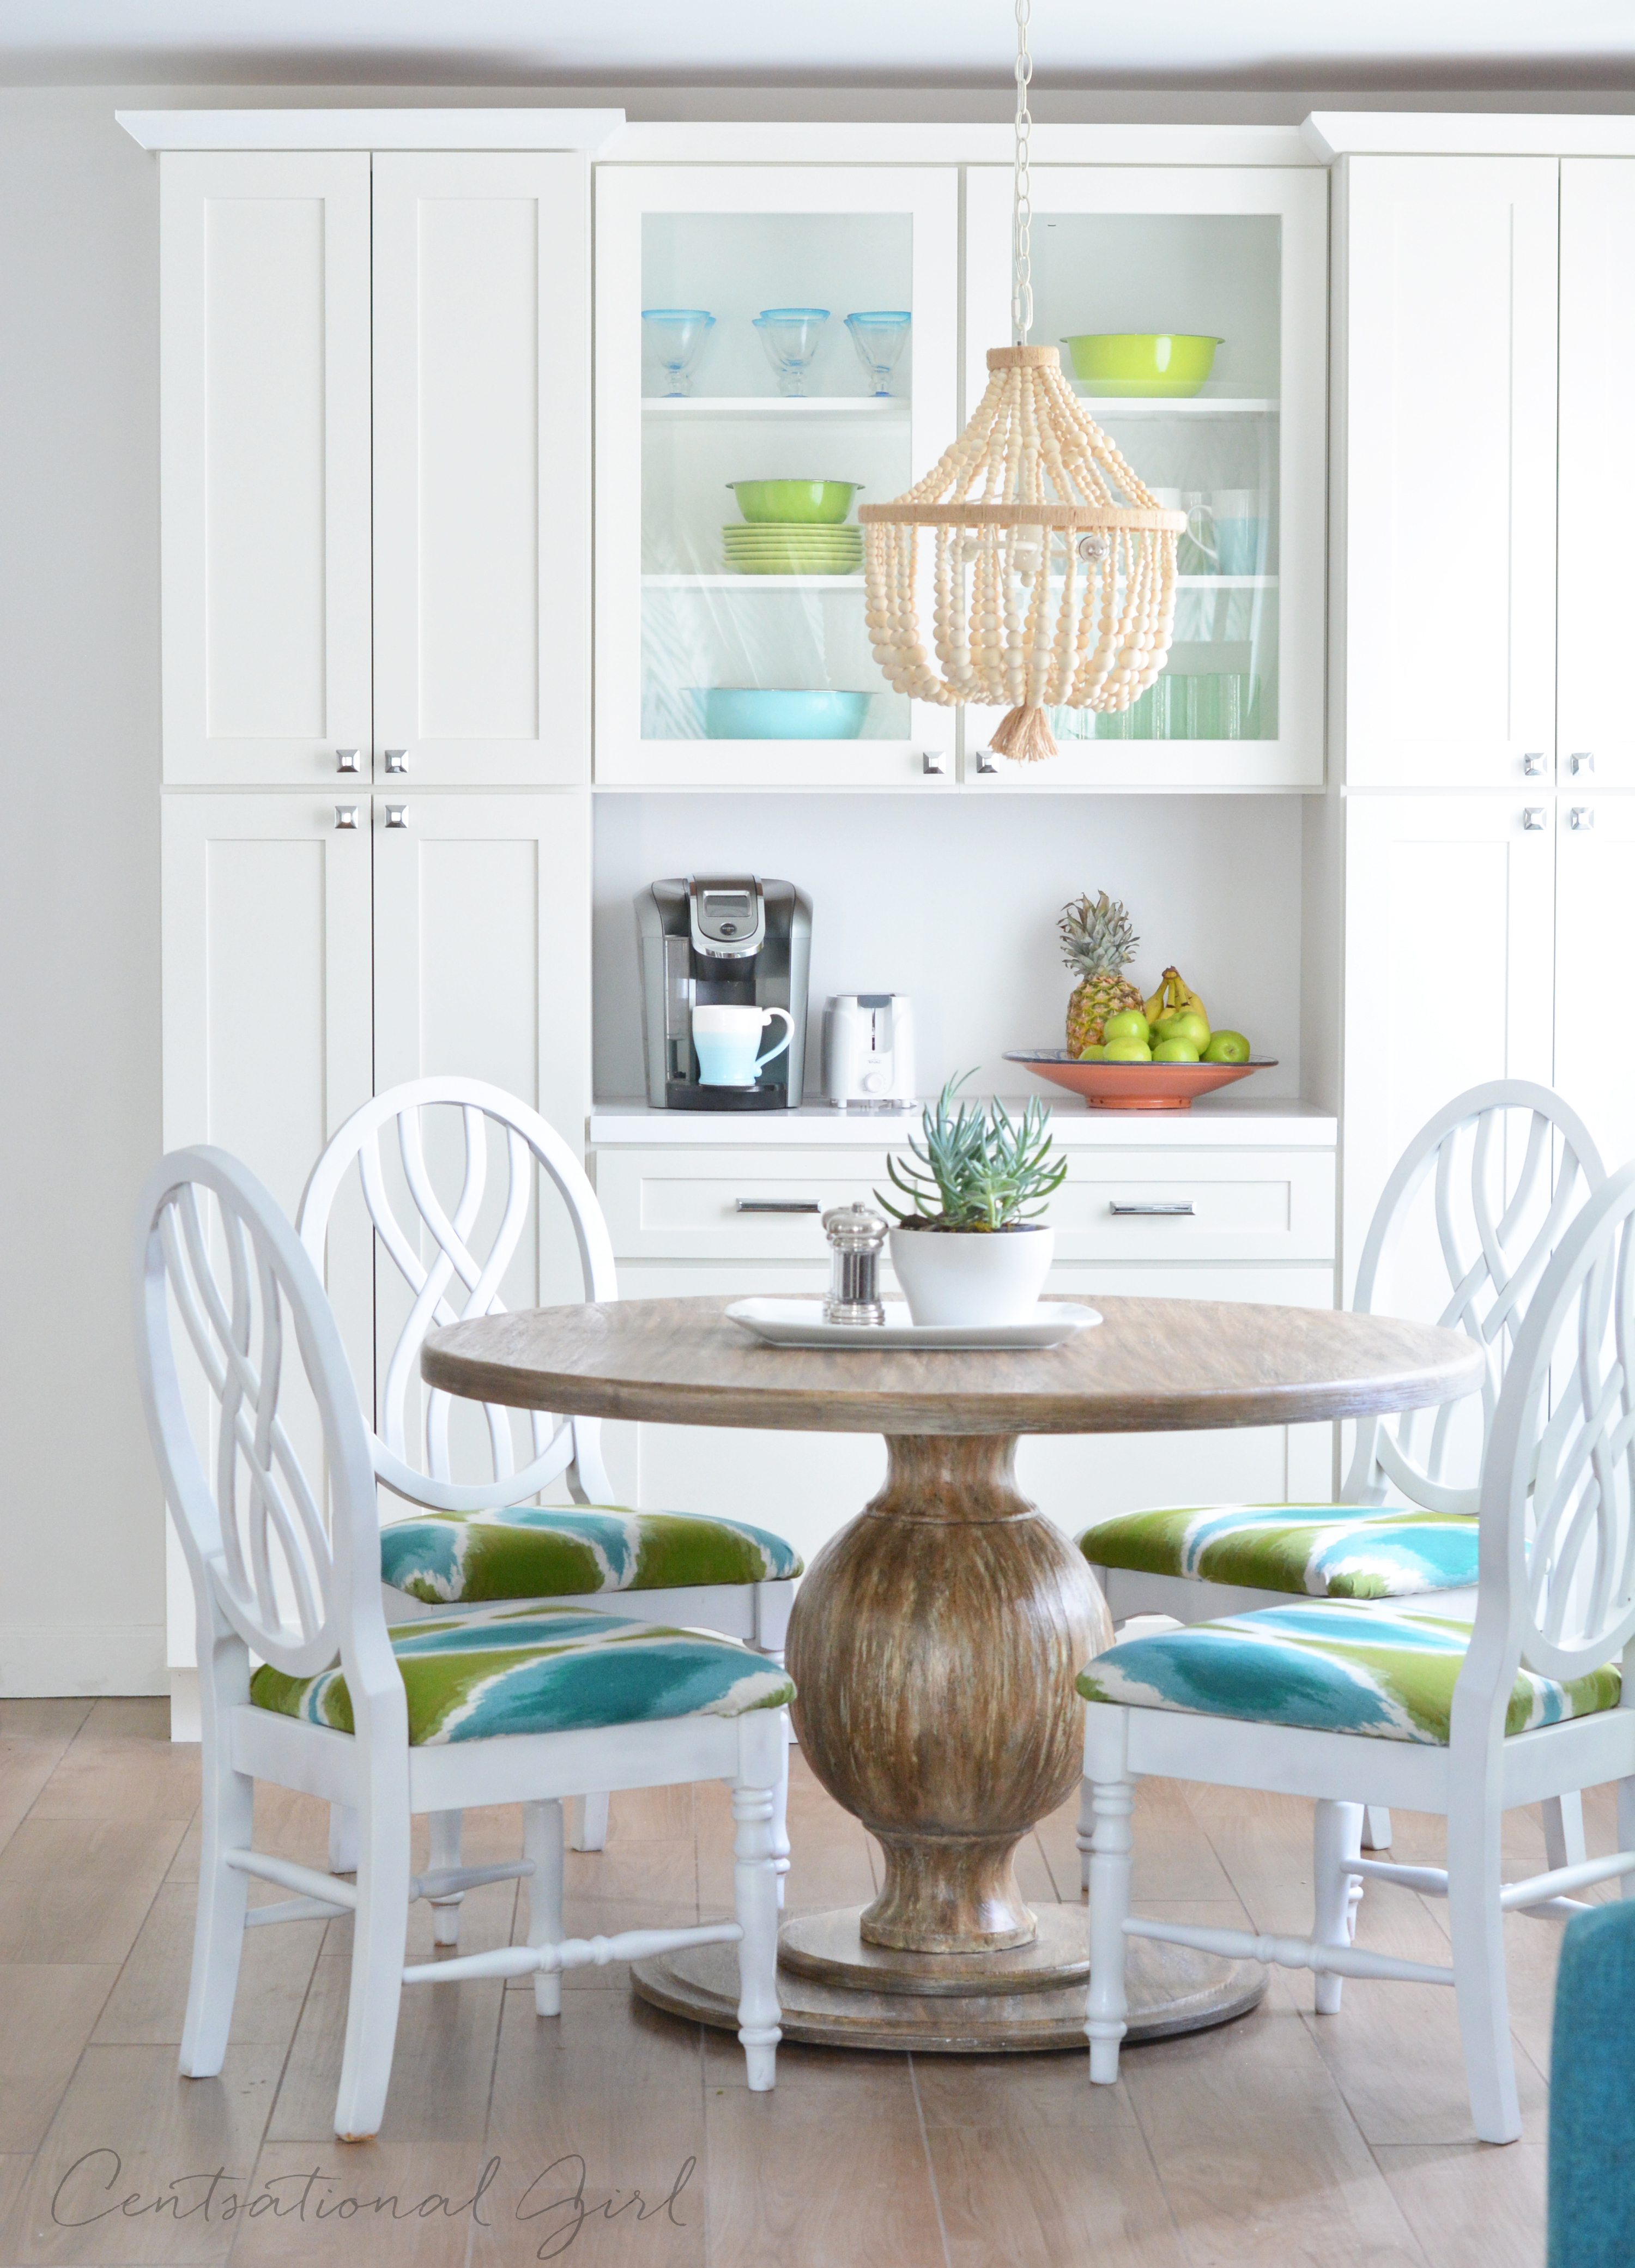
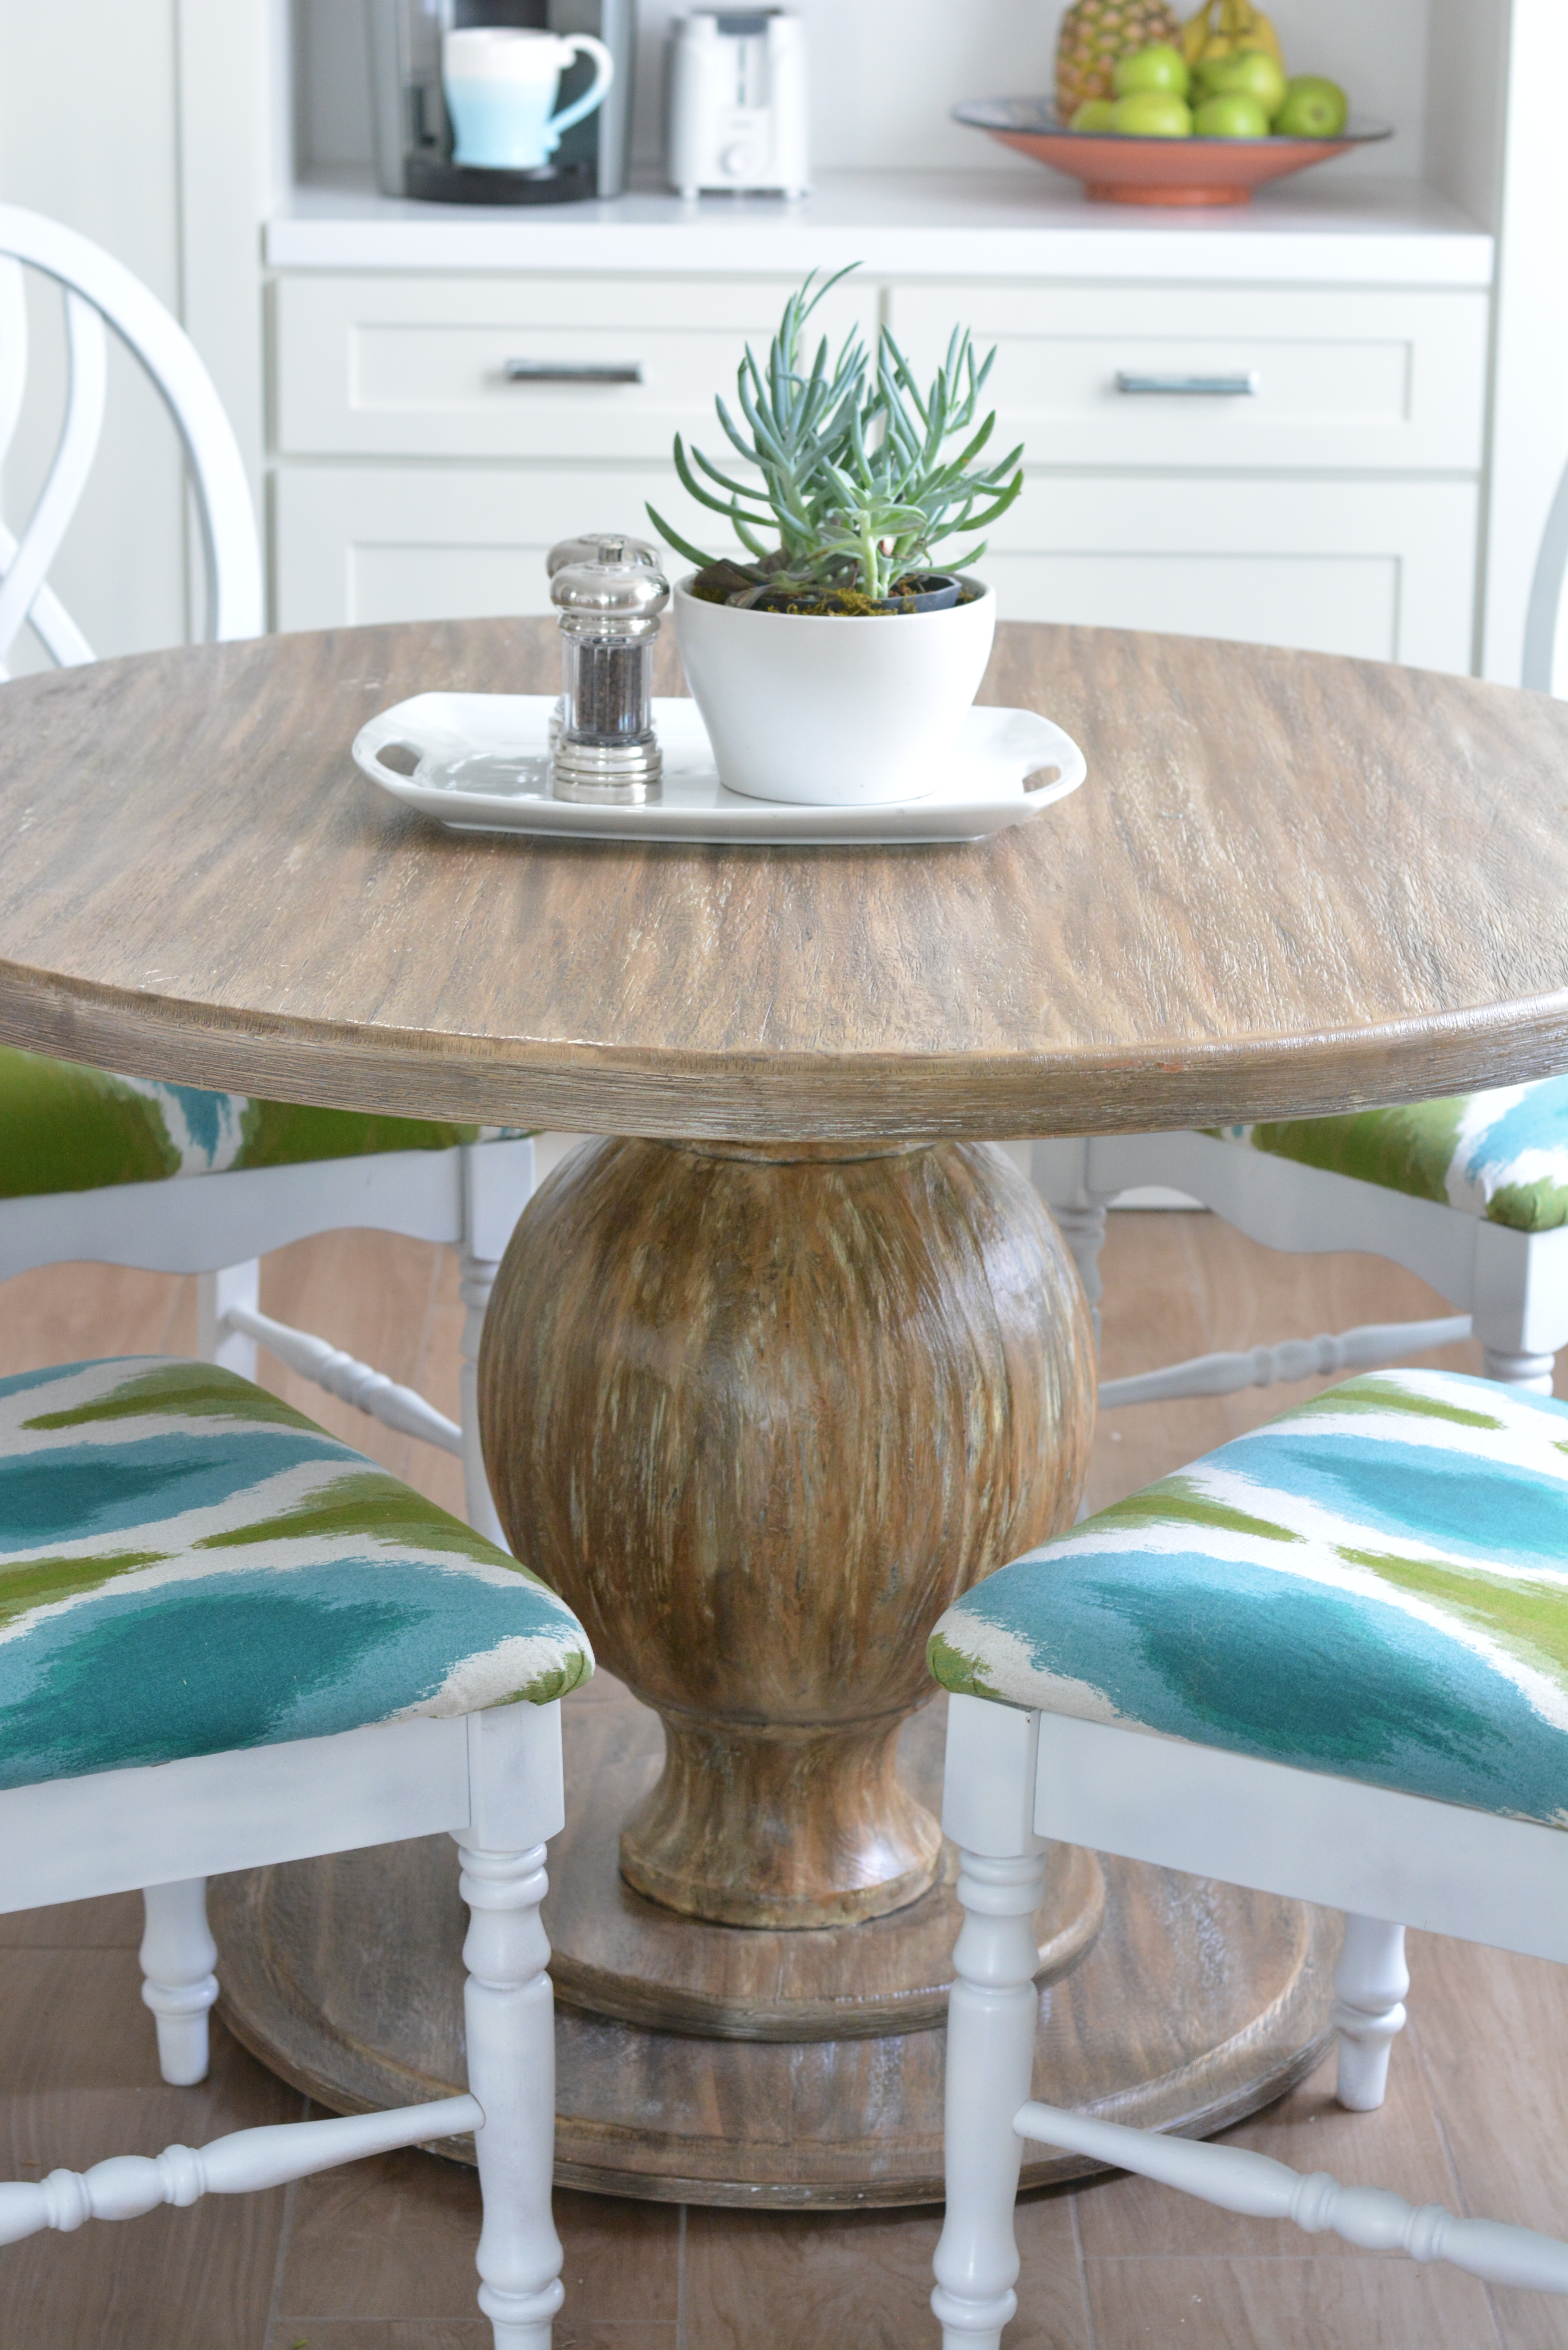
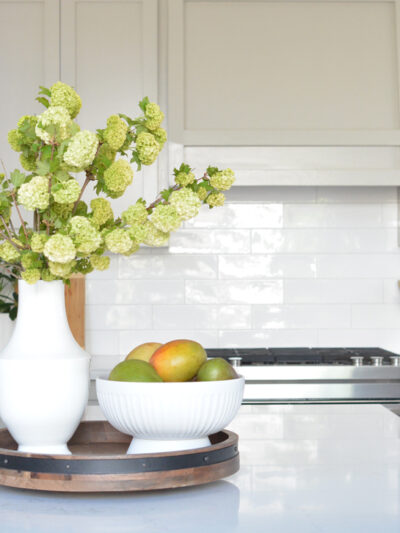
Design wise, there’s no rule that light fixtures should match, but I believe they should complement each other so I chose weathered light wood as the finish for both the pendants and the breakfast nook chandelier since they’re adjacent to each other.
#6. Make Functional Changes.
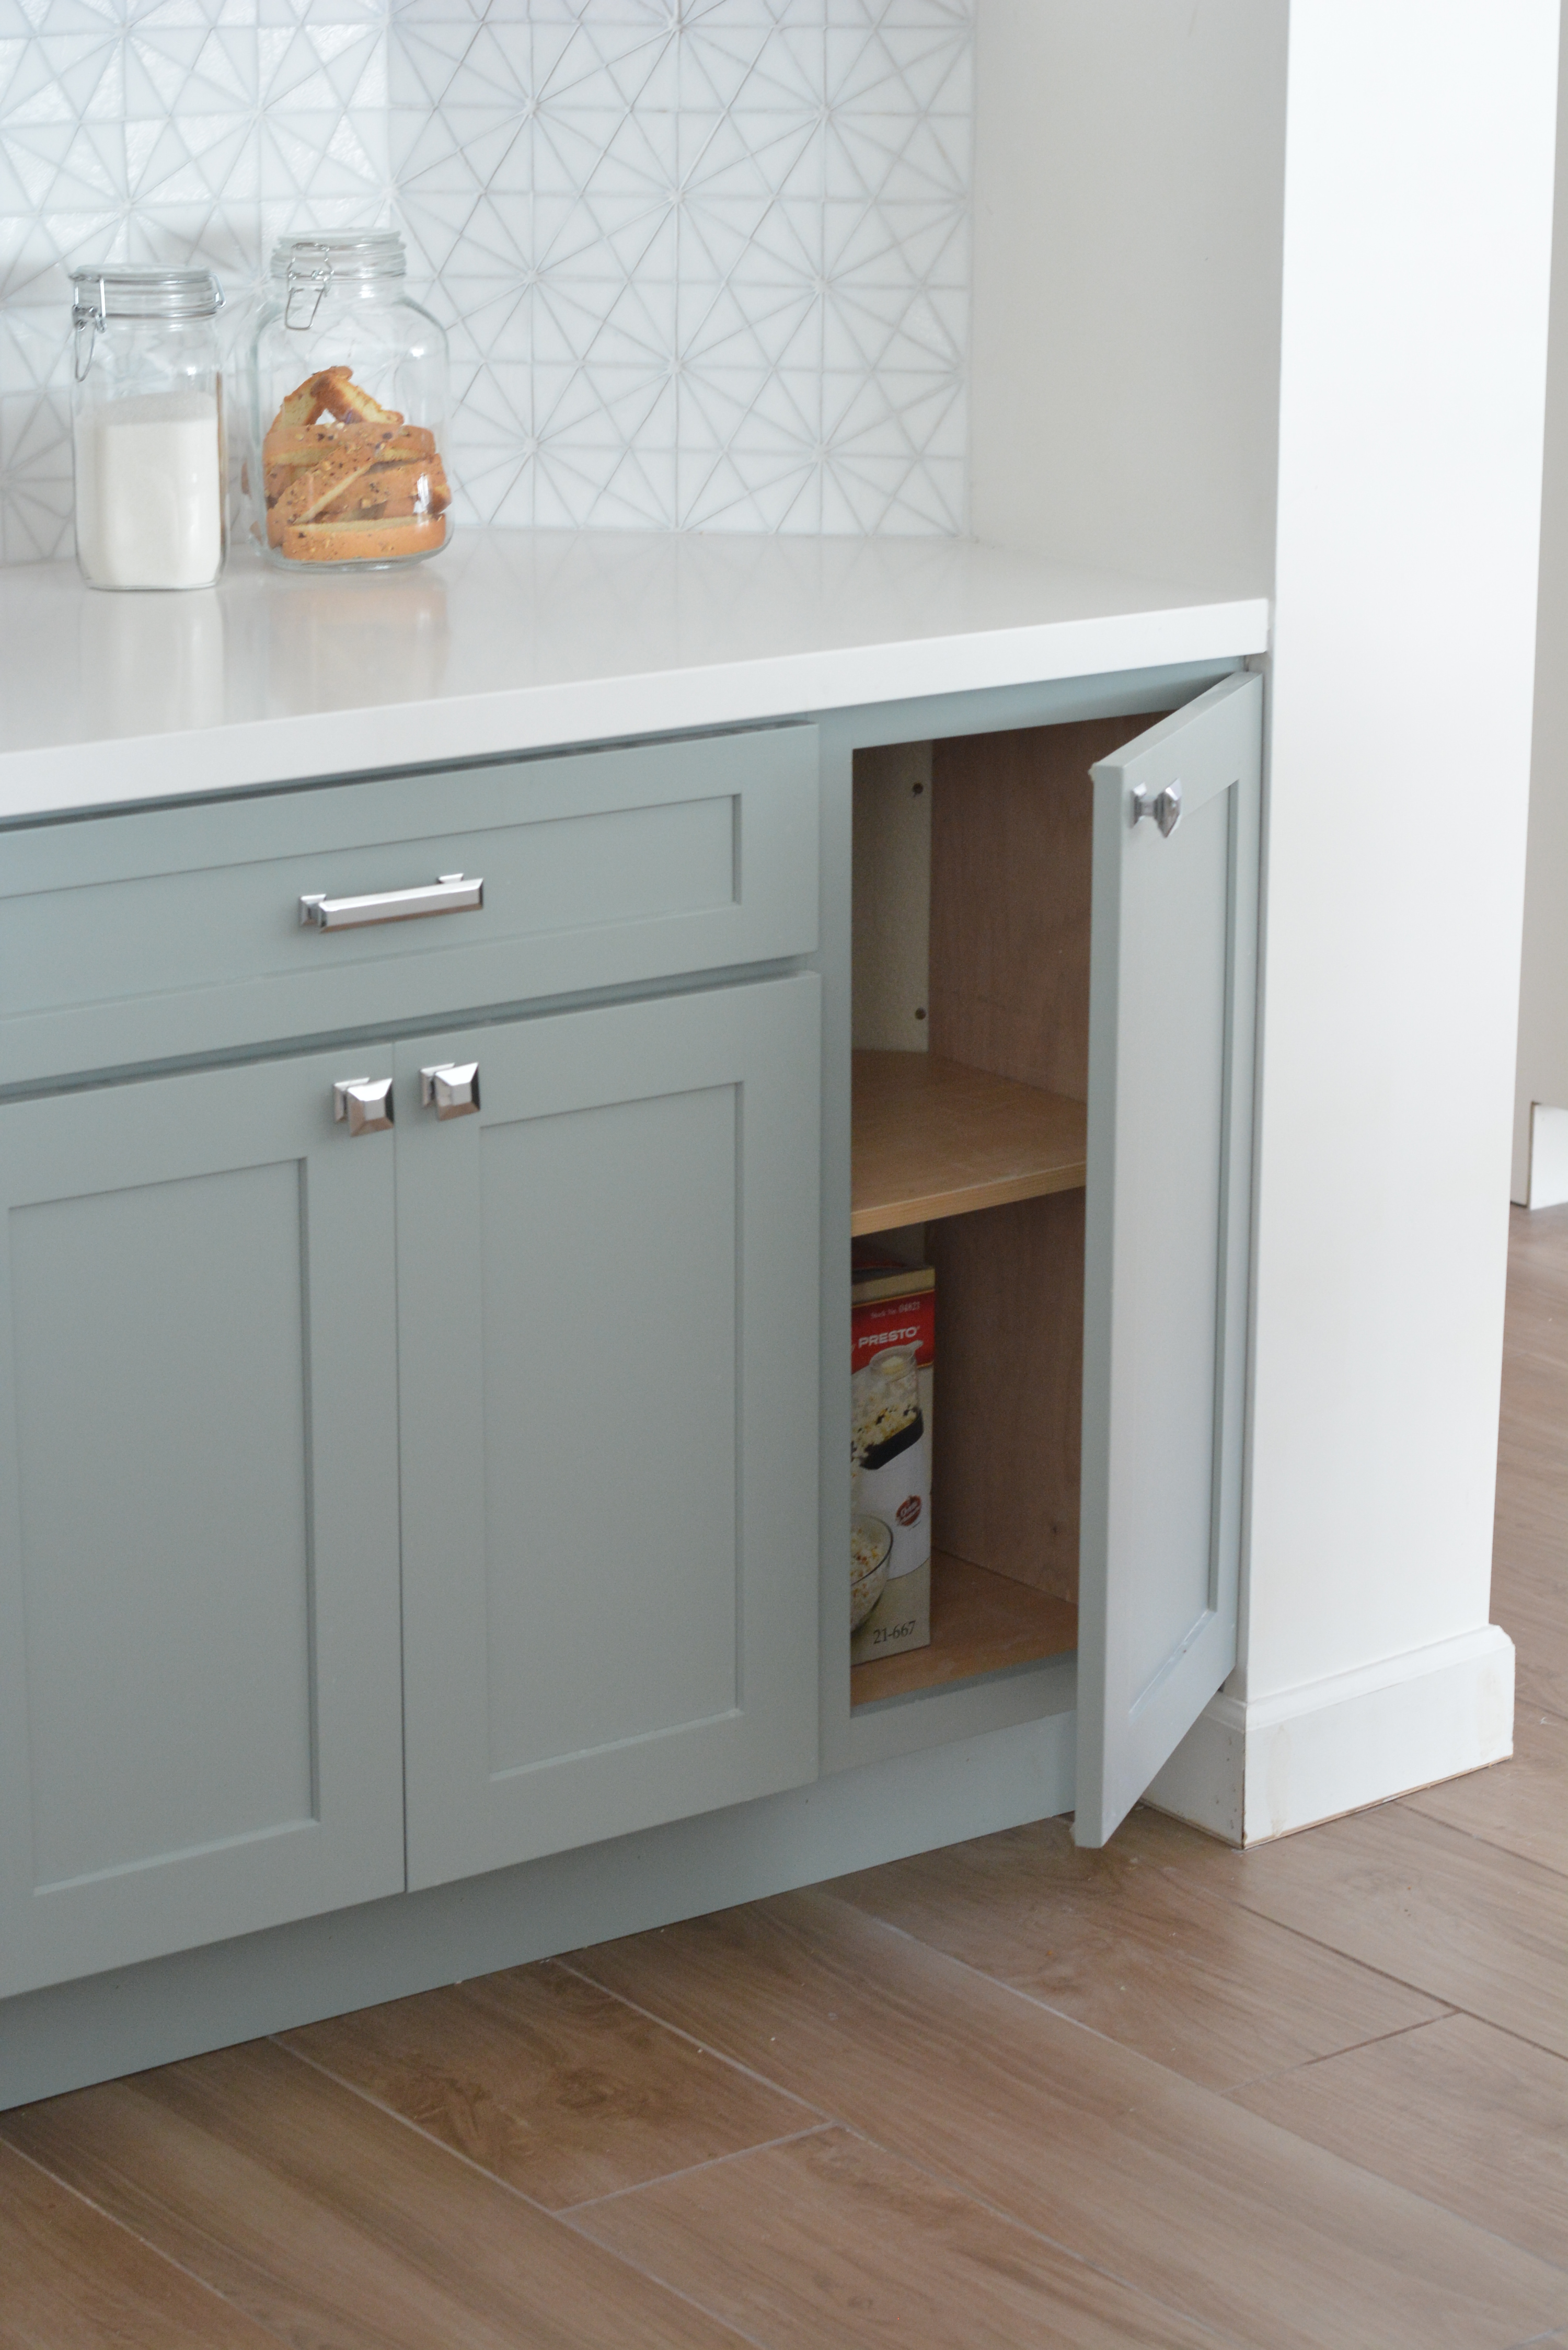
We couldn’t move any plumbing because of the slab foundation so we kept the appliances and sink in the same place, but I do think one of my smarter changes was moving the pantry into the adjacent breakfast nook for more storage and more counter space in the kitchen. One regret is not insisting the tops and trim go to the ceiling but hey if Sarah’s cabinets stop short then so can mine!

I found these chairs and that table on separate thrift store visits. The table I painted and moved to the sunroom, the chairs I spray painted gloss white then recovered their seats in a Tarjay shower curtain seen here.

Several of you asked about the rationale of moving the microwave out of the kitchen. I’m not a big microwave user but many of you are (great debate in these comments) so I planned ahead and made room for one on the breakfast nook counter for future tenants.

I kept it out in the garage and may move it to this baker’s rack but I did make sure there was room for one outside of the kitchen.
Another functional change was opting for a counter depth fridge instead of the standard depth that was there before, now it doesn’t protrude into the kitchen entrance like the old one did and it’s framed in for a more custom look.
Lesson #7: Decide Where to Splurge and Where to Save.
I saved money with discounted cabinets, but spent extra on a custom hood (see #8 below). I bought a used counter depth refrigerator and cheaper model dishwasher but paid more for a slide in range instead of a free standing one because its lower profile allowed the tile to take the spotlight.

I bought inexpensive hardware but paid more than I’ve ever paid per square foot for the backsplash tile. I bought a floor model breakfast table for 25% off because it had a few scratches and recovered thrift store chairs to save money, but paid several hundred dollars for the perfect barstools.

Decide early on where you can save money and where you don’t intend to compromise, you can have a beautiful space by combining the inexpensive options with a few splurge worthy choices.
#8. Communicate Clearly with Contractors.
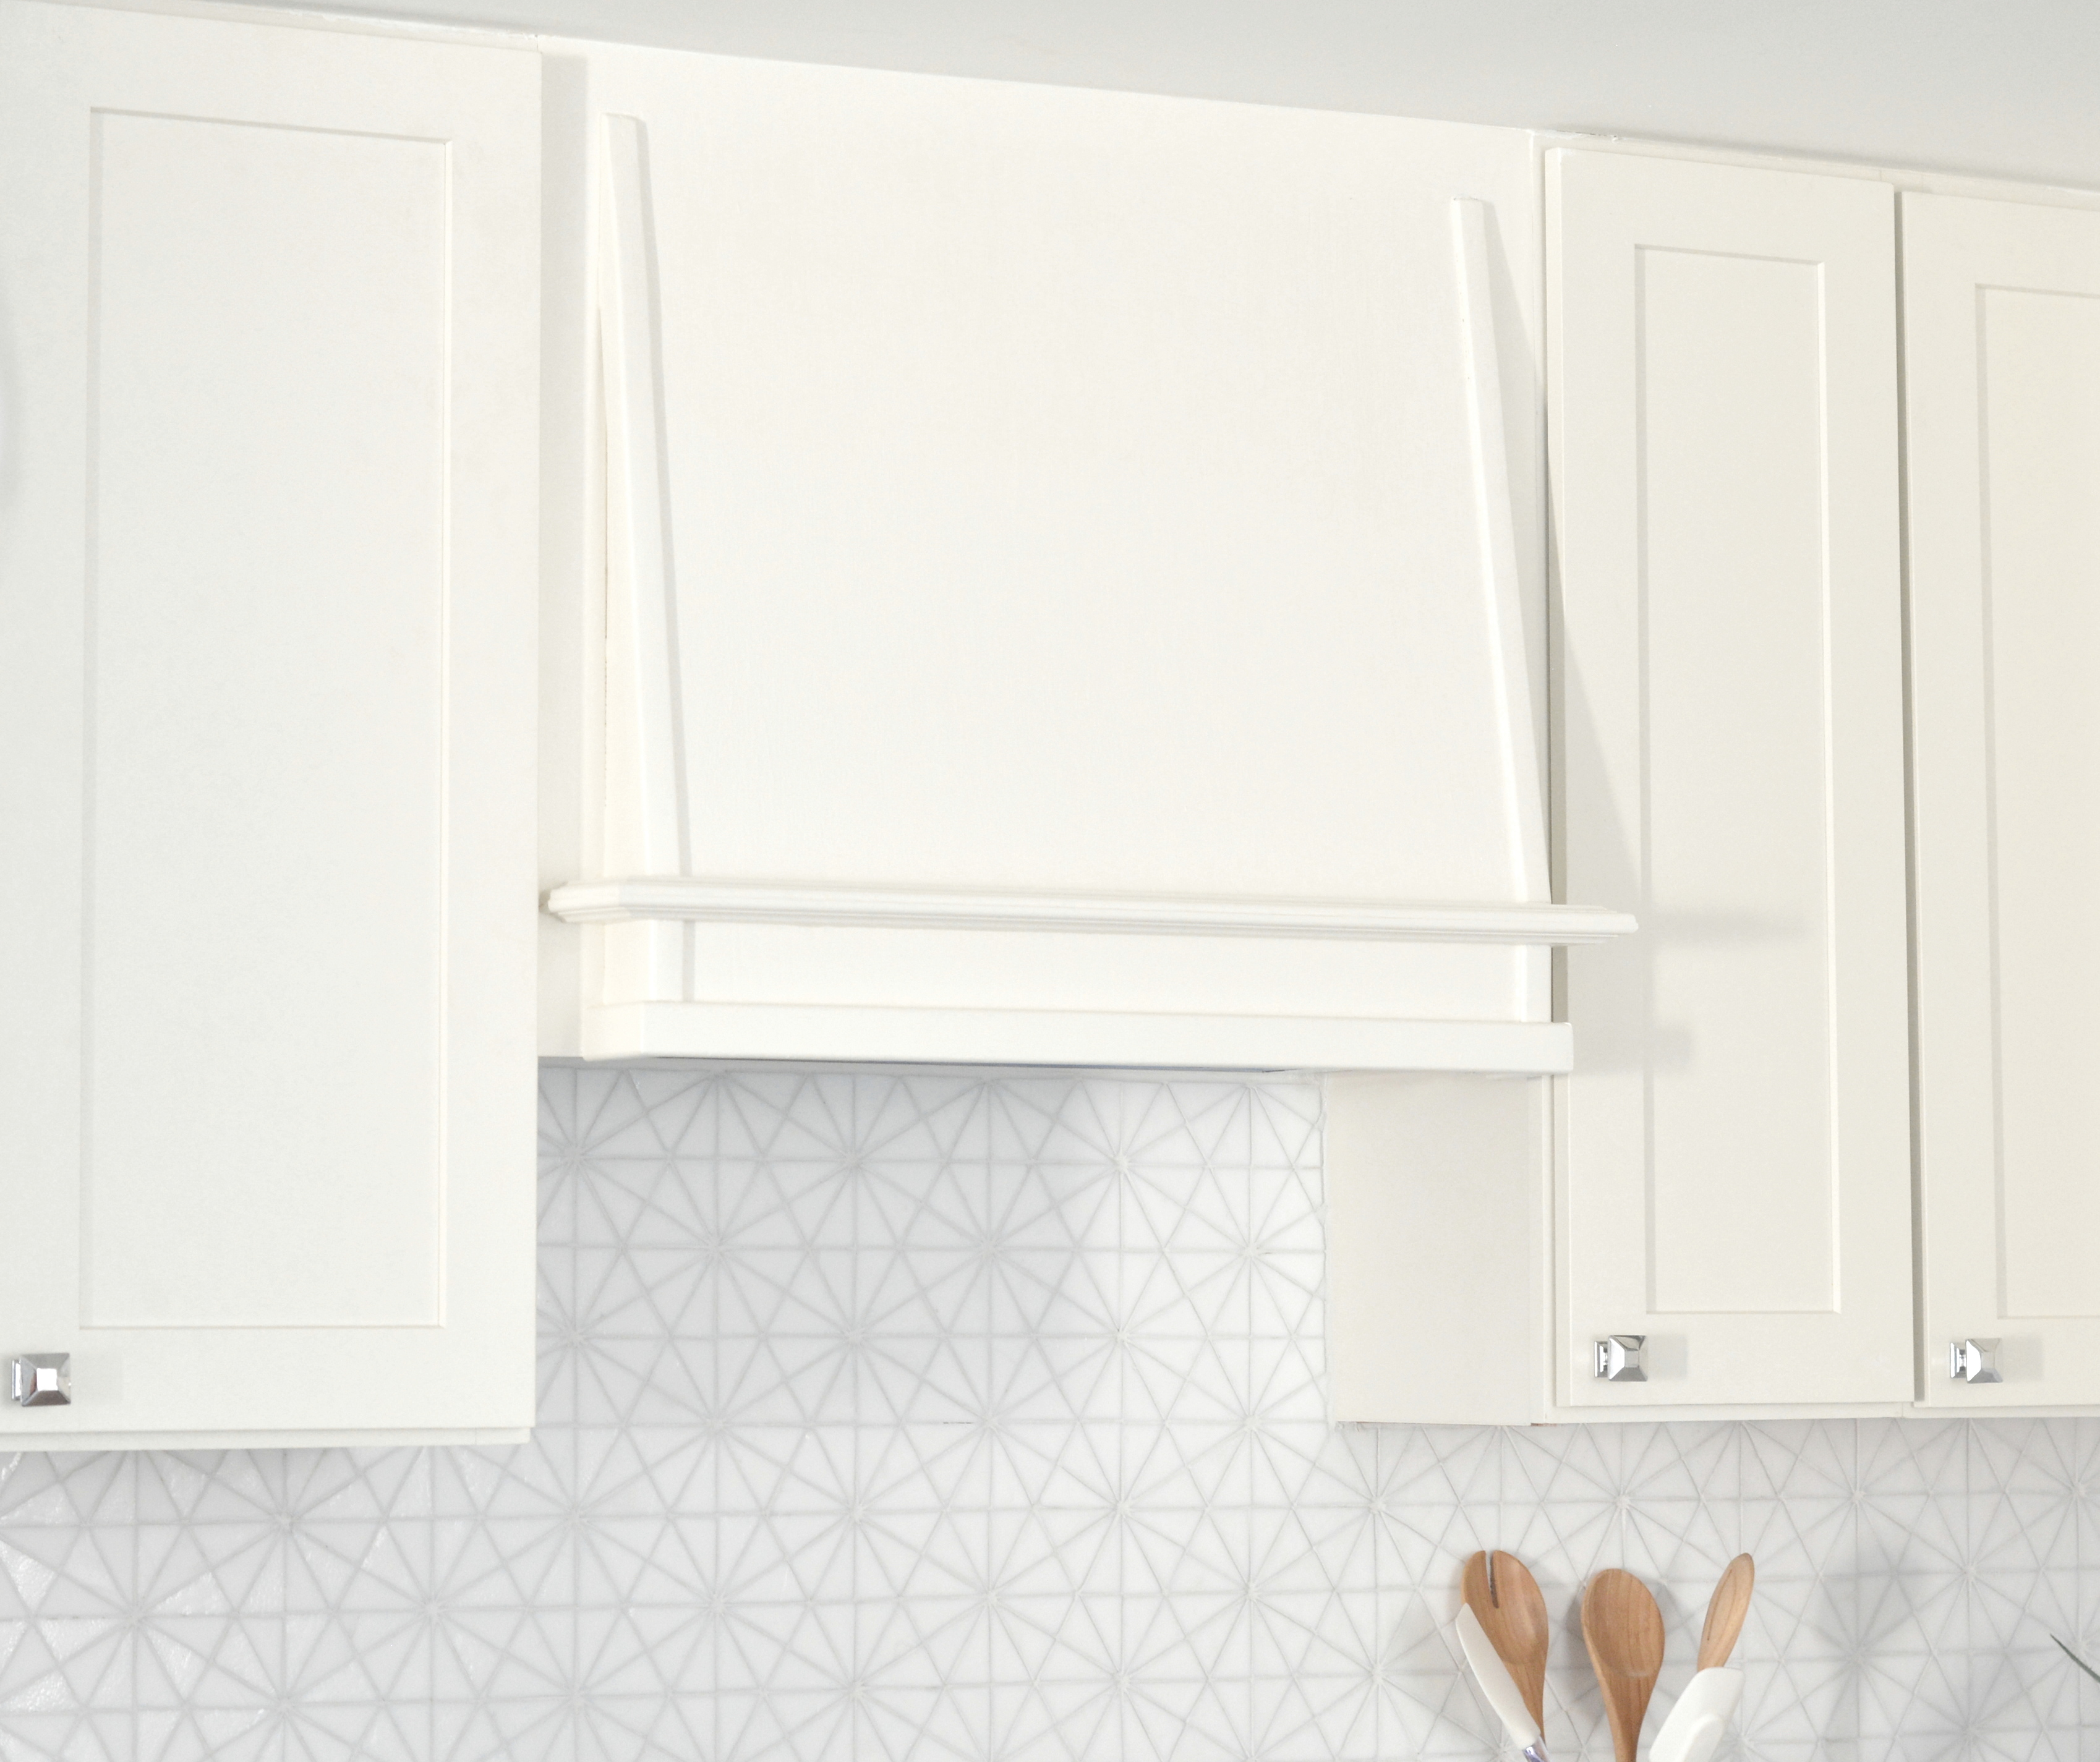
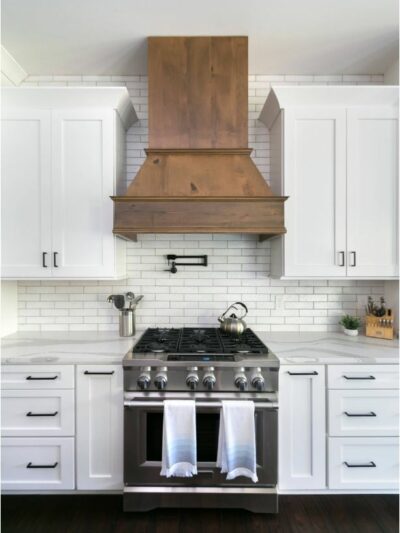
Sometimes things don’t work out as well as you plan due to lack of communication. I didn’t want a hood cabinet in this kitchen I wanted a custom chimney hood and thought it would be easy to just have a carpenter build it so I sent him this image as an example of what I wanted.
By the time it was installed I learned the carpenter hadn’t used as high quality wood as I thought he should and he also improvised with different trim. I hadn’t put it the details in writing, only texted the image of the design which was really dumb on my part and so the design while functional didn’t look exactly like I wanted. Rather than start over, I had him come back and beef up the trim and I decided to just live with it.

It looks fine in the space, I’m just being picky, after all the trim on range hood covers doesn’t need to be exactly the same as the neighboring upper cabinets and does make the space more interesting but still, the result was not precisely what I wanted. If I’d have drawn out the specifications and communicated them clearly, the result would have been different.
#9. Details Matter.
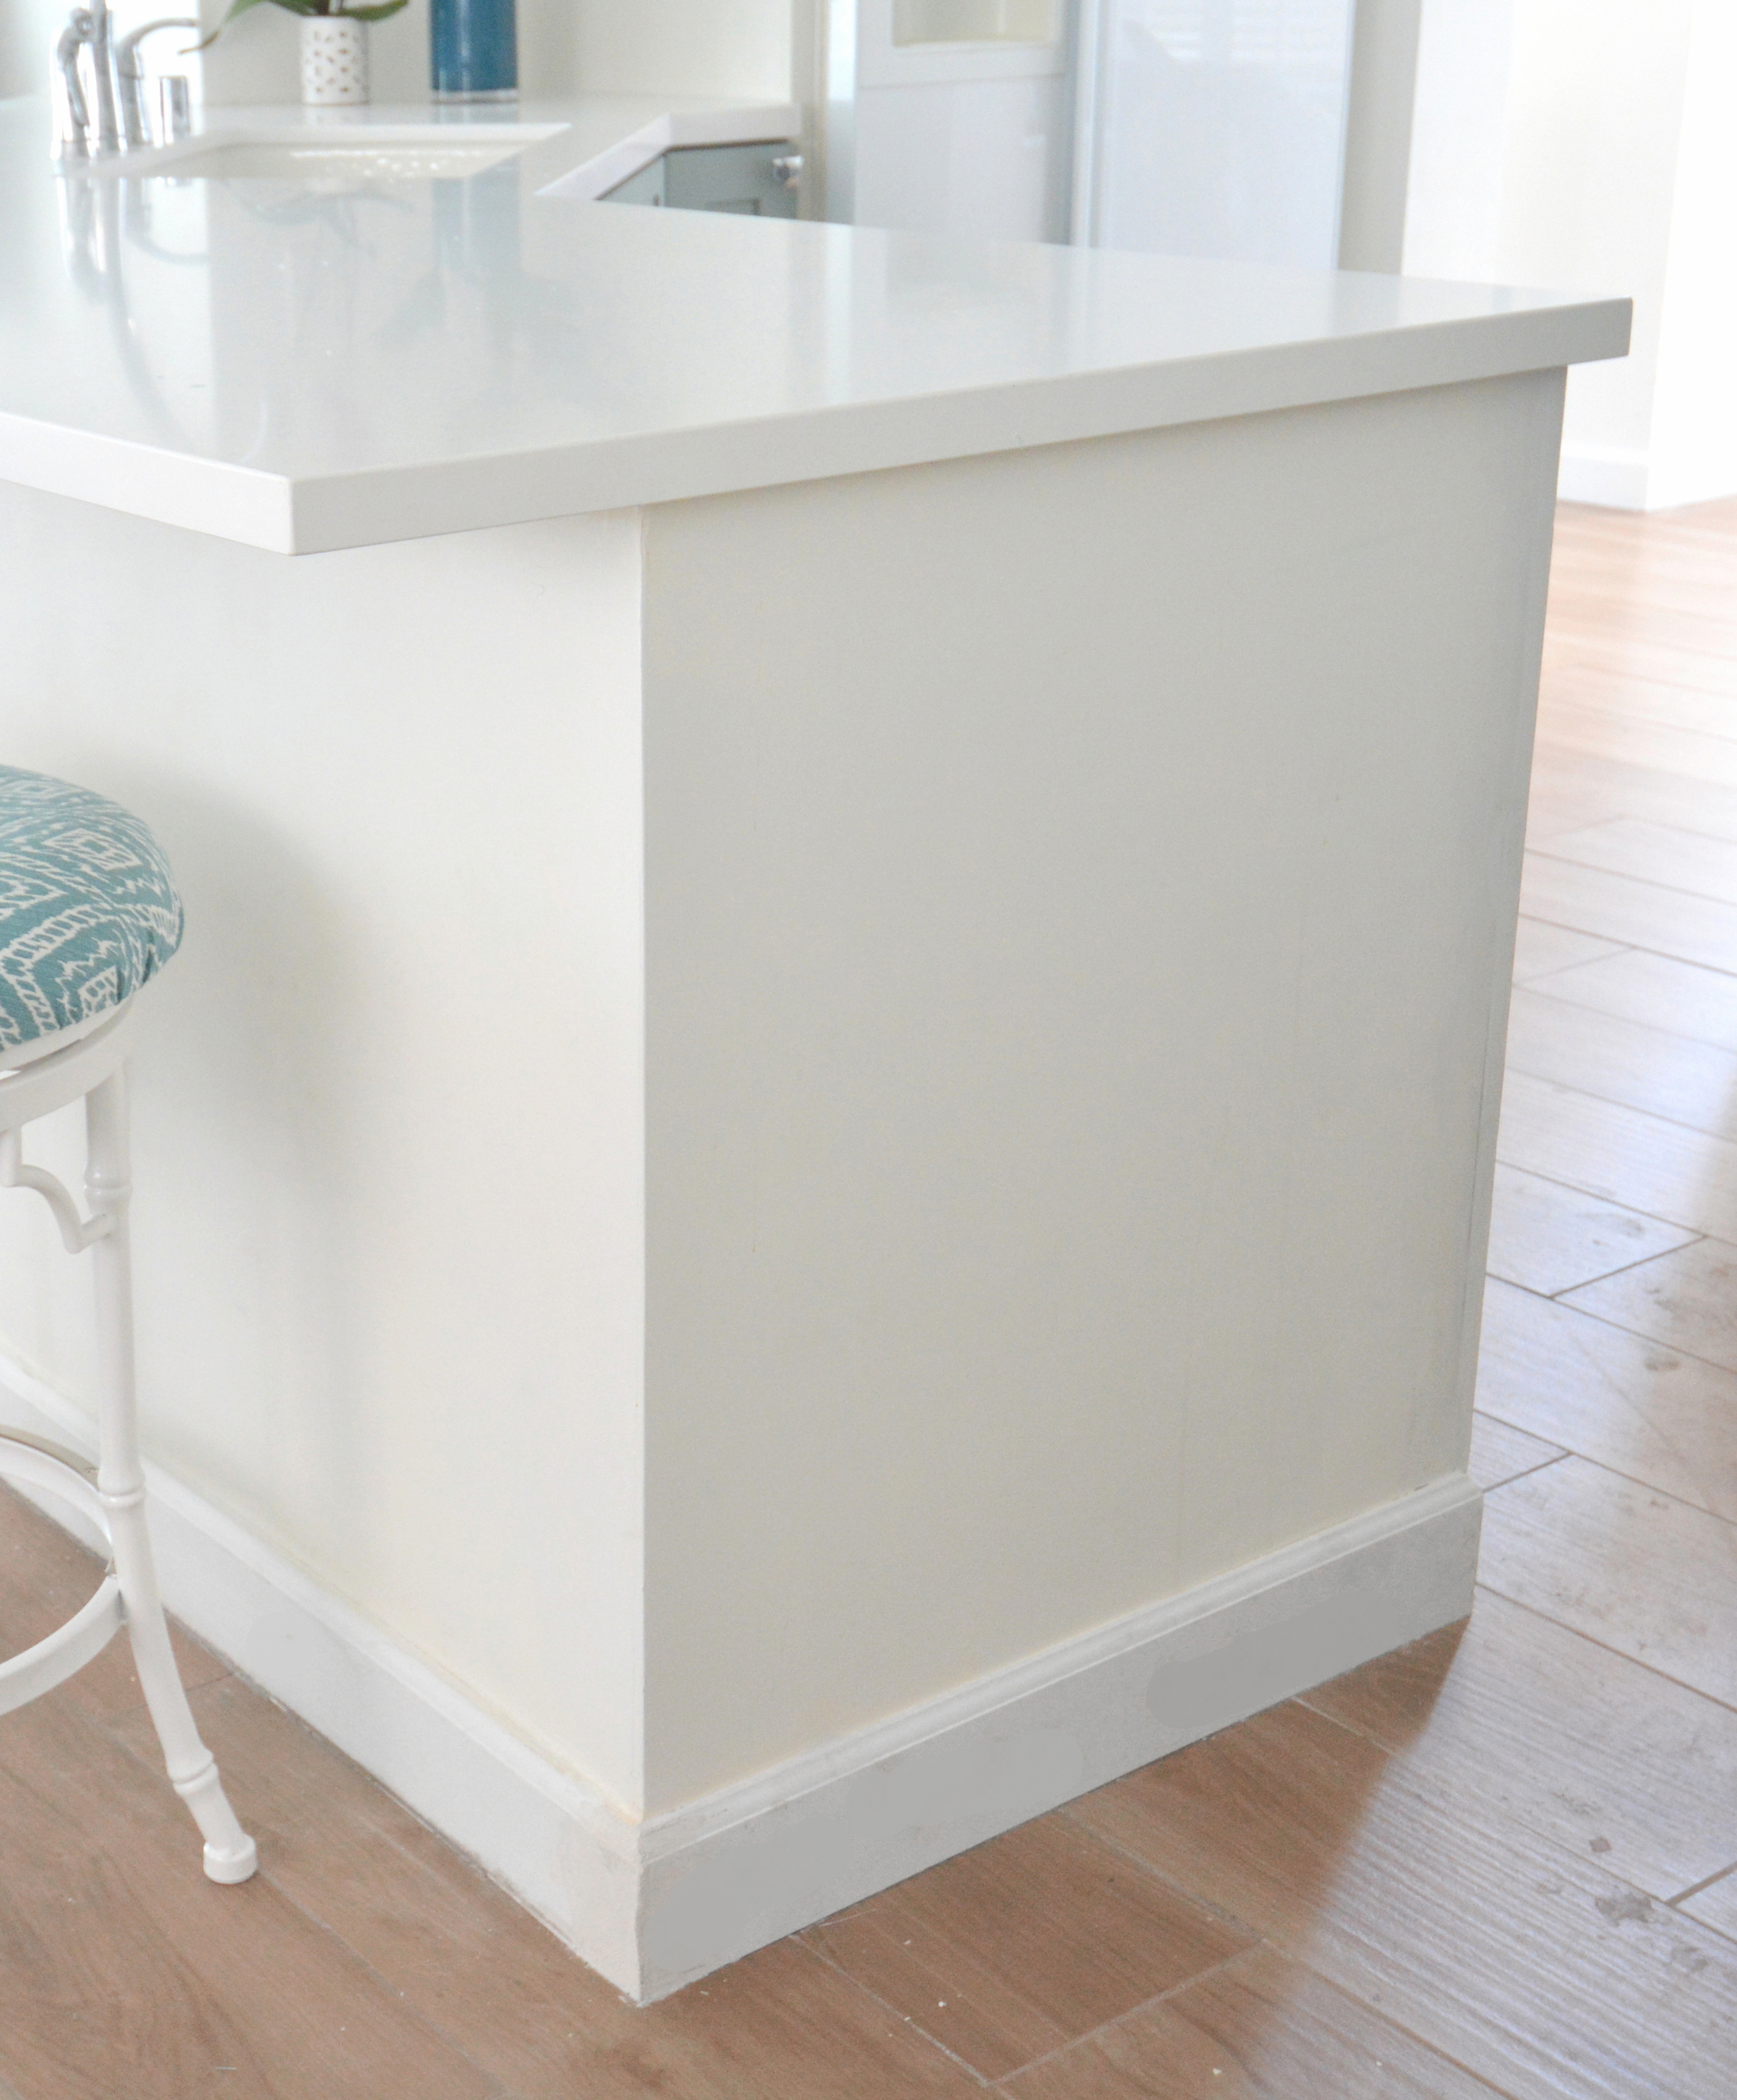
In every kitchen remodel I’ve learned the devil is in the details. Here’s an example. This is the edge of the peninsula in the beginning, I knew I wanted to take it down to one level surface. What I later didn’t like was how the cabinet edge looked next to the wall.
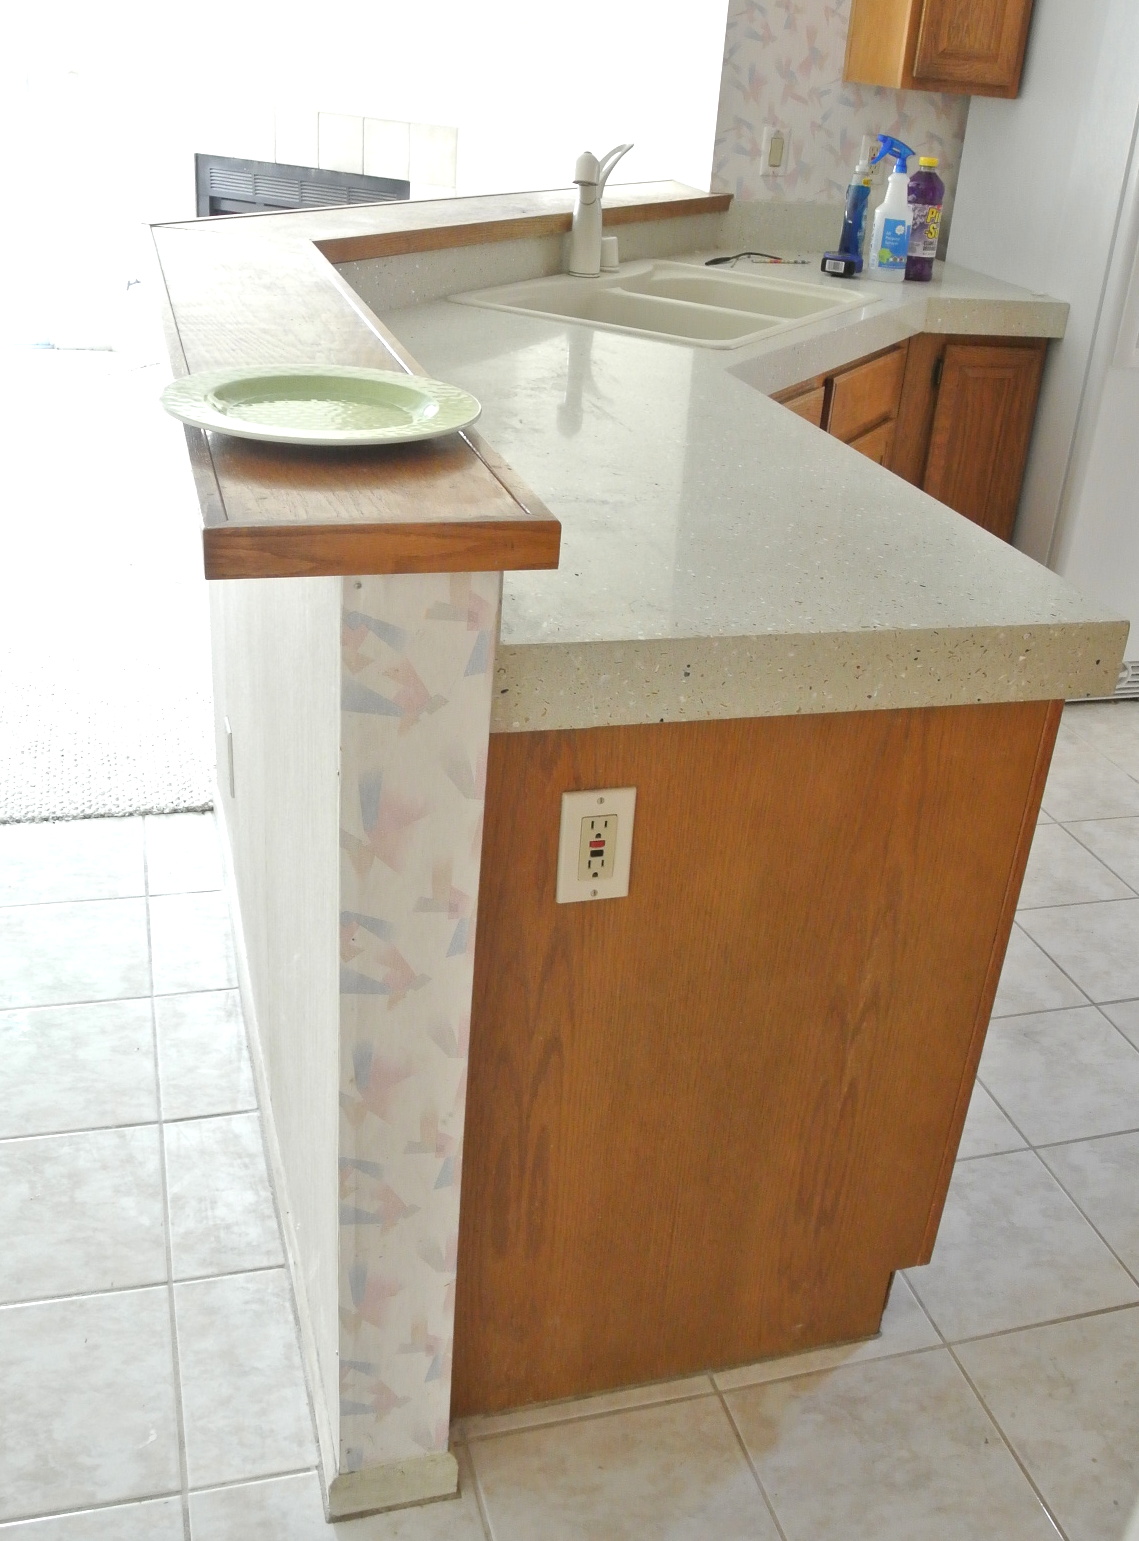
Lowering the pony wall from bar height to counter height was a huge improvement but I still found the difference in color between the wall and cabinet jarring from this angle.
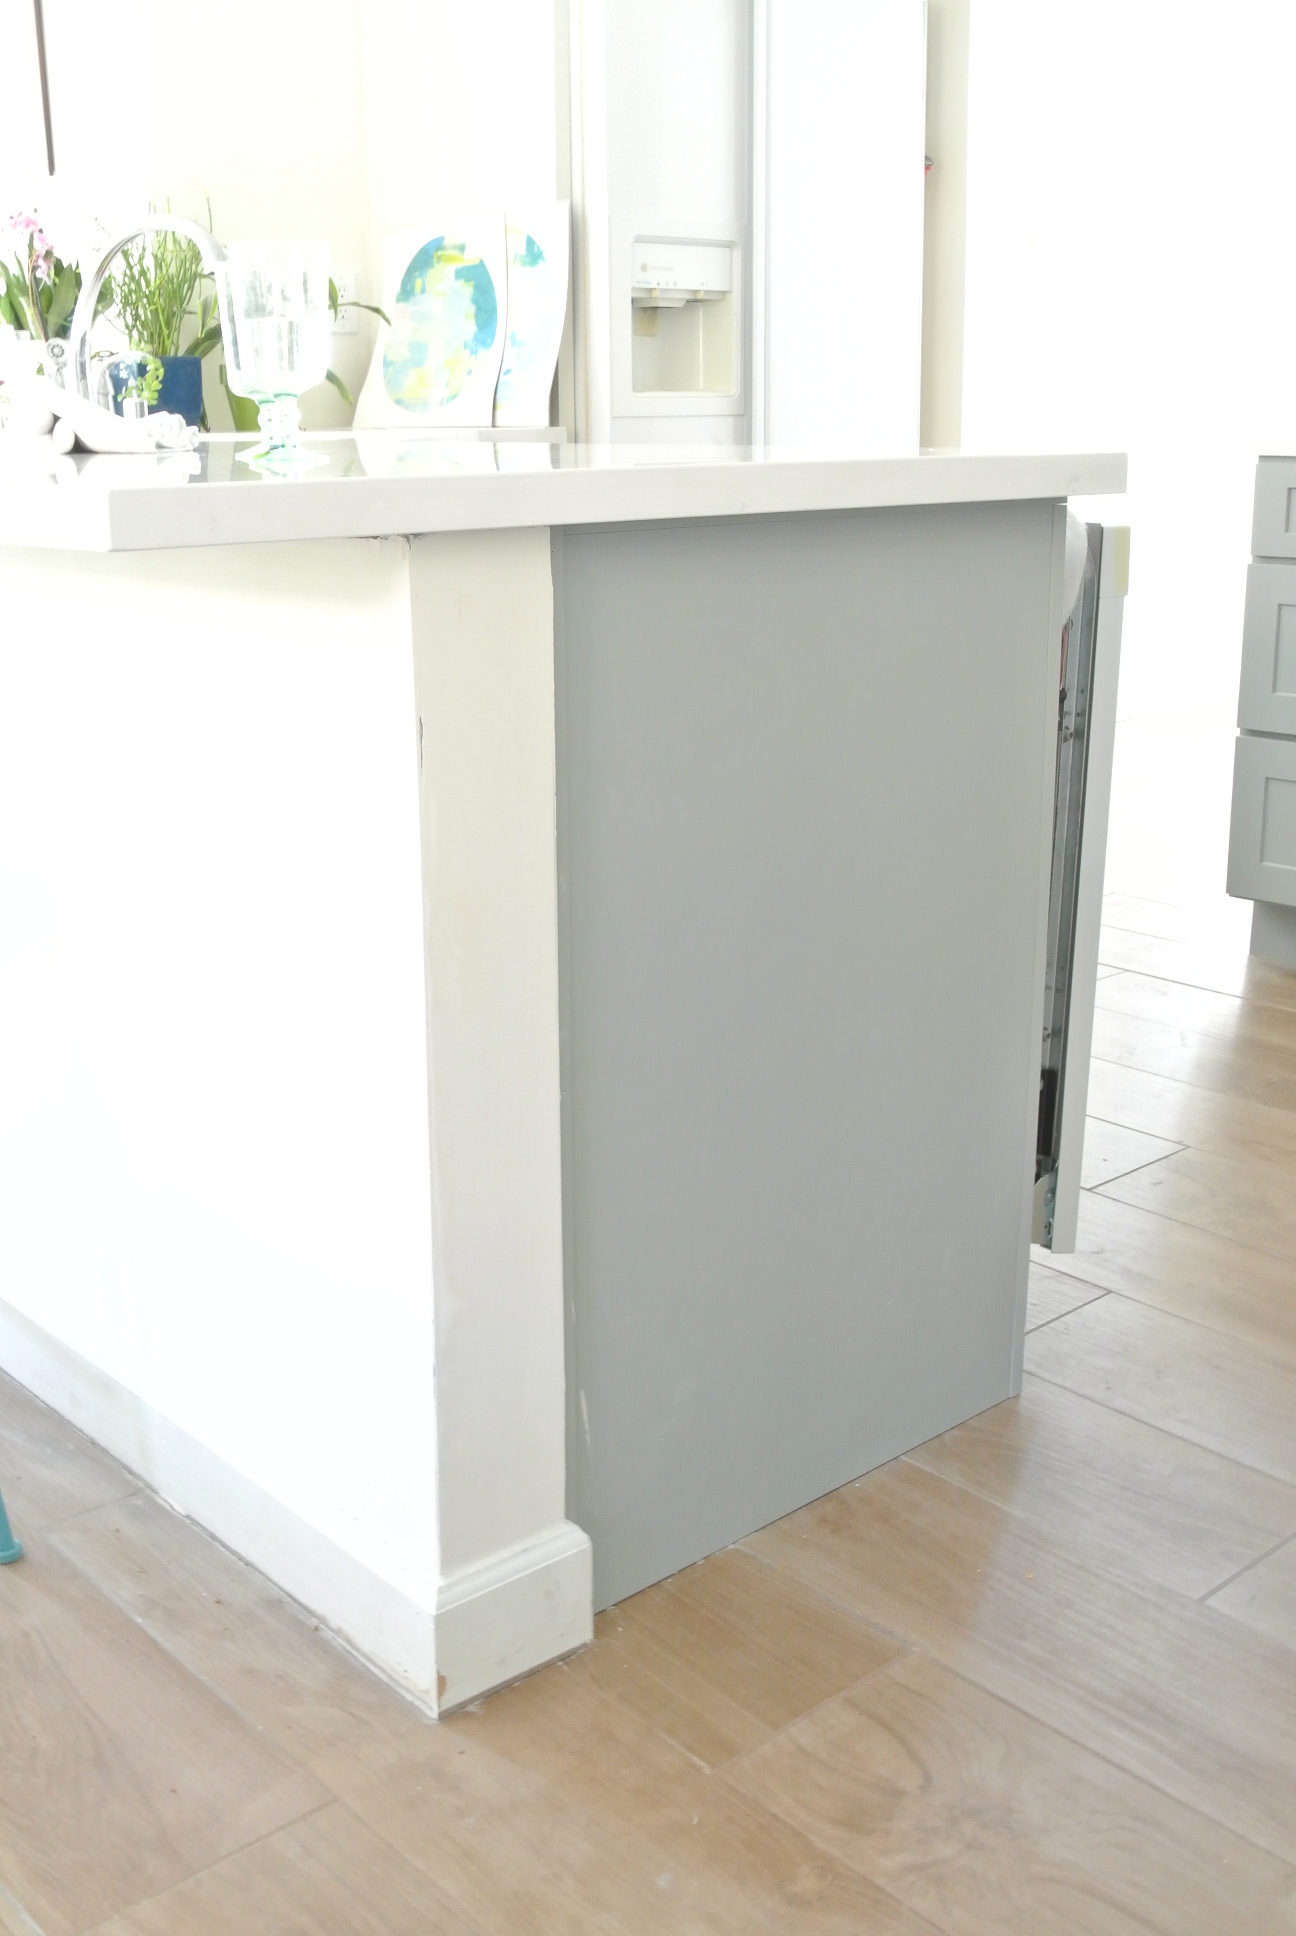
I toyed with the idea of a waterfall edge (see this post) but didn’t like how it would have dropped down only on one side. I thought it would look unbalanced from this view to have a waterfall edge only on the right side. A waterfall edge, while dreamy, didn’t quite work for this space.
The solution was to disguise the side of the cabinet with drywall for a clean smooth edge, it’s a little detail but it makes a big difference.
#10. Personalize With What You Love.
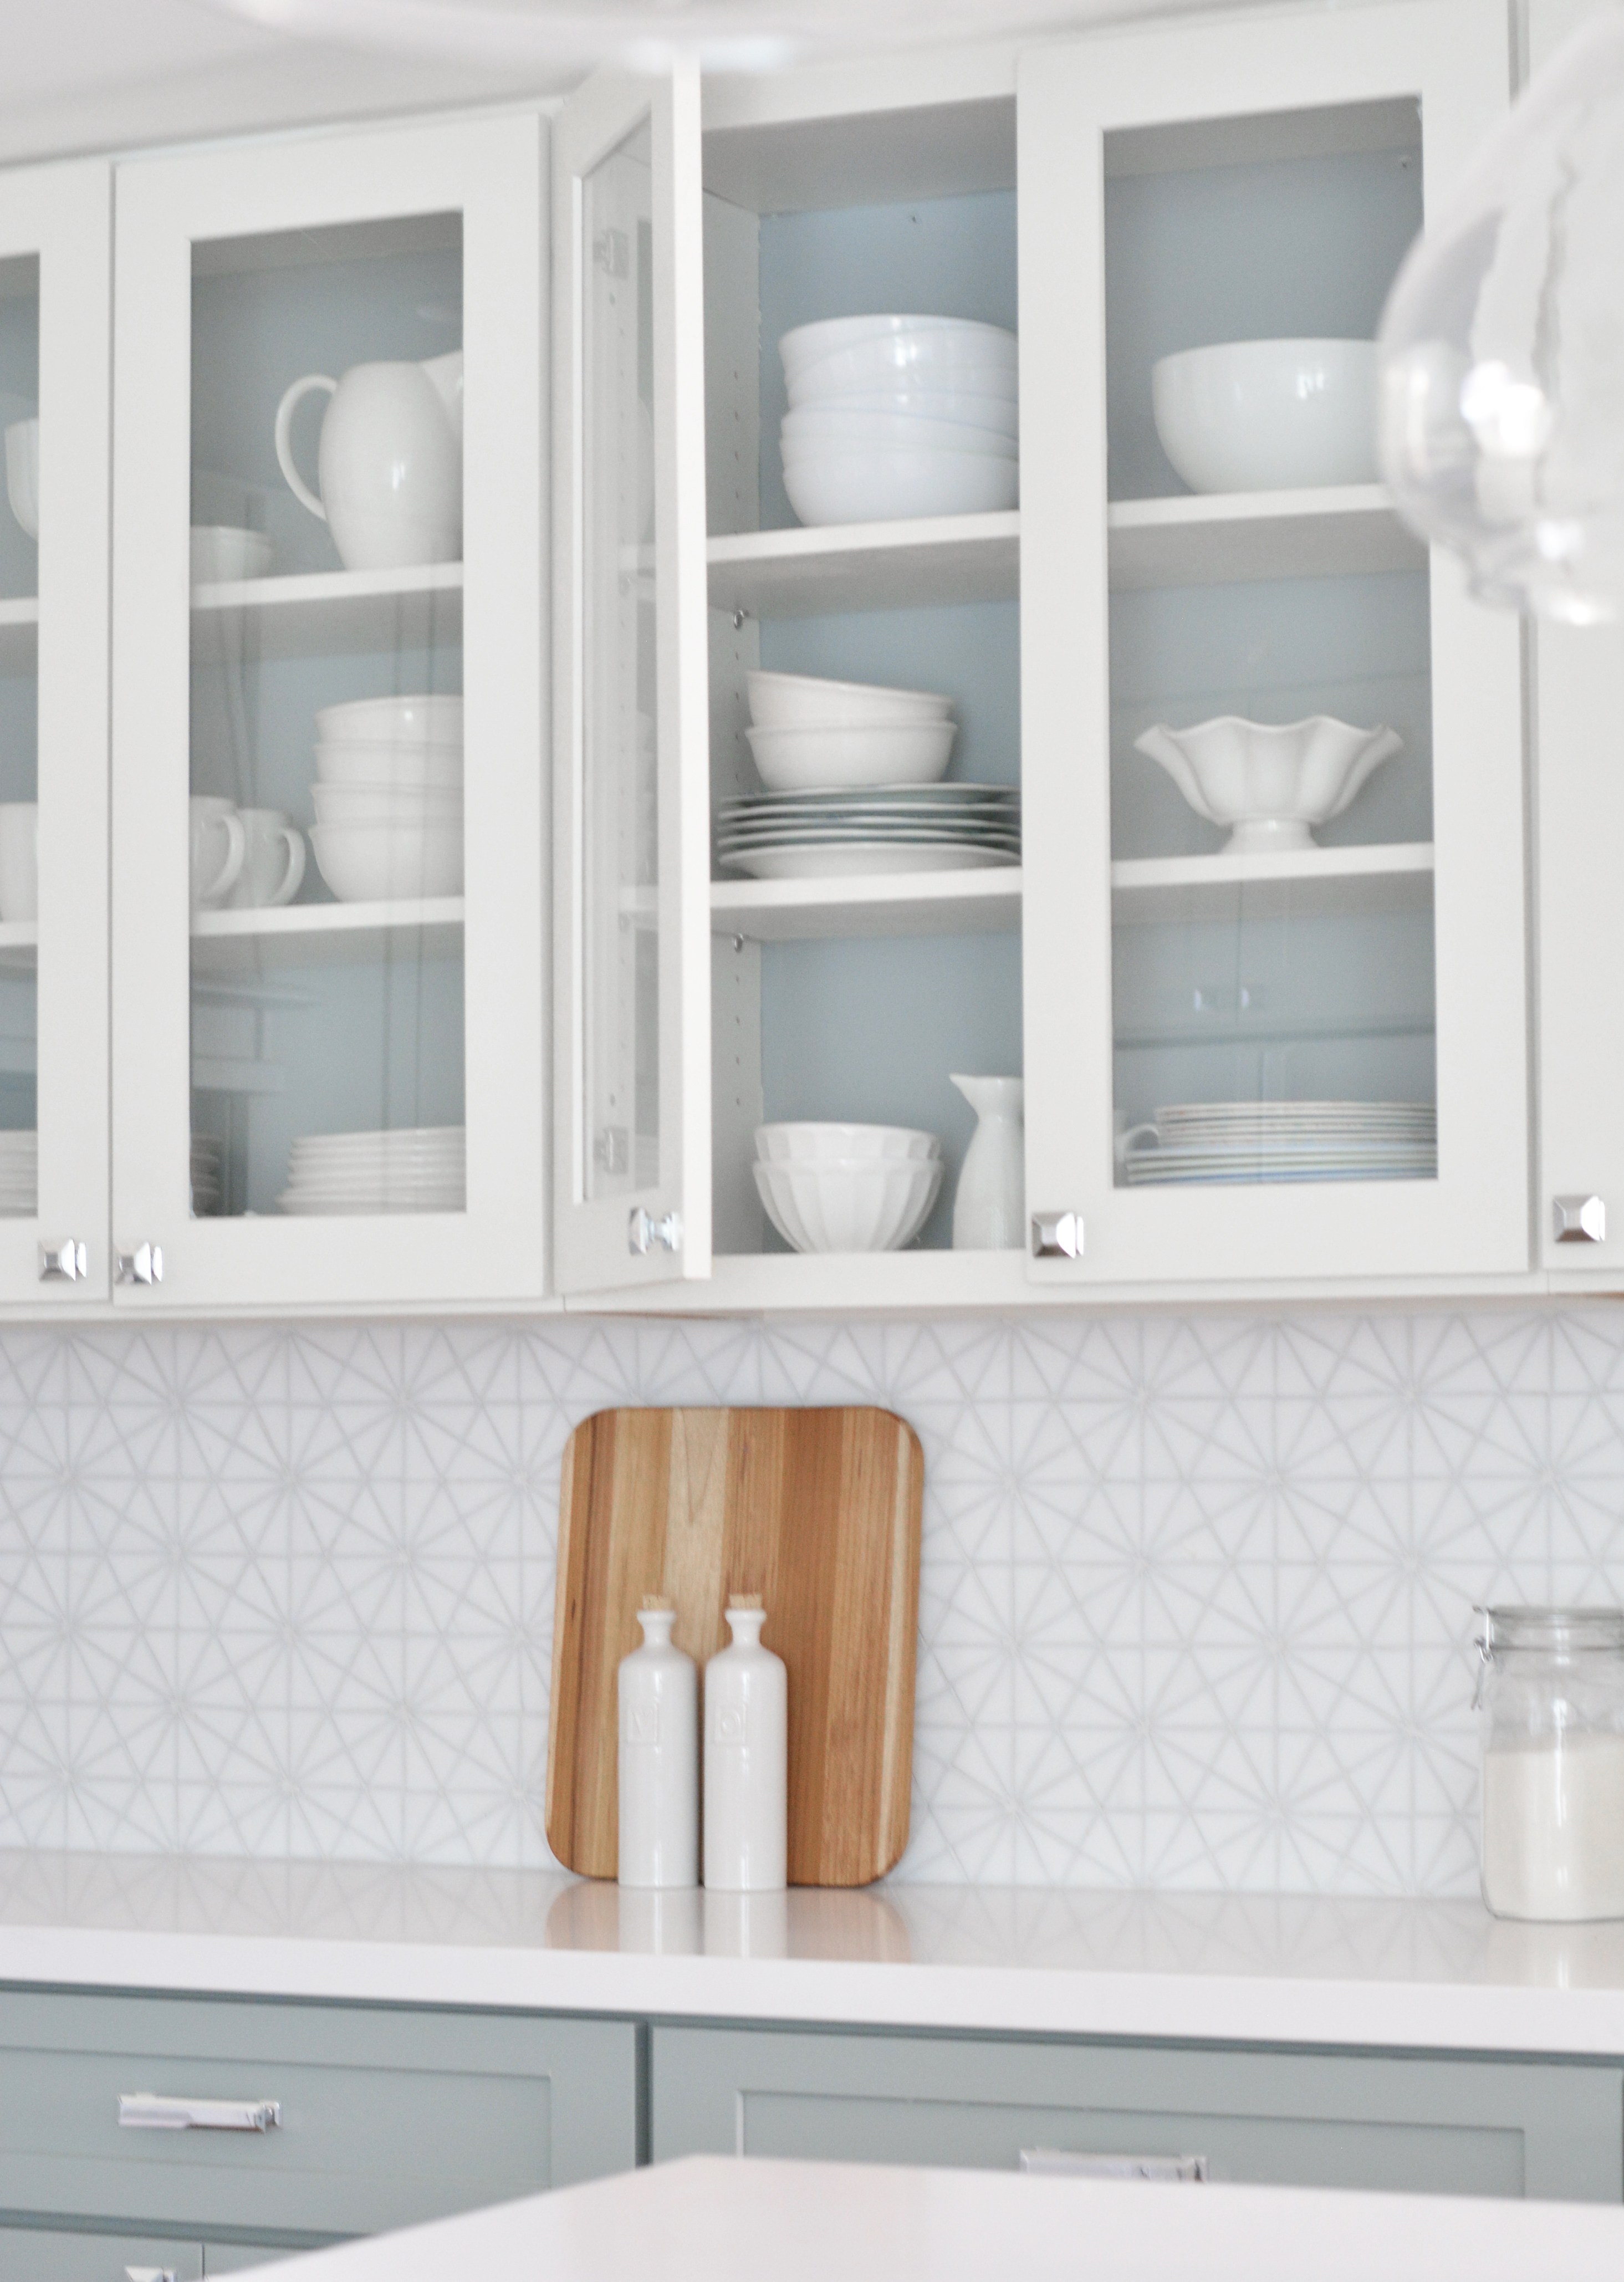
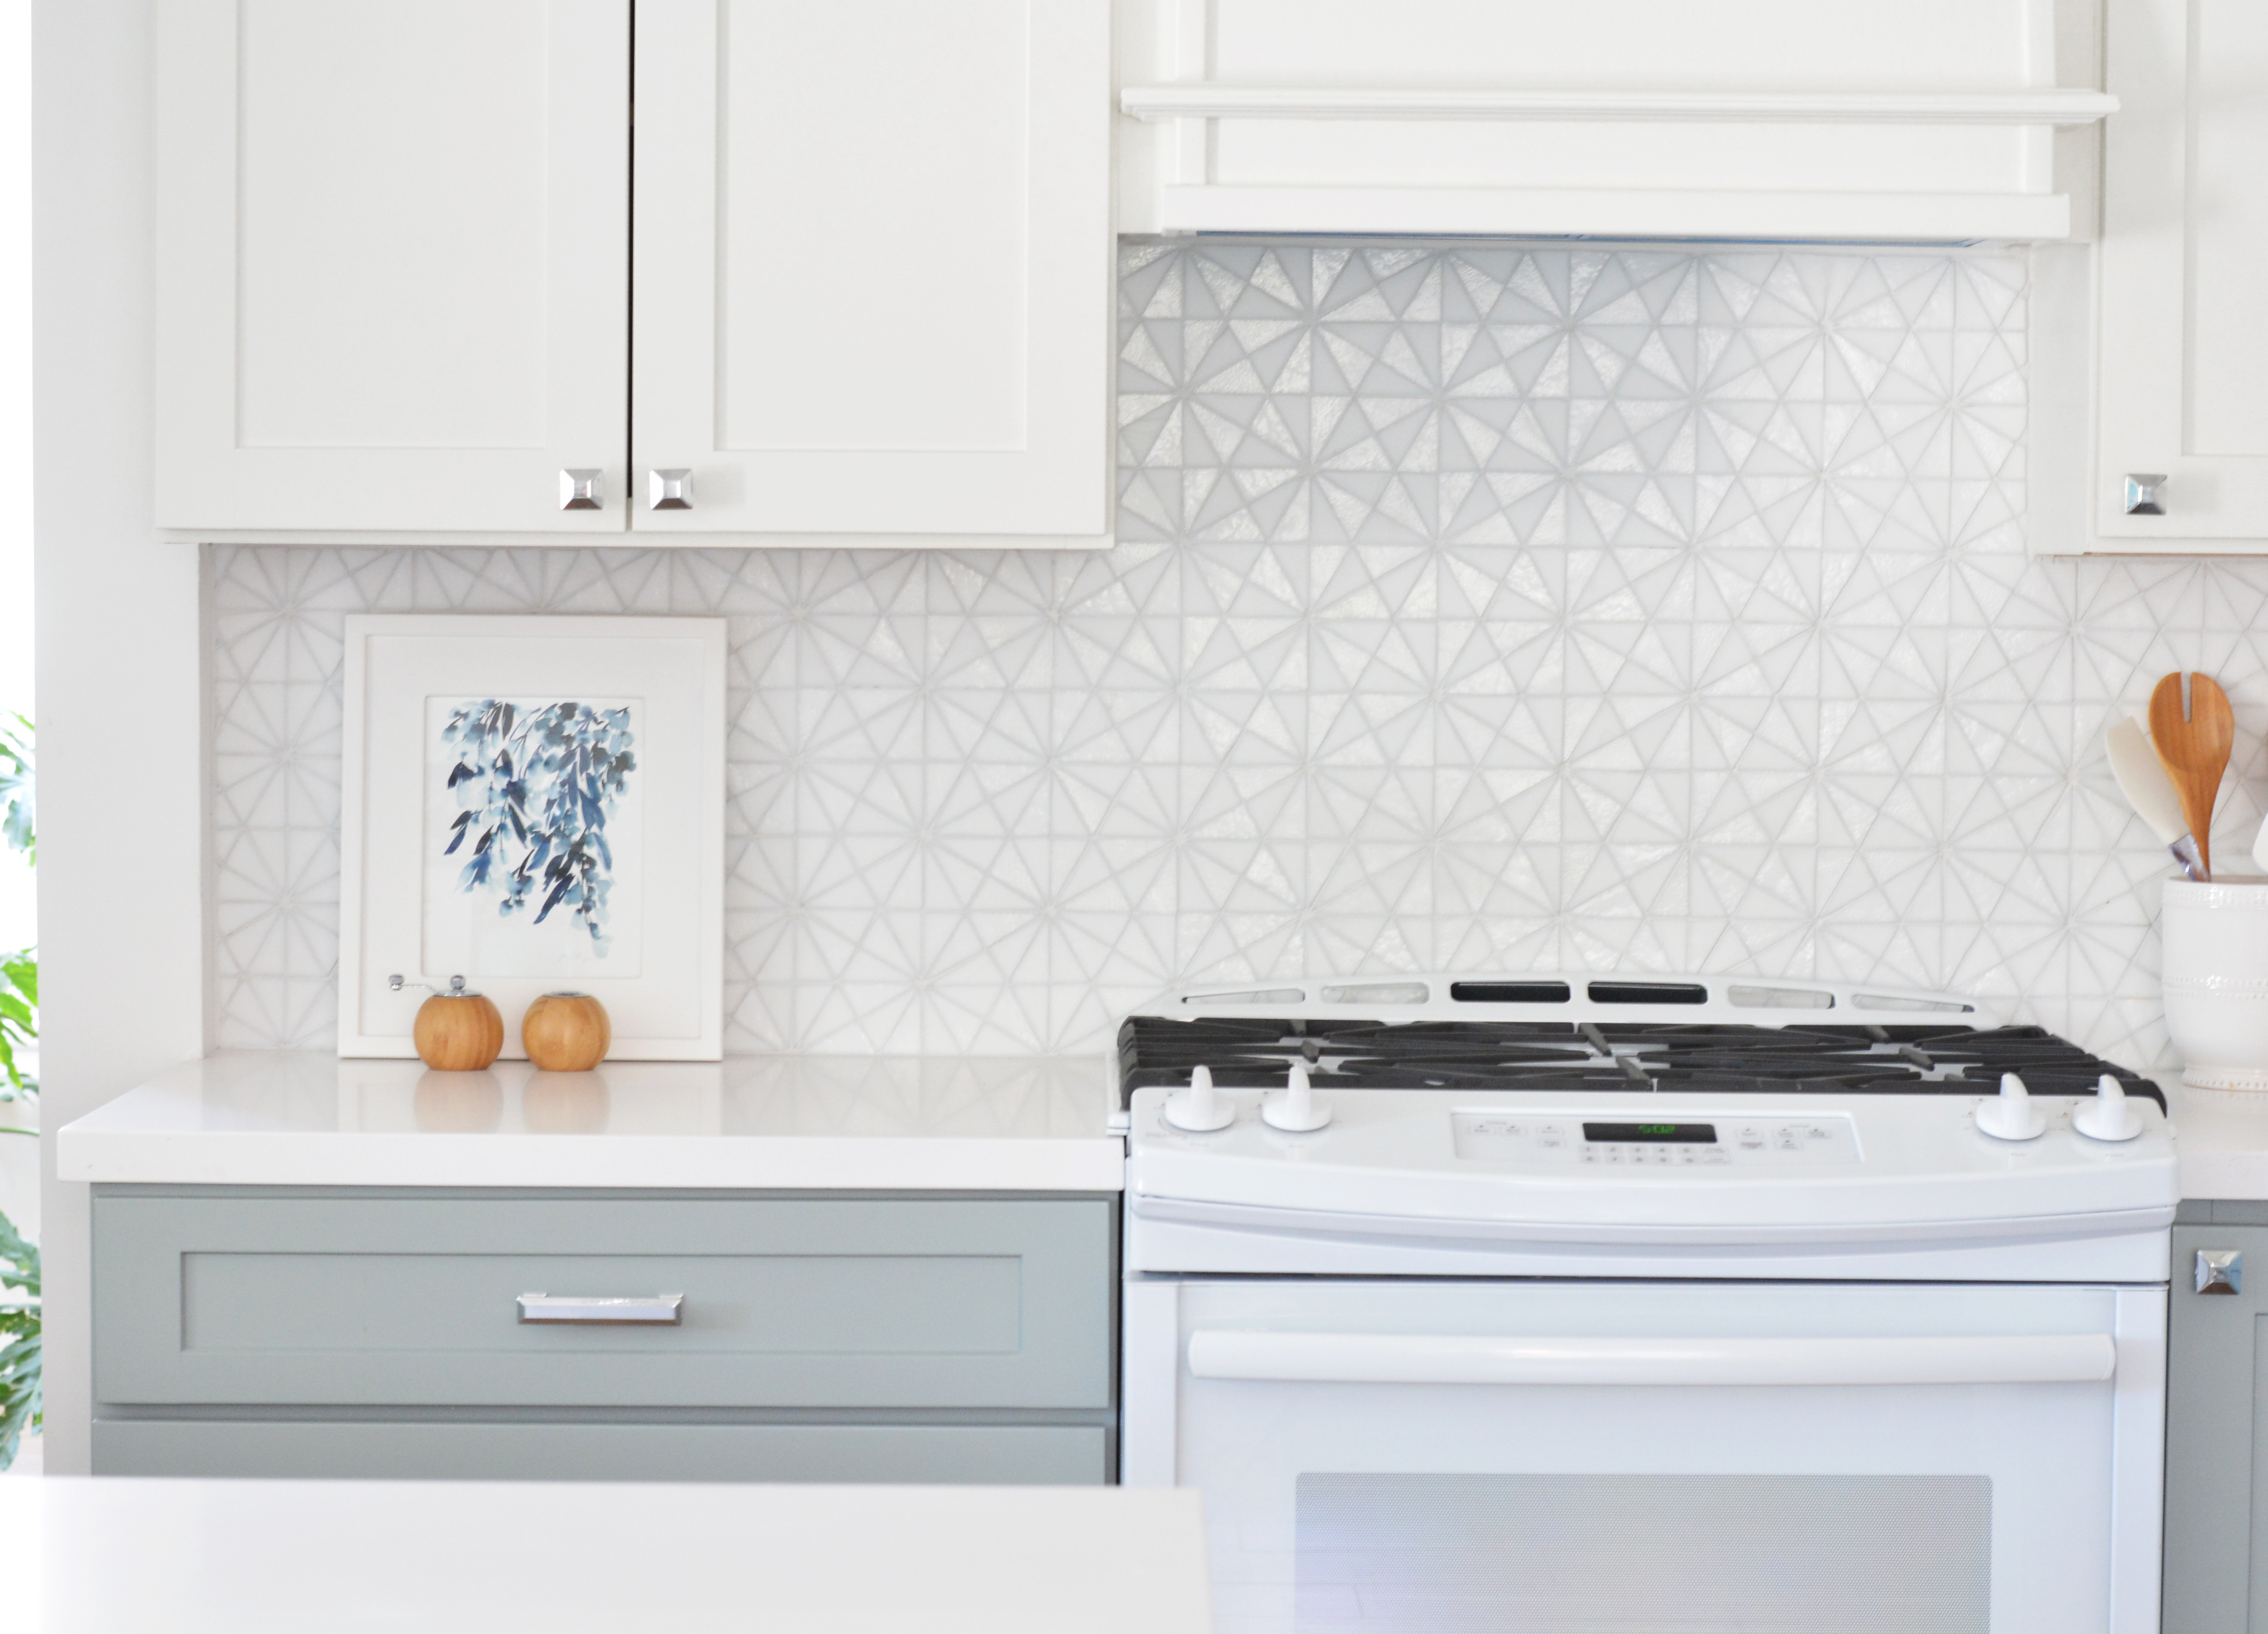
Sure it’s important with kitchen remodels to make timeless choices with cabinets and countertops that will still look great in 20 years. But I also believe when you’re remodeling for YOU that you shouldn’t always play it safe and have a little fun like I did with my diva tile backsplash.
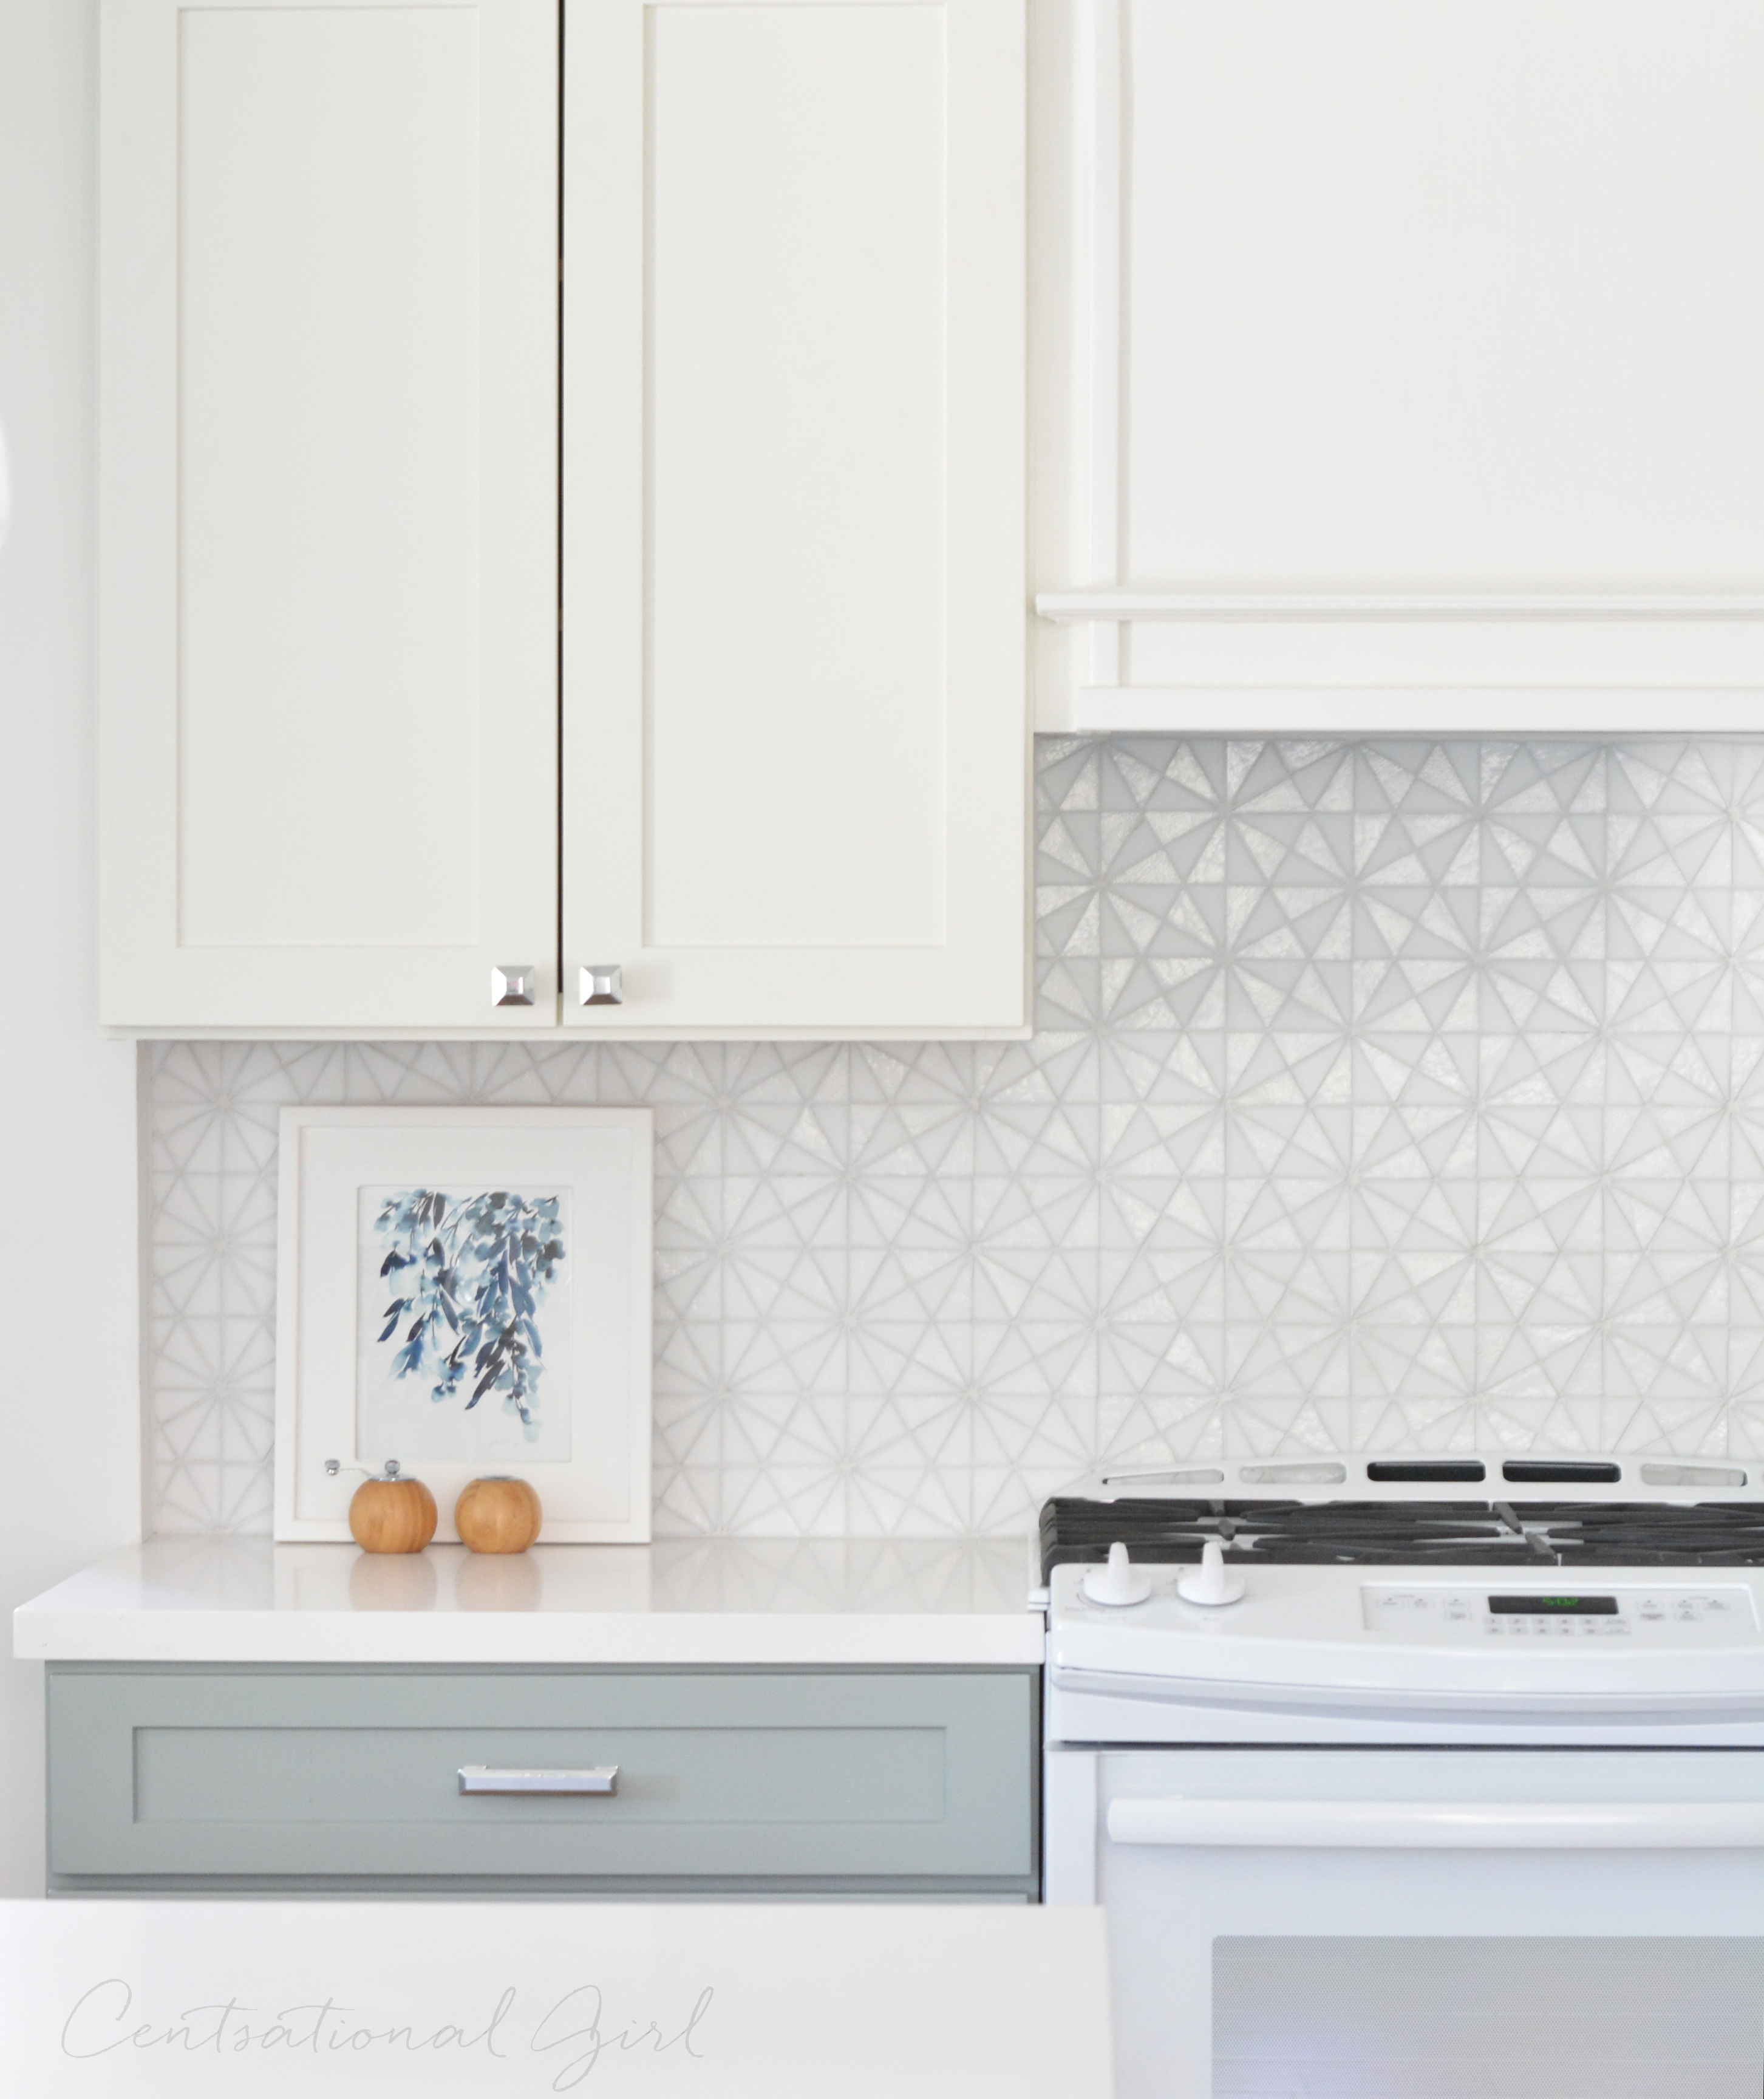
I’ve labeled it my diva backsplash because it’s sparkly, expensive, more difficult to install than your average mosaic, yet impossible to resist.
When I spied the Tessera blend in the Kaleidoscope pattern in the tile showroom I couldn’t get it out of my head so I paid more money for it than I ever have on a backsplash even with a designer discount (thank you Oceanside) and ordered it.

This particular tile must be installed with the paper facing you (see this post from the past where I installed a tile mirror border with the same brand of tile.) This particular hand cut mosaic required I wait 2 hours for the mortar to be almost-but-not-quite dry then soak the paper with a sponge, slowly peel it back and readjust each and every single triangle for even grout lines. It took me over two hours just to peel off the paper and reposition the tiles but it was worth it.
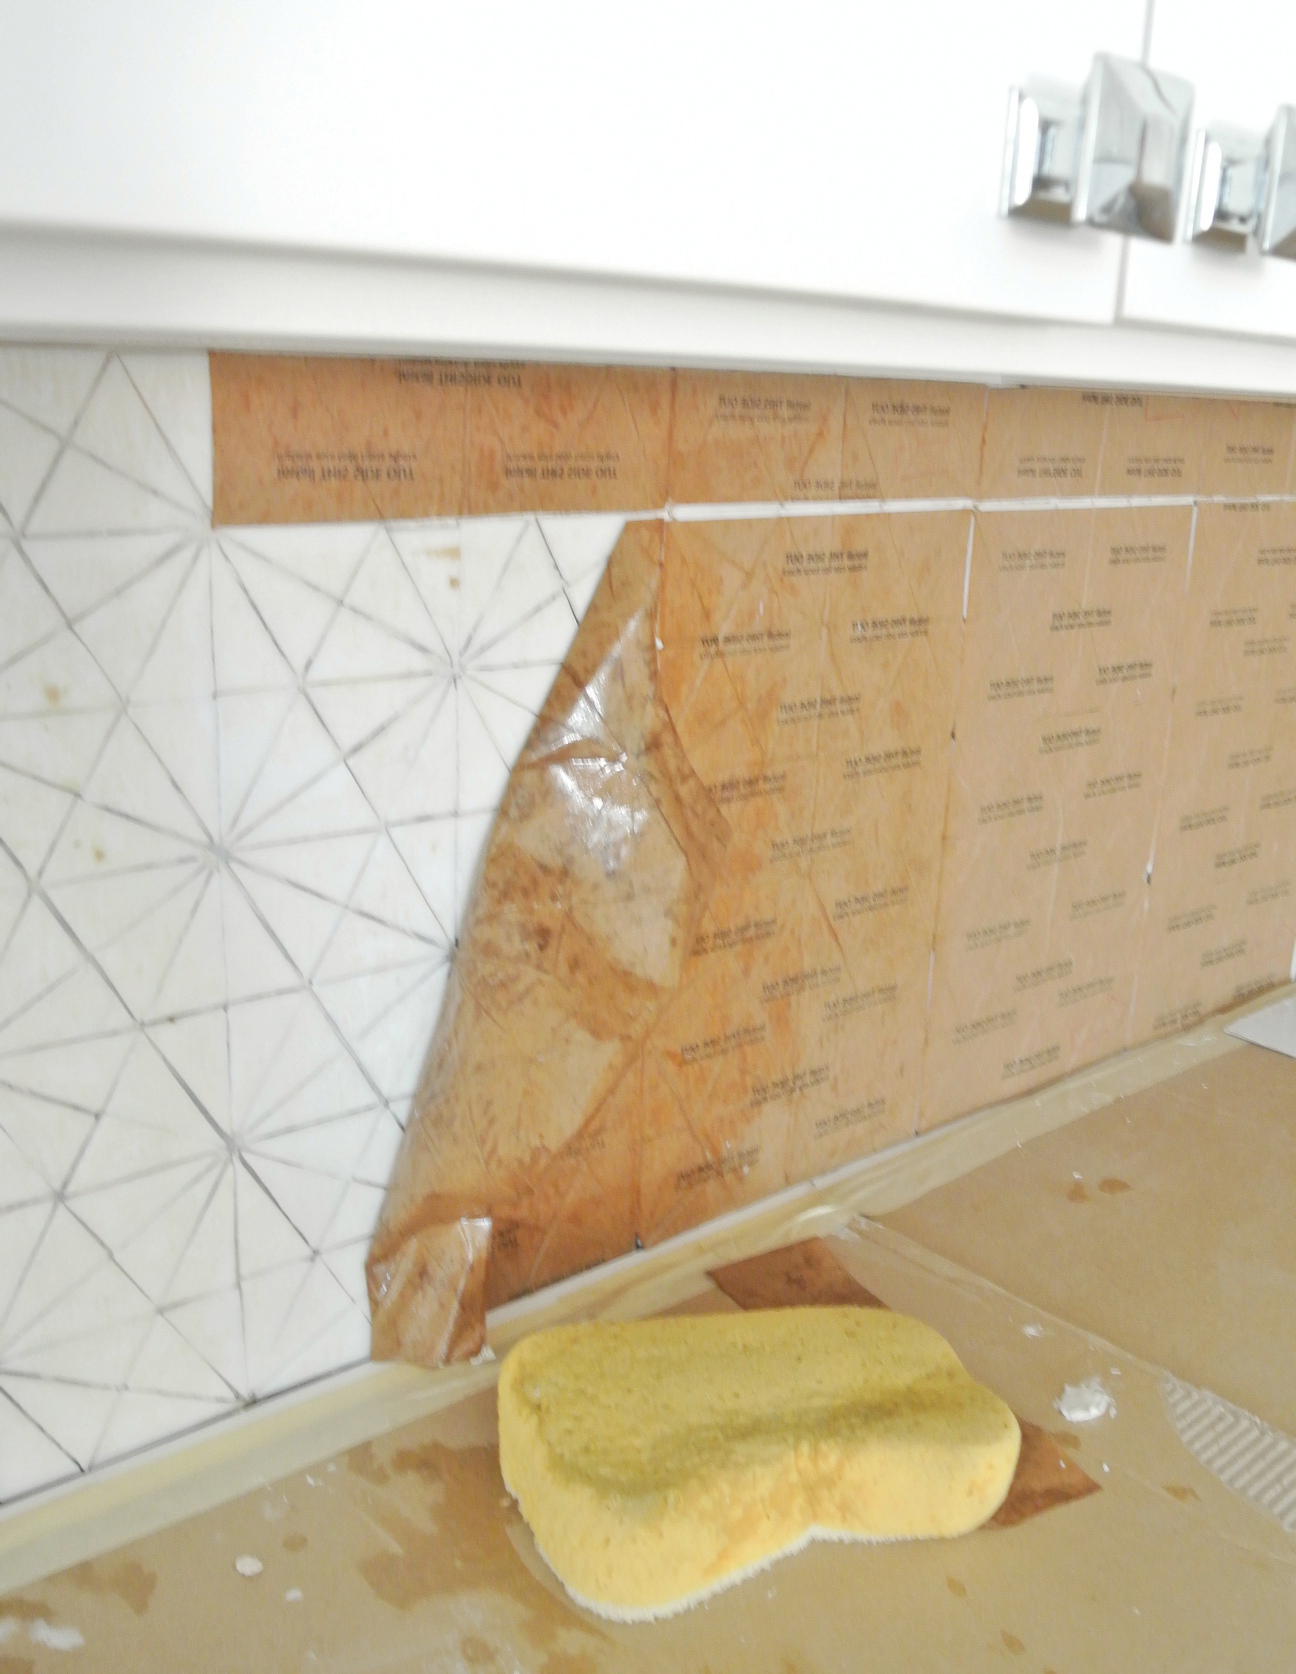

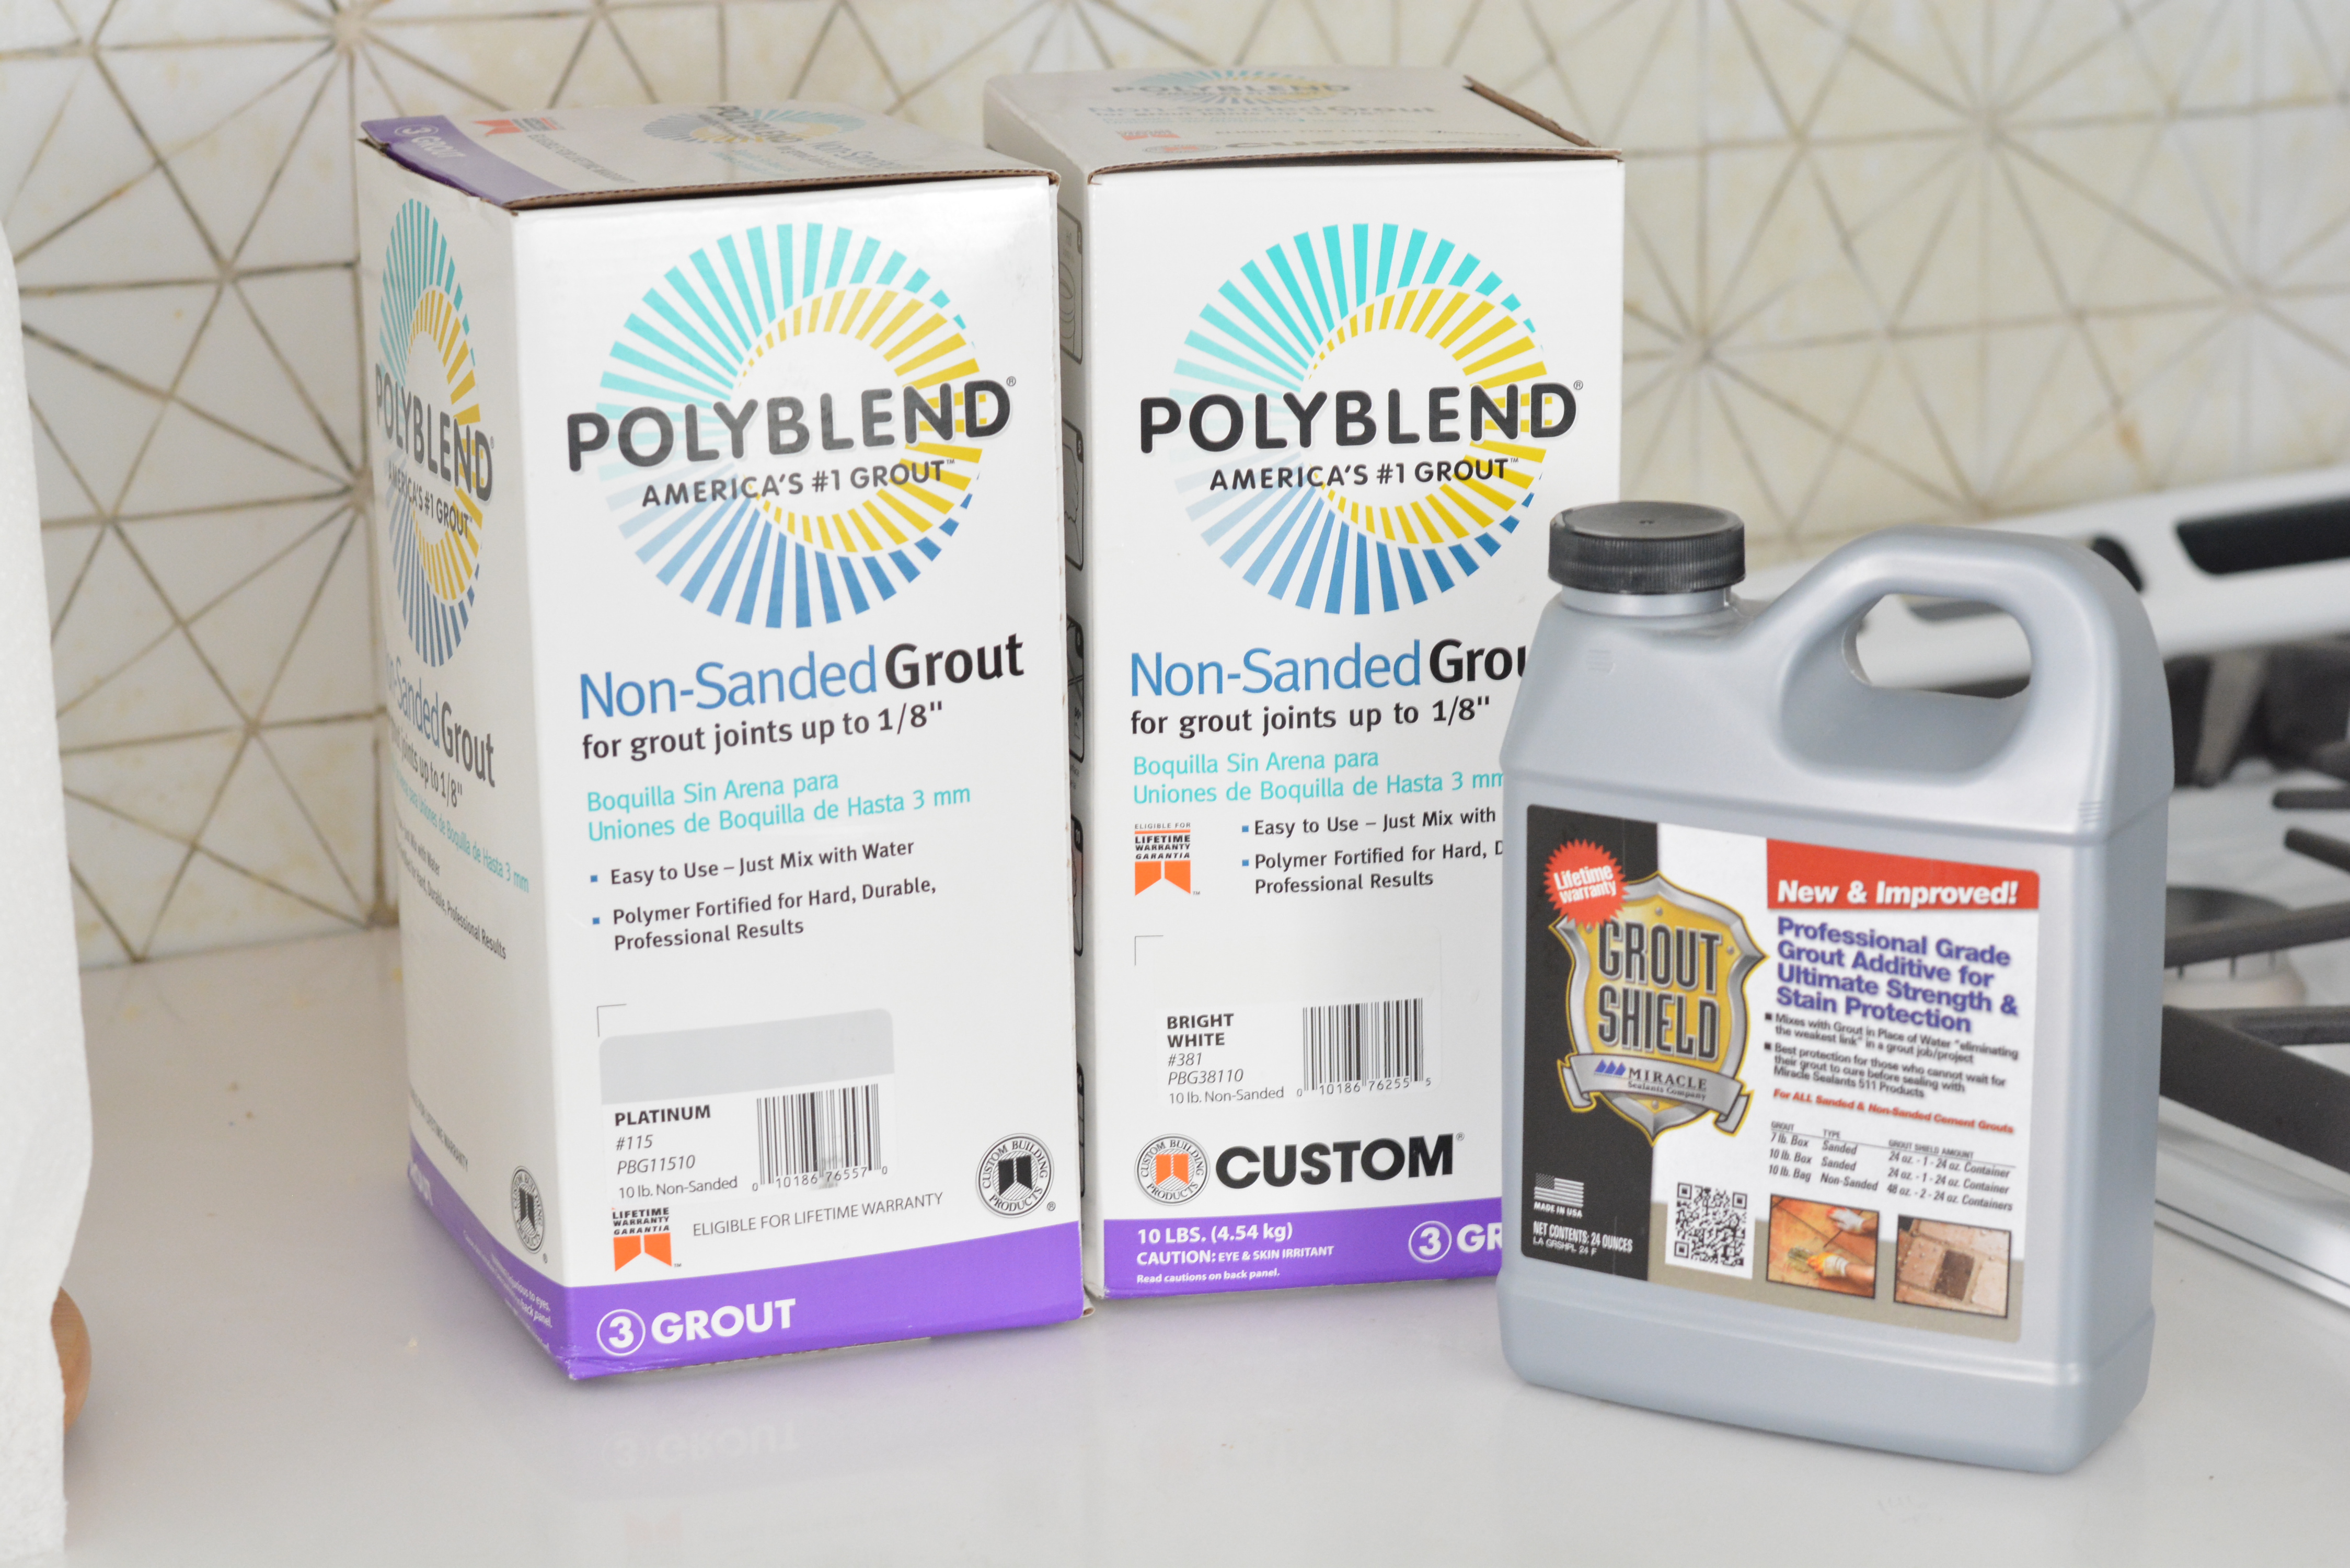
I also mixed a custom grout color, half Platinum half Bright White, the result was a paler gray.
Not everyone adores this backsplash as much as I do but what matters is that I LOVE IT.
Take a risk, personalize your kitchen with something that makes you happy, it’s your house!
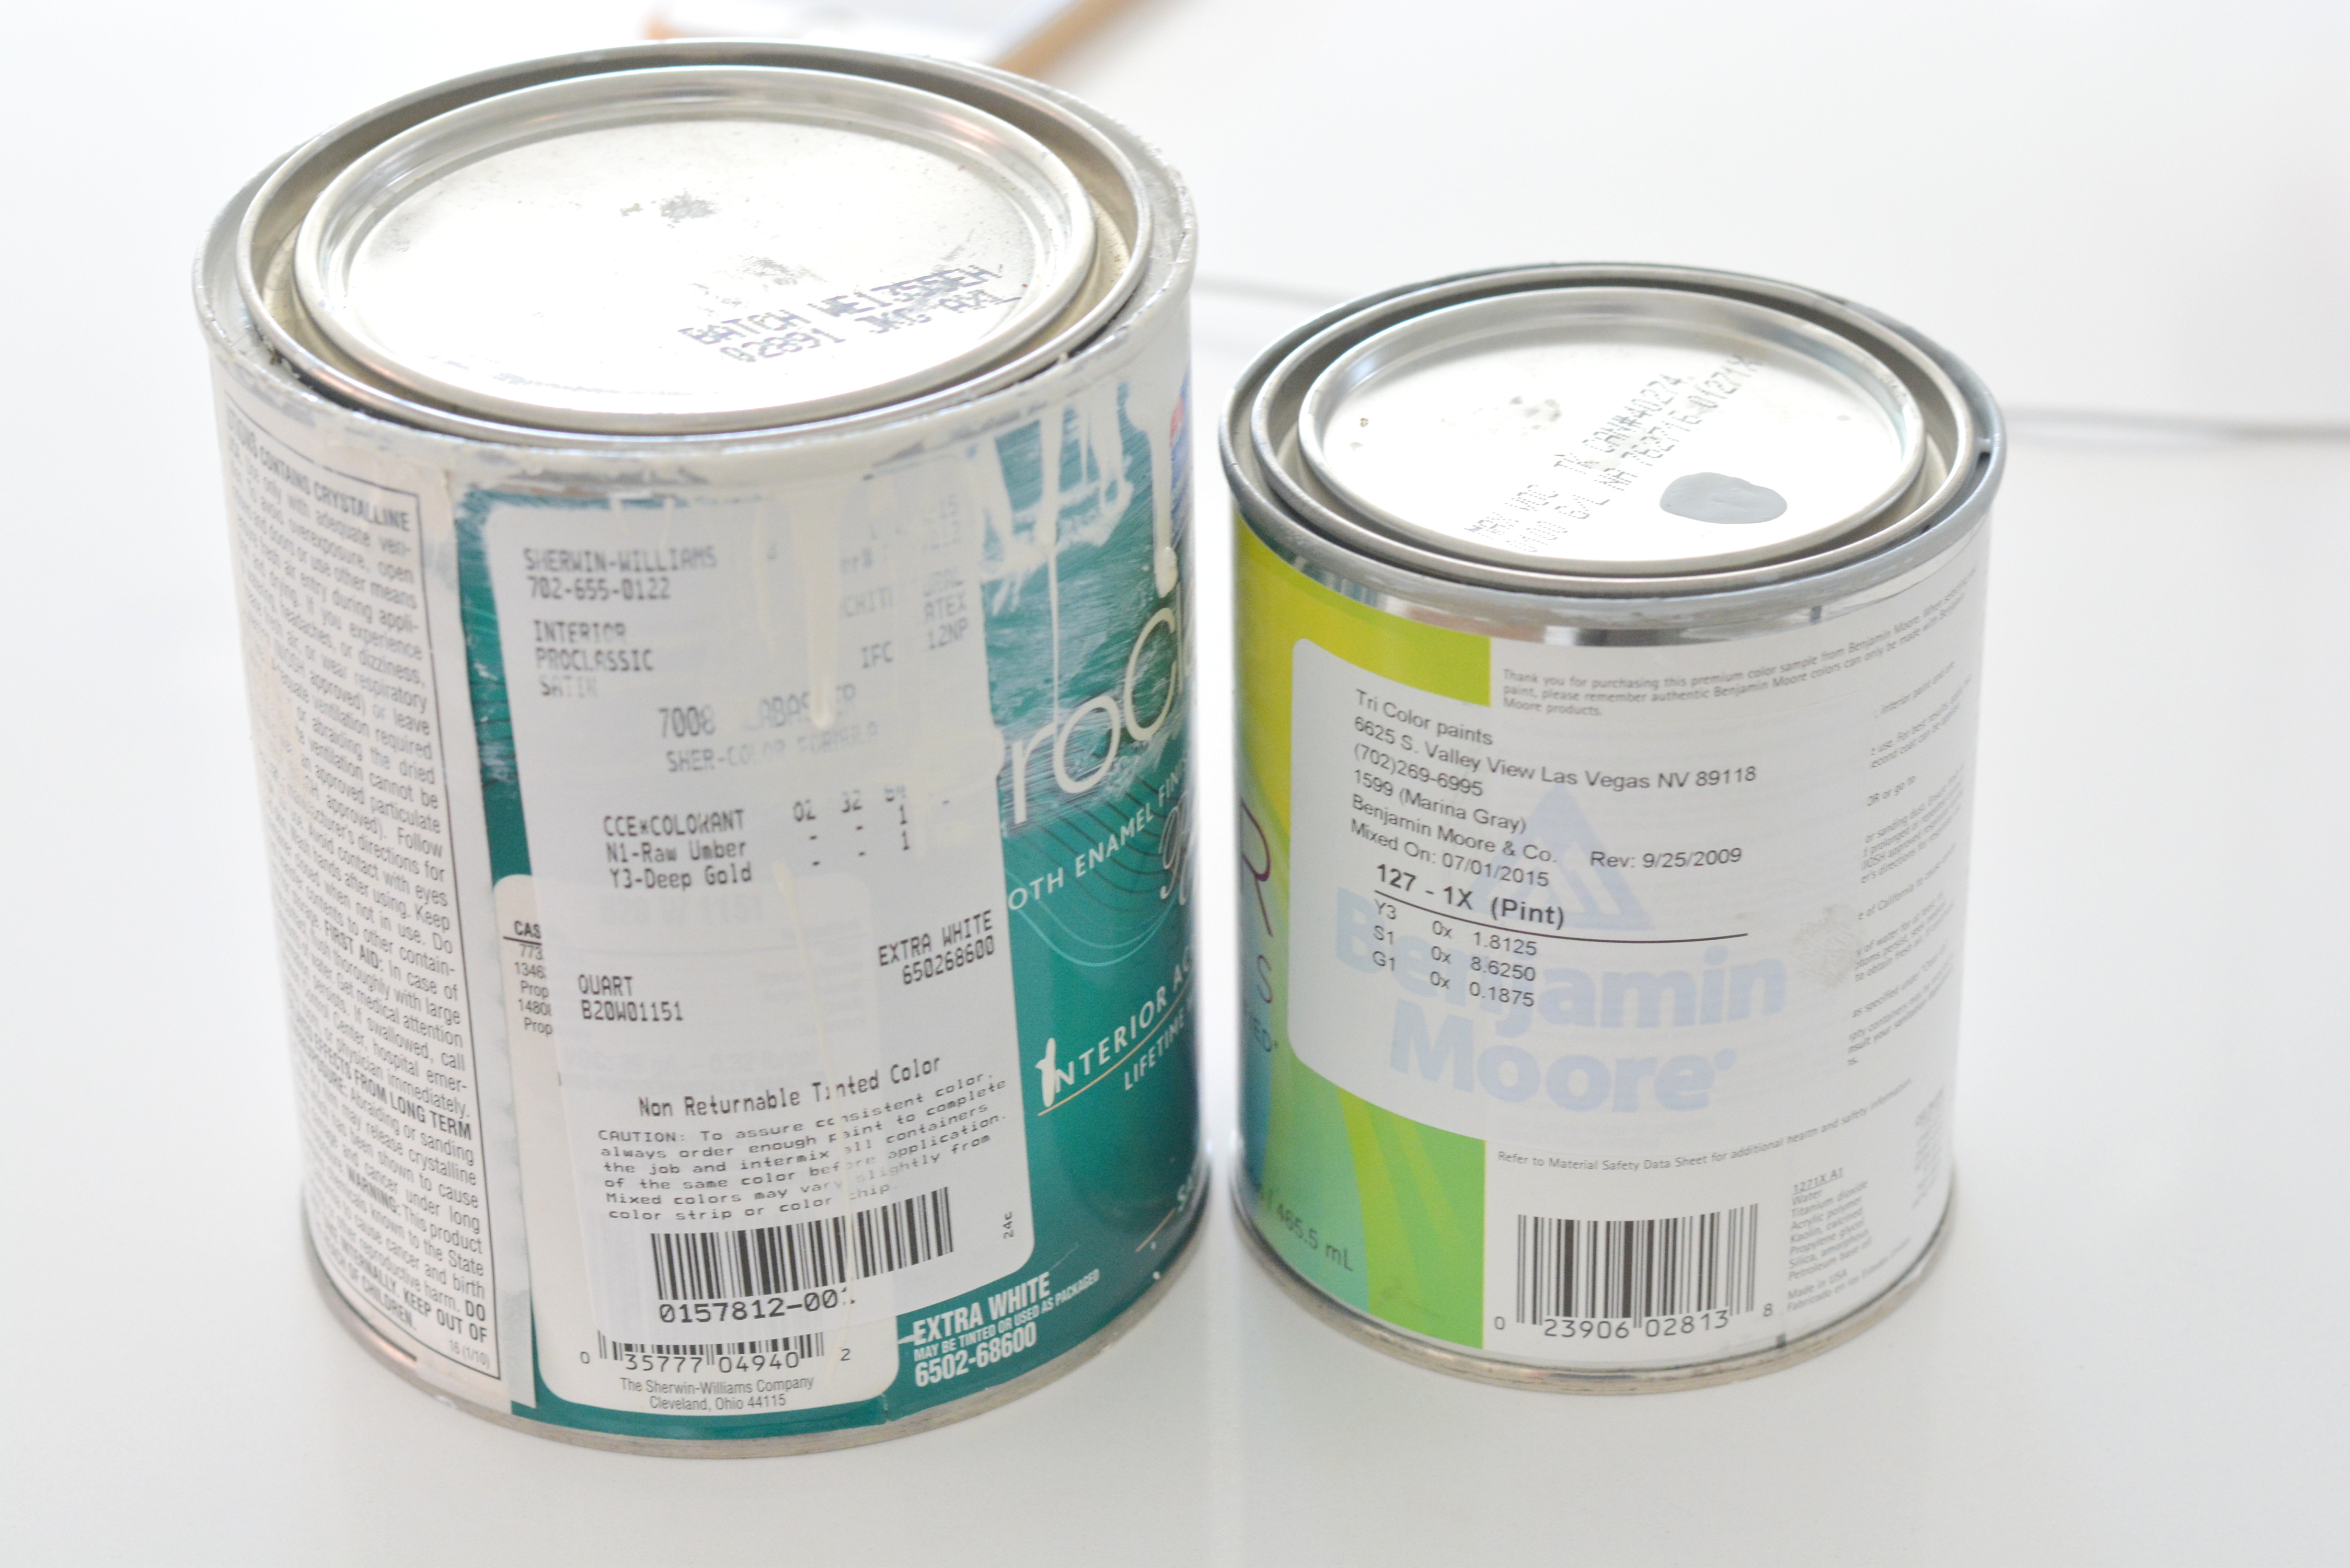
Several of you asked for a paint color match for the cabinets, the white I color matched to Sherwin Williams ‘Alabaster’ and used it to paint the custom hood. The lower cabinets are gray with a hint of blue, the closest is Benjamin Moore’s ‘Marina Gray’ which I used to paint the inside of the glass upper kitchen cabinets.
Sources:
Cabinets: Cliq Studios in Harbor and White
Flooring: Daltile Forest Park Sugar Maple
Countertops: Caesarstone in Pure White
Tile backsplash: Tessera Kaleidoscope in White 101/301, Oceanside Glass Tile
Barstools: Swivel Bamboo (recovered in Baja Diamond Aqua)
Chome Hardware: pulls and knobs
Artwork: Wisteria Watercolor
Faucet: Delta with Spray
Range: GE Slide In with Self Cleaning
Beaded Chandelier: Dahlia by Pottery Barn Kids
Weathered Wood Pendants: Shades of Light
Pedestal Table: Blanca by World Market
Kitchen Rug: Juniper by Dash & Albert
What lessons did you learn while remodeling your kitchen? I’d love to know!
…


I Love your kitchen! Maybe I missed it, but just wondering why you’re buying furniture if it’s going to be a rental? Or are you renting it as a furnished apt?
Yes renting it furnished Jessica – and in between tenants we stay there too. :)
Wonderful remodel, and so timely for me as we are painting redoing our kitchen too!! Thanks for the tips! One sourcing question. In the photo with your backsplash selection (georgous, by the way!!), there are also a few more selections. The multicolored hex is the one I’m referring to. Is that Oceanside glass too??? Thanks so much! Bravo :)
Yep Gina, also a gorgeous choice!
Love these tips!!! Absolutely stunning! Love your taste, you are beyond talented!
Beautiful! These are some great tips for people looking into remodeling their kitchen. It looks so bright now! Thanks for sharing!
I absolutely adore the tile. The problem now is I might have my heart set on it and its is probably out of my budget. It is so different then the now standard “mixed bars” or simple, timeless, possibly boring subway.
So educational! The results are gorgeous. I’ve added a link to this post on my Facebook Group page for home staging because the advice is so right on! Thanks.
This is so BEAUTIFUL! The backsplash is gorgeous. I learned I really don’t like stainless steel but since the most desirable stove only came in stainless steel, I felt the other appliances should also. However, next time, which will be soon, they just won’t match, stainless steel stove and white everything else. Is that bad?
I also found a counter depth frig looked best for our space but is small inside! You see the cubic feet but it doesn’t sink in. It’s just my husband and me, but if I still had kids at home, I would be plenty upset. The best option would have been to move the refrigerator. Live and learn.
So pretty! Maybe you covered this elsewhere, but what are your thoughts on the white appliances? We are building a new home and will have white cabinets with a white/gray countertop and a gray or stained island. White appliance are obviously less expensive – in fact they are the “standard” allowance we get from our builder. But my family wants stainless or slate. They think it looks better or more finished, that the white would look cheap. Thoughts on the stainless/slate trend???
Sensational centsational girl!! Always inspiring!! Thank you for sharing. I love it all!
Oh my goodness, your kitchen is GORGEOUS!! I especially love your backsplash tile!! Thank you so much for sharing! :)
~Jen
Perfect timing, as we are redoing our kitchen. Love all the white ceramic accent pieces on the counter. Where are they from – oh, and the two-tone coffee mugs in the hutch? Thank you so much!
I’m a long time reader. I love your style, Kate. The Vegas house turned out beautifully! I was wondering, since I believe you’ve mentioned that your husband is a broker (?), if you could/would do a post about determining how much money should be put into a house to update it and still make a profit when it comes time to sell?
I recently had a kitchen remodel also. One thing I learned is contractors do not have the eye or vision of the homeowner therefore very close supervisîon is important. And if not satisfied, have them fix it until you are happy. On the other hand, it is also important that the contractor advises the homeowner if the design will not work beforehand so that adjustments can be made early on. Yours turned out beautiful. And I am happy with mine.
I was wondering if you could share your actual cost for items and labor. This way those of us who are considering something like a Diva backsplash can get an idea what it runs. Thanks!
Gorgeous remodel. I too went with a slide in range so my tile back-splash would not be disrupted. I wish I had gone with a power strip under the cabinets, so there wouldn’t be outlets in the back-splash. I dont see any in yours….are they hidden behind decorative items for the pictures? Also regarding #3, wouldnt it have been cheaper/easier/faster to divide the extra space at the end of the cabinet run between all the cabinets (4?) with skinny spacers, rather than re-framing an fattening up the wall? It would have barely been noticeable. Glad you nixed the waterfall idea…sometimes the easiest solutions are the best.
This post inspired my kitchen. I used that exact same grout combo on white glass tile. I LOVE IT! I would love to show you a picture.