Today is the day we’re kicking off the Summer “Get It, Got It, Go” Blog Hop with projects completed with ScotchBlue™ Painter’s Tape and supplies purchased at The Home Depot. I’m excited about this campaign, there will be three dozen bloggers contributing ideas and I’ll be sharing them throughout the summer!
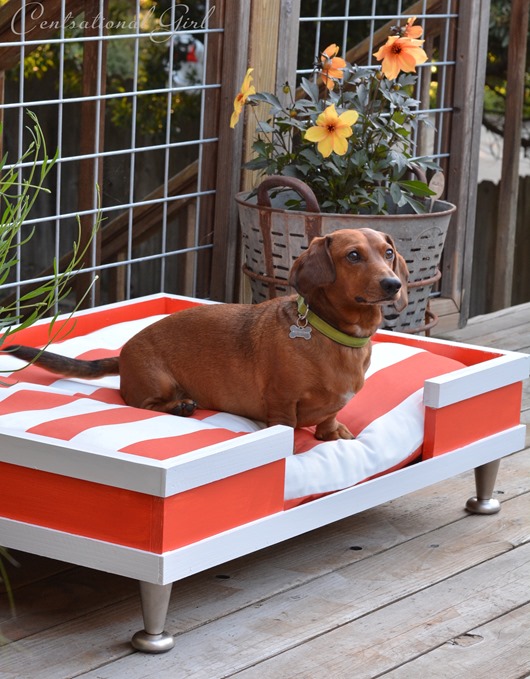
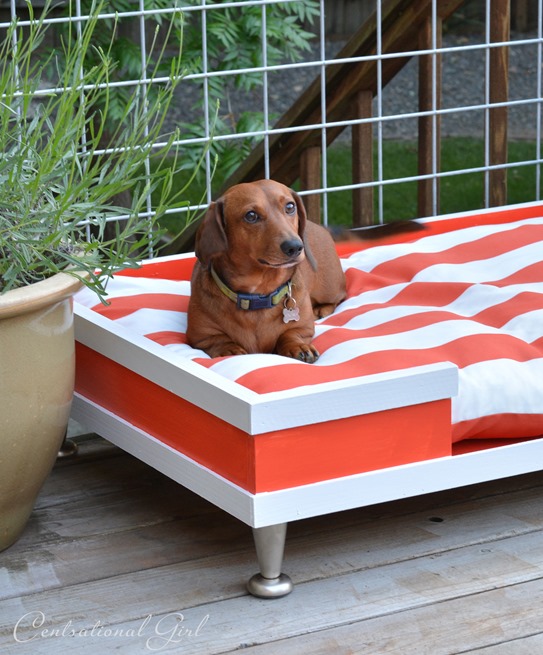
I’m starting the event with this modern pet bed we built for our good friends, they have the cutest pair of dachshunds so we built a bed for them to lounge outdoors during the day, but the bed can also be used indoors too. I painted the base a bright orange and topped it off with a striped cushion in a durable outdoor fabric.

The bed is elevated with tapered metal legs for easy cleaning underneath and the bright color is so fun for summer! This little pup is waiting for his treat…
To recreate a similar version here’s what you’ll need!
Supplies from Home Depot: 5/8” plywood sheet cut to size of base; ¾” x 5.5” poplar planks for sides; 1½” x 4’ poplar hobby boards for decorative trim; ScotchBlue™ Painter’s Tape, 1¼” wood screws, primer & exterior paint (if using outdoors).
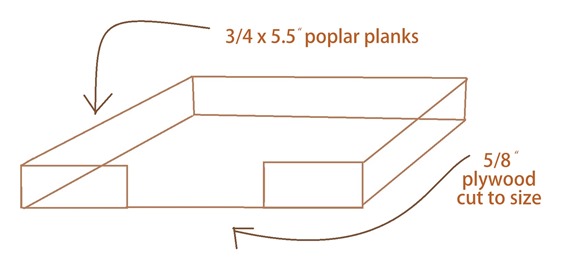
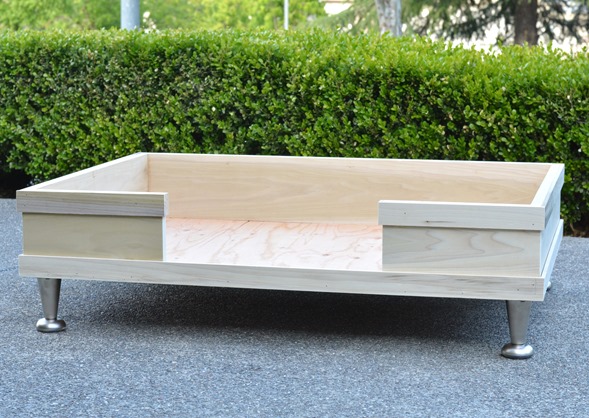
This elevated pet bed is project you can build in an afternoon, it took us 2 hours from start to finish not including the painting process. I had the plywood base cut at Home Depot, then we attached the planks after we trimmed them to fit with our miter saw at home. The dimensions I worked with were 28” x 38” based on the pet bed cushion I picked up at Petco, here’s the basic box we built.
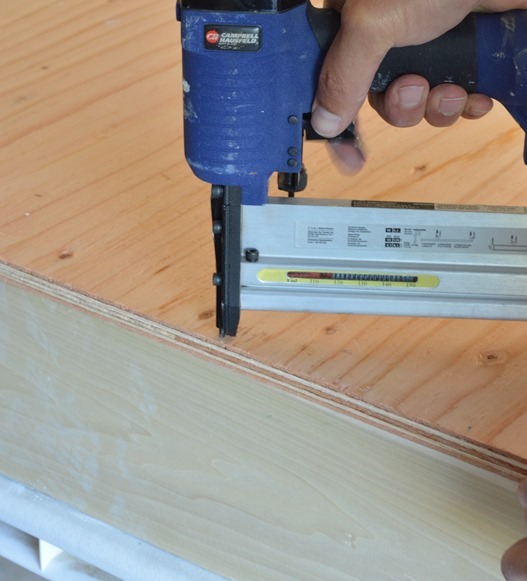
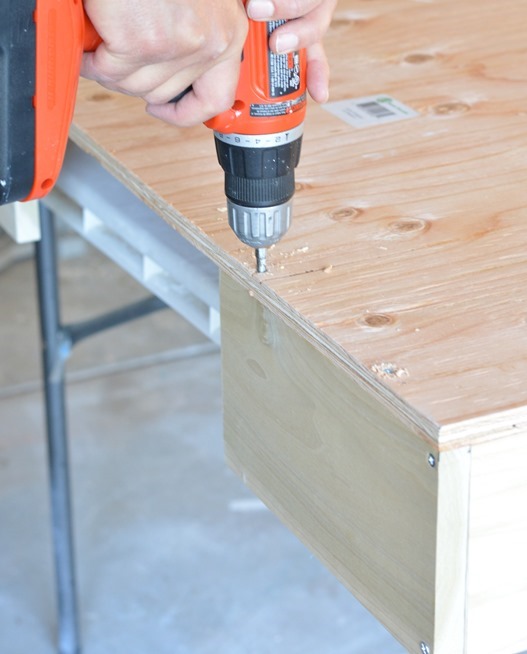
We attached the sides to the plywood base with a brad nailer to hold them in place then secured them with wood screws to make the bed solid. Make sure to drill pilot holes before using the wood screws so there is no splintering or splitting wood.
I found these metal tapered furniture feet on eBay for $2 each, they were the perfect modern touch to this elevated bed, and a great price too!
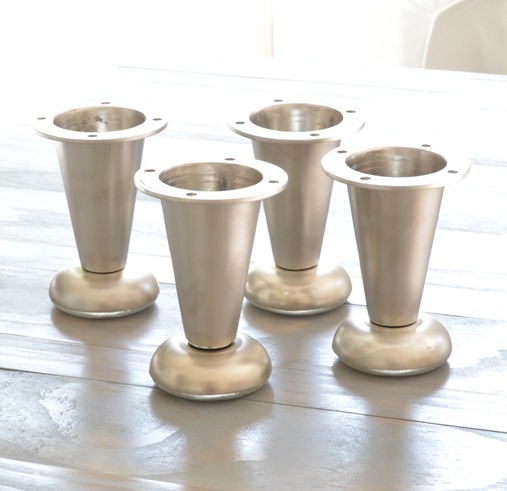
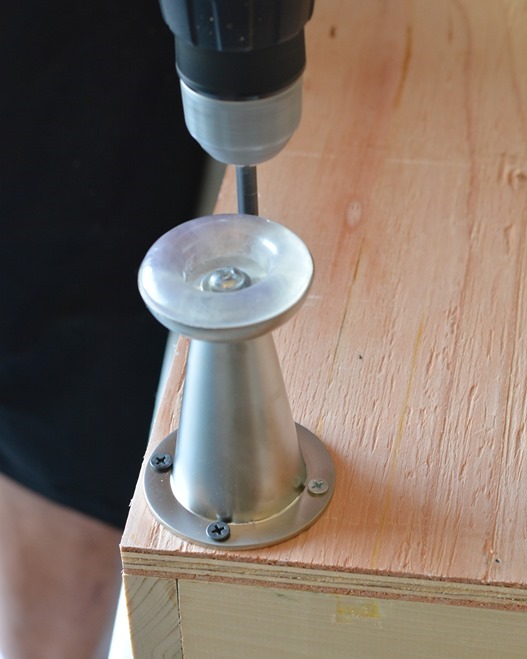
We attached them to the base of the pet bed with two 1¼” wood screws (darker, on the left) into the sides and two short ¾” screws into the plywood (on the right).
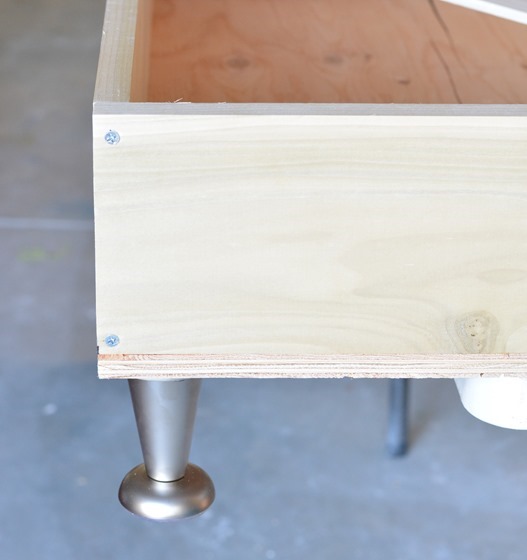
We made sure to secure the wood screws for the frame at the top and bottom where they’d be hidden by the decorative trim.
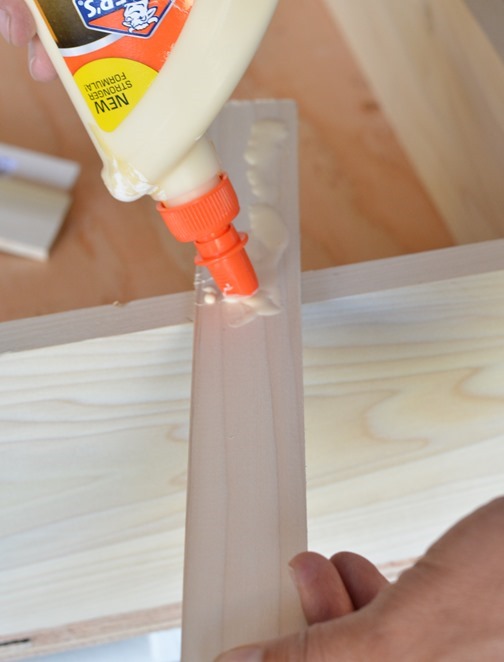
To hide the plywood edge and trim the edges we used 1½” x 4’ poplar hobby boards from Home Depot, trimmed to fit the top and bottom and secured with wood glue and a few brad nails.
Once the bed is put together, it looks like this. You can stain it at this point and add polyurethane after that or paint it any color you like. Sand any rough edges and fill any gaps with wood filler.
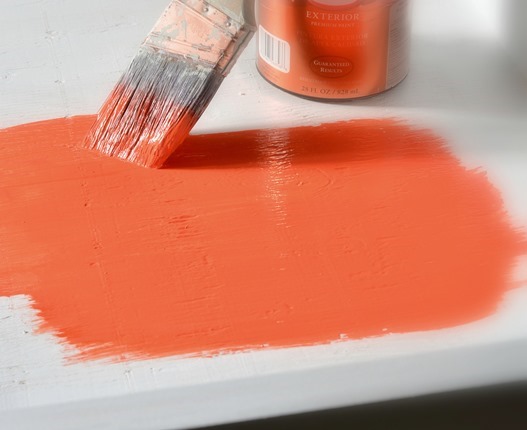
I chose a two tone painted finish, first priming with a water based primer for wood then painting the outside frame with two coats of white paint. I painted the interior of the bed bright orange for contrast, “Skyrocket Red” by Glidden in the exterior formula.
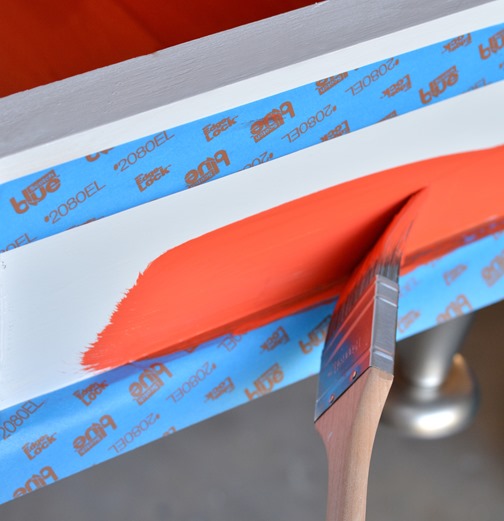
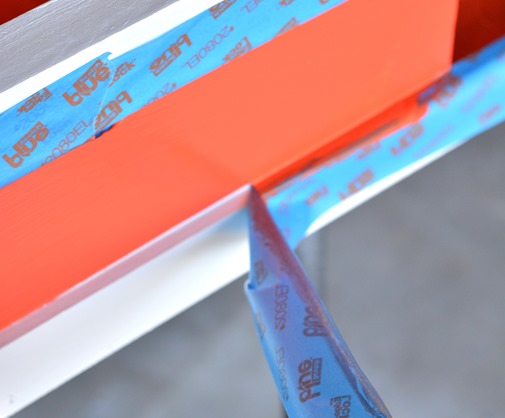
For the orange color between the decorative trim, I used the ScotchBlue™ Painter’s Tape Delicate Surfaces with Advanced Edge-Lock™ Paint Line Protector over the white paint, it gives you crisp lines but doesn’t peel up the paint underneath.
I color matched the paint to coordinate with the striped outdoor fabric I bought at Online Fabric Store. For the cushion, I stitched up a removable cover with this zipper pillow technique for easy washing when necessary.
The bed was built to fit two pups but Rufus was too excited to sit still for a photo!
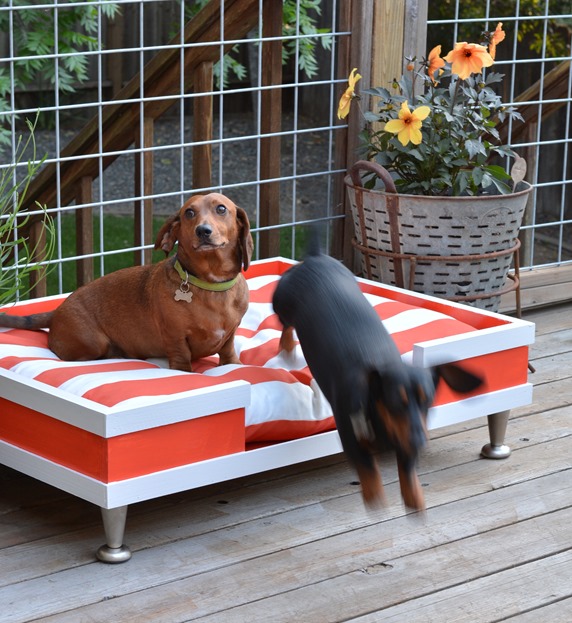
Chip is a much better sport… and is already at home in his new bed.
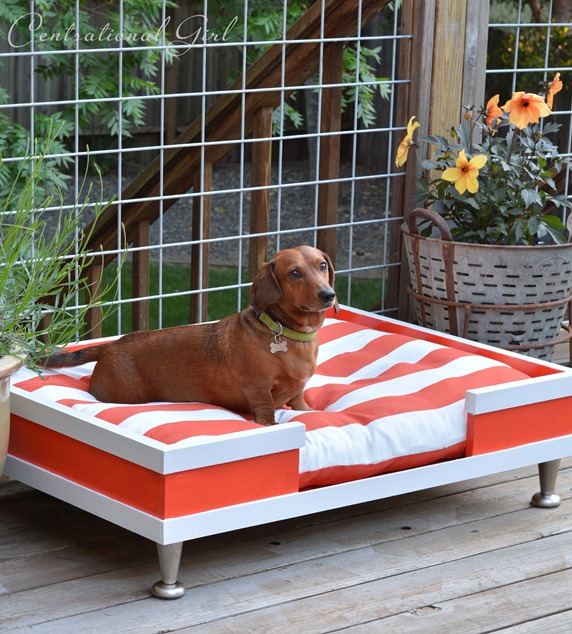
For all of you pet owners, this project is a way to give your pup a stylish place to rest!
Bed frame cost: Wood from Home Depot $70 (less for a smaller bed); tape & paint $20; metal legs (with shipping) $15; total $105. The additional cost of the bed cushion and fabric varies by size and supplier.
Thanks so much to ScotchBlue™ Painter’s Tape and The Home Depot for making this project possible. Join The Home Depot’s consumer program for exclusive social community opportunities.
Disclosure: I am proud to be a 3M sponsored blogger, and I get the opportunity to evaluate new products from ScotchBlue™ Painter’s Tape. Opinions are my own and additional product used in the project were selected by me.
.


This bed is so cute!!!
Kate, this turned out so cute and stylish! I am in love with the crisp coral and white stripes and the beautiful metal feet! Nice work!!!
Love this!
OMG your dog are so lucky:-) I wouldn’t mind having such bed for myself
Love
Ewelina
xxxxx
chiclifestyleofewelina.blogspot.com
ADORABLE!
Too cute. I think my pup may need one. Thanks for the detailed instructions, Kate.
Great! So easy to build!
;)
This is adorable! I think I might need ones of these for my dog, though he is a 90lb ball of fur. Probably would have to add a few feet in the middle for support. I already have the perfect cushion for him too!
Thanks Kate!
Too cute. Your friends doggies will love that. The feet are perfect and so is the color.
How cute! What a stylish little dog bed!
Wow! You did an amazing job, I love the design and colors you used and this is so much cuter than any pet bed you could purchase.
I love it! I wish my dog would use one, but he’s a weirdo and lays right beside his dog beds on the cold hard floor.
Love it. Great colors and I love all the trim! Good job Kate!
Great job! Every pet deserves a bed like that :) And it`s so easy to build. Thanks for the instructions.
Very cute bed for some adorable weenie dogs!
Came out great! He looks happy with it anyway :)
Love it! :) I need to make one of these!
I love the bed that you made. We also have dachshunds that would love it. Thanks for the directions.
I have not gotten any emails from you (or the other blogs I follow) since May 13. Do you have any idea what I should do? I LOVE your blog and I don’t want to miss a thing. I apologize for bugging you about such a weird issue. I am just not sure what is going on.
It’s a Feedburner issue Nicki, all blogs are having this problem – click on my Subscribe tab and sign up via Feedblitz so you won’t miss a post and thanks for reading!
Kate
What an awesome project Kate! Just pinned. And thank you so much for the mention. :)
I know its been a while since this went up but I actually just started a similar project. First, this is an amazing job and looks like you really know your stuff! I otoh am a little worried I made a stupid mistake. My cat bed project is for interior use but I was so excited by a $2 price tag on one of those returned quarts of paint, that I failed to notice that it is exterior paint- same brand that you used here. Do you know if that can cause any help problems if used on an indoor project? Cats spend hours sleeping and I was just wondering if constant breathing on the painted bed is dangerous? Thanks!
I love the bed and the color its beautiful, I am sure my dog would love lone. Thank you for posting it.
Hello Kate Riley
I love the colours of this bed! So pretty! Something that fits with the character of my home. And I can make it myself! I looked around the web and found your DIY modern pet bed so adorable, and after having gone through your blog, it is easy for me to make. The main feature of this bed is that every size of dog can be easily adjustable & is so much comfortable than the store bought ones. The cost of this DIY modern pet bed project is also very reasonable. Thanks for the detailed instructions. I’ll surely give this a try. Cheers!
So great to read this, let me know if you do end up building it, I loved that project!