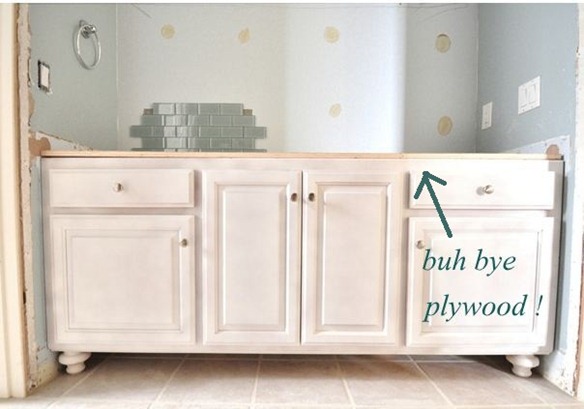
We’ve finally turned our attention back to the hallway bathroom remodel that we started last spring with the vanity upgrade. We’ve lived without a sink and just a plywood top in here for 9 months while I went on the hunt for the right countertop and as a result the bathroom remodel came to a halt.
The main reason for the delay came down to choosing the right countertops and I needed two, one for the sink vanity (seen with plywood above) and another for the cabinet on the opposite wall. I had my heart set on solid surface marble or Caesarstone for a long time but all the estimates were extremely pricey ($1,400 and up!)
It came down to the decision to save up a lot of cash for marble or Caesarstone or just get ‘er done with wood countertops topped with a vessel sink for this hall guest bathroom . We chose wood, but I wanted a more polished edge beyond the the standard square edge that comes with slab wood countertops.
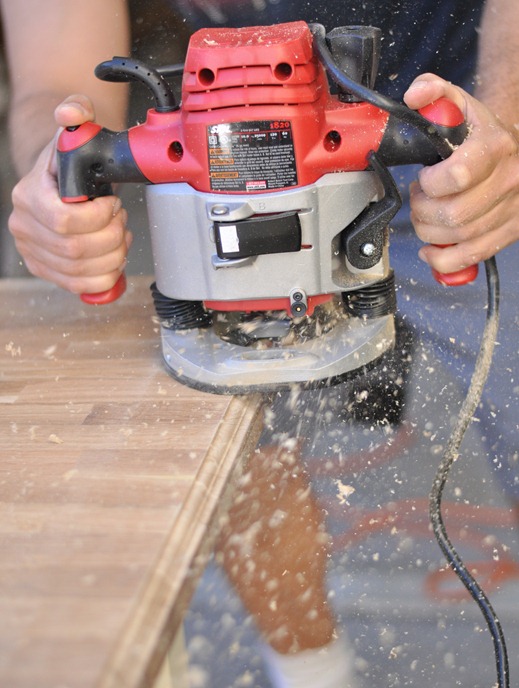
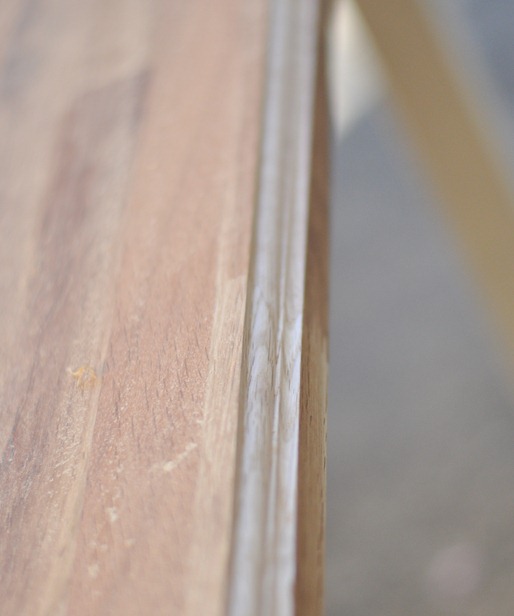
I did some research and learned that I could get a fancy ogee edge with a great power tool – a plunge router coupled with a specialty bit, so I ordered this router and this ogee bit online from True Value.
It arrived a week later (free shipping!) and I picked it up at my local True Value hardware store for this project.
Matt picked up two wood countertops at IKEA over the weekend and we got to work!
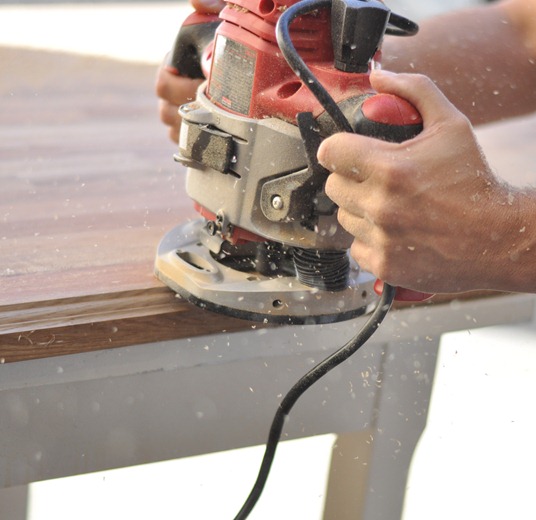
The bit has a self guiding part (a mini wheel attachment) that slides along the edge of the wood while the sharp edge of the bit cuts the detail on the wood. As long as you follow the instructions provided for the tool, it’s easy to give your wood countertop a carved edge with this power tool + bit combo.
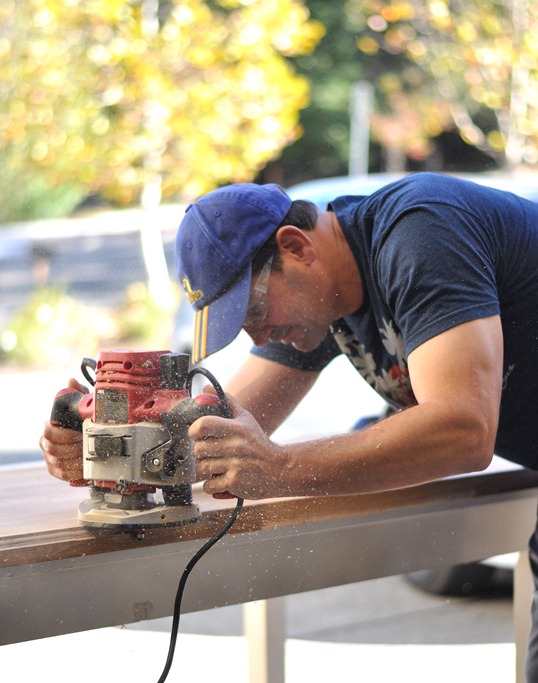
This particular model plunge router does not come with a sawdust collector so the wood particles fly everywhere – it’s best to make these cuts outside and wearing safety goggles!
Make sure you cut on a steady surface – we used an old table we set up outside for stability and clamps attached to the table to hold the wood in place.
It takes just a few minutes to give a wood countertop a really nice detailed edge with this router tool and an ogee bit.
We borrowed a friend’s table saw to rip the edges of both countertops so the width and depth fit the measurements of our bathroom. The next step is sanding and staining, then adding several layers of protective varnish to make it waterproof.
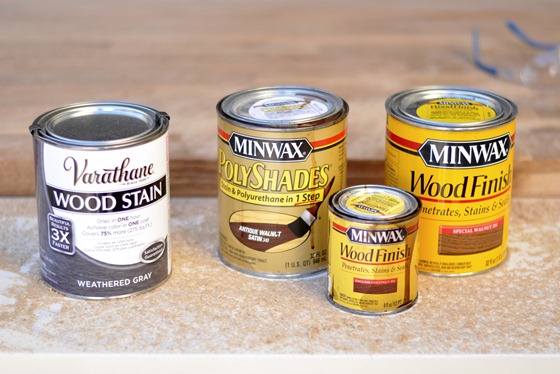
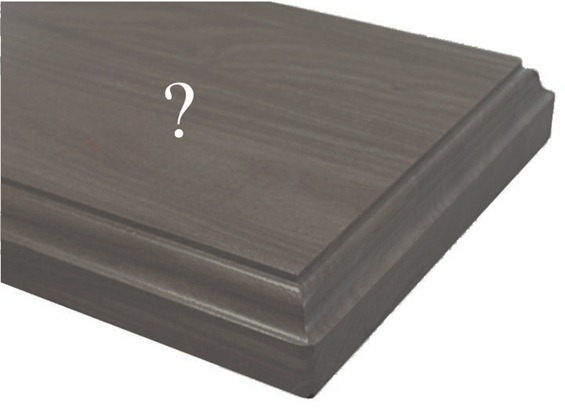
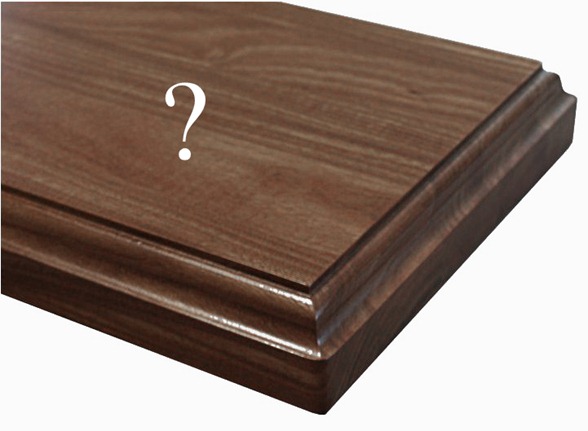
I’m torn about the finish stain – weathered gray or classic dark ?
The cabinets will be painted white and the glass tile will be spa blue, so either finish will work. I’ll experiment with the various stains and report back with the results!
I was one of the bloggers selected by True Value to work on the DIY Squad. I have been compensated for my time commitment to the program as well as my writing about my experience. I have also been compensated for the materials needed for my DIY project. My opinions are entirely my own and I have not been paid to publish positive comments.
.



Amazing! I cannot wait to see what you choose. I love both, but have been on a grey kick lately. I’m planning on grey stain for the dressers in my master bedroom.
Thanks for sharing this great tool with us! I can’t wait to see your finished result!
Leslie
House on the Way
I have a dark wood counter with a vessel sink. I LOVE the look, but it shows water droplets really badly. I’m constantly wiping up the counters. The weathered grey may be a bit more forgiving.
They look great! I like the weathered grey a little better, probably because I’m on a grey kick right now… Can’t wait to see what you & Matt choose!
looks fantastic…my hubby has done router work with mdf. it routers great as well..but a hint..keep a very consistent speed and pressure. and practice on some scraps if it’s the 1st time using a router ! it can be a bit tricky….
Ooh, that’s looking really great so far. We have a router that we don’t use nearly enough. Now you have me thinking about router bits!
I like the gray. Its a bit unusual and it will look awesome with your glass tiles.
I love you for this post! I have been looking for a top for my desk and I had no idea about the ikea wood countertop. Ohhh… and that edge… Perfect! Thanks for sharing this idea. You made my day!
I vote for the weathered grey!
Cool! I’m curious about the weathered gray, as I’ve been contemplating that for kitchen countertops.
I vote classic dark! Love it when people add a little bit of a custom tweak to the Ikea counters.
I had no idea it was that easy to make a pretty edge! Wow! I think the wood was definitely the best choice! I vote classic dark!
I love the gray one! I am not a fan of the wood look unless you are going for a rustic or english cottage type thing… great work! I’m itching to buy a fixer-upper for me and my husband to be, but we’ll see!
Wow! This is so informative. I had no idea this could be a DIY project. Can’t wait to see how it turns out. I vote for the classic dark–good contrast to the blue.
vote for weathered gray, will be cooler with the blue.
I vote for the dark wood stain. Looks great so far – this excactly what I want to do for a kitchen island countertop when the time comes for that update! Have you considered using waterlox for sealing it – I’ve read great things about it but don’t have any personal experience with it.
Routers are so awesome.
The dark wood is really pretty, but I’m loving that gray. If it were my home, I’d wonder if the dark were a better long term choice, though.
Beautiful work! I like both of the colors shown, but what about a deep, rich classic cherry or mahogany?
looks nice. i’m waayy too messy and splashy with the h2O to have wood counter in my master bath but looks so beautiful
I think the gray would look great! We bought a large vessel sink for our hall bath and are still deciding on the countertop — great idea!
Nice finishing touches to the wood! If that were me I think I would choose the gray. Either one you choose I am sure it will look great! Can’t wait to see the finished result.
wow!!! just lovely! I vote for the classic dark.
I vote for the weathered gray. It will look beautiful with that backsplash and white cabinets. I’m excited to see the final results!!
That is gorgeous! I vote for classic dark.
That’s funny I did a very similar project this week, I built a counter top by laminating 2″ boards into an 8 ft counter , because it cost less than $70 to do that. I routered the edge with the same bit , I stained it deep dark brown three coats of oil stain Varathanes Kona. I an just attaching the under mount sink right now , this is for my laundry room. I may do this for my master bath also. Hopefully it will be installed and functional tomorrow.
Your counter looks great.
Chris
I love the edging of the countertop. Now I totally want to make a desk with that edge.
I vote for the dark! It’ll look so pretty.
:)
Beautiful. Classic dark stain, for sure.
Loving it all! I really like both stains but lean towards the dark stain. It’ll contrast nicely but I’m also not sure how you’re picturing the rest of the room. Excited to see the rest!
We just did a walnut floating shelf with a vessel sink in our guest bathroom and I’d recommend Waterlox for sealing your wood. I don’t know if you can get it in California, but it is well worth it to track down. Perfect for protecting wood in a bathroom/wet environment. Good luck!
Hi Brit, I’ve heard such great things about Waterlox – yep I’m gonna track it down!
Kate
I Love the classic dark stain in the second picture! Can you tell me what color of stain that is? I’m getting ready to stain my kitchen countertops and that is exactly the shade I’m going for! Thank you!!
Hi Jenny, it doesn’t have a specified color but Minwax ‘Walnut’ is close!
Kate
Can’t wait to see the results – hurry!!! I vote for the gray.
Love this idea! I love the white, wood look. You’ve used it before on other projects and it’s so classic. Since reading your posts I’ve painted two prices white with dark wood stain. They’re gorgeous!!!
Weathered gray, love it and its different than the norm,but I would prefer classic wood for a kitchen. Good luck.
I see the can of Polyshades. DO NOT use it on the counter top unless you seal it really well. Really well. We used it to refinish our cabinets and it has not held up at all. We’re talking cabinet doors and frames which are not subject to the water that a counter top would be. Seriously give more than a thought before you use the polyshades.
Hi Debbie, I totally agree! You have to get the color right first before you add Poly, that one is just there for a color idea, but not the actual product, but so so glad you mentioned it!
I have absolutely no idea about the wood finish: I think the “weathered gray” might look nicer in the space and do well with the kiddos, but the classic finish might blend better with your house. Either way, I’m sure the room will come out wonderfully.
Waiting to see the result !!!!
I vote classic dark. But I’m partial since we put in wood countertops with white cabinets in our kitchen this year. We almost did the glass tile too, but opted for marble tiles instead. We stained them in Minwax Dark Walnut and sealed them with Satin Waterlox. You’ll love the wood either color!
Weathered grey would look lovely with the other choices you’ve made.You can always go darker at a later date. CTD
I love the weathered gray.
The grey! The grey! :)
Classic dark – it’s timeless and will look beautiful with your colour scheme and glass tile.
The edge looks great!!!! As for color, I vote (oh, that reminds me it’s election day …. got to grab my coat, scarf, gloves, etc. and head out to vote soon), I vote for the classic dark (which will beautifully pop against the light colors of white + blue). I believe you life softer tones/hues (like the gray), but dark color is well classic beauty. And hey, 4 years from now (next presidential election) u can revamp it’s color (the beauty of wood). :)
I really like the gray. Can’t wait to see it finished!
Super project, and great DIY! I have been dreaming up a new kitchen in which the perimiter counters are butcher block and the island is stone. I was thinking about where I would get the edge beveled to match the stone – and now I know I can easily do it myself. I’ll have to find a tool like that here. Thanks!
Vera
The edging looks great..The color choice is harder but I think it would be the gray for me..
I don’t think you can go wrong with either color and I am loving the wood! Varathane’s water based floor polyurethane would be another good option for finishing. I loved the smooth durable finish it gave my stair treads
My vote is the classic wood. And may I add, your husband has very muscular arms in that shot? (My husband likes it when I tell him that, and I think everyone can use genuine compliments.) : )
Ha ha Kathy! Yes, I said that too, he’s been working out!!!
Kate
Love the weathered grey!
Hey Kate—be warned that the router can woo you in to many more cool projects!
I have a dedicated router table and the same free-style router you just got AND ABOUT 30 different router bits profiles now! It’s wAAAy fUn!
Catherine
I’m so forgetful~~
your project looks really good, can’t wait to see the final design!
Catherine
Hey, great minds think alike. We just did our kitchen counters in IKEA butcher block and added a very similar decorative edge. I did a little tutorial on how to cut the edge as well.
I like how your bit ended up making it look, very classic. I think this is a great use for butcher block counters, especially once you make it waterproof.
One thing we really needed to watch out for when adding the edge to our oak counter is the tendency “fuzz” up the cut or even burn the edges. The best way to overcome that is to make multiple cuts, taking a little away each time.
Here’s our post if you’re interested. http://www.oldtownhome.com/2012/9/5/Living-On-the-Edge-Adding-a-Decorative-Edge-to-Butcher-Block-Counters/
The other advantage to a decorative edge is the ability to use that edge to join two pieces of butcher block in a near seamless manner using the same router bit in a negative fashion. This is what we had to do in the corner of our counters in front of our sink. It’s a cool trick all made possible by the router.
http://www.oldtownhome.com/2012/9/11/Stick-a-Fork-in-Them-The-IKEA-Butcher-Block-Counters-are-Done/
Thanks so much for sharing Alex, beautiful job !!!
Kate
I love the look of that weathered gray stain! I hate my dining room table because of its color (cherry) — but it’s a good size for our apartment, and I don’t want to buy something new until I can buy it for the long haul. I wonder how that stain would work on top of cherry wood? I don’t want to strip it. Hmm.
Your posts always motivate me. :)
My husband and I are interesting in doing the same sort of counter top for our bath vanity. What do you recommend for securing the counter to the base? Just wood glue?
I love the dark wood stain, I think it would be fresh and bring an element of natural beauty. Love the color of back splash tiles too!
I like the dark gray and the routed edge, too!
Great project! I vote for the dark wood stain because I like that better with the wall color.
Where did you purchase the wooden countertop? The work you’ve put into it has made it just lovely!
Hi Trish – they are IKEA countertops!
Now, this is what I call vision! What beautiful results and well worth the wait!
Cheers!,
Barbara