Have I ever mentioned I want to take up sculpture? No, I mean it, I really do. I want to take a real class someday to study the art form, it intrigues and inspires me to no end. So as I was aimlessly browsing the aisles of the craft store the other day (a frequent habit) I came across some moldable stone clay and thought, hey why not give it a try – I’m adventurous like that with $10 to burn.
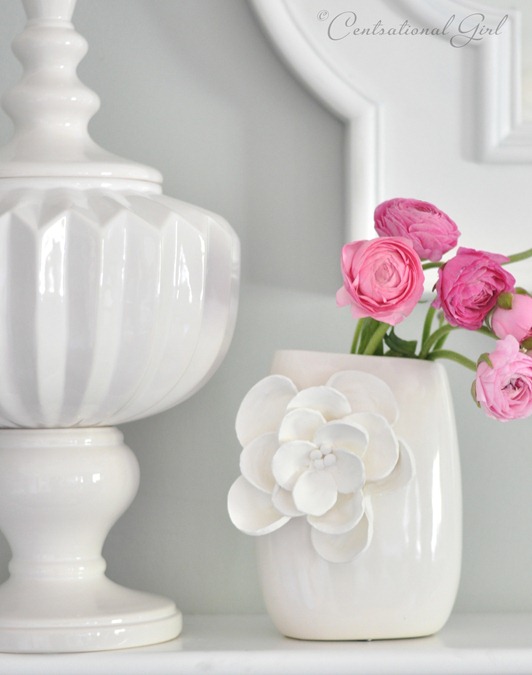
What started out as an experiment ended up as something I’m rather proud of, this pretty three dimensional clay petal vase that combines two loves of mine: white ceramic sculptural thingies and very big blooms.
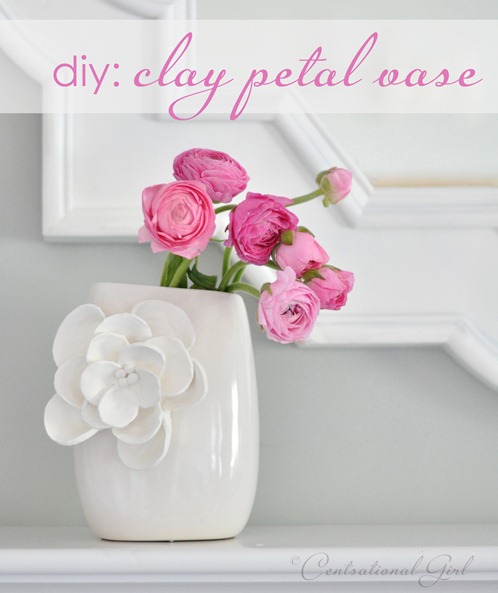
No I didn’t sculpt the vase (ha! I wish!) that was a purchase from Michaels, but I did sculpt the large bloom mounted on the front out of the white stone clay with my very own fingers. I’ll show you how.
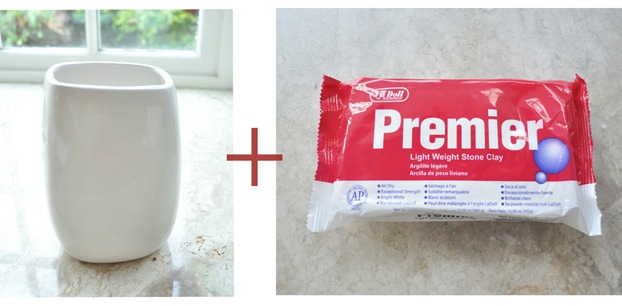
First, grab yourself a pretty vase or vessel and some stone clay at a craft store. I used the Premier version and was happy to find it’s very soft and silky to the touch. Dare I say, sensual? Hmm, maybe too strong a word, but it’s a really soft texture to work with.
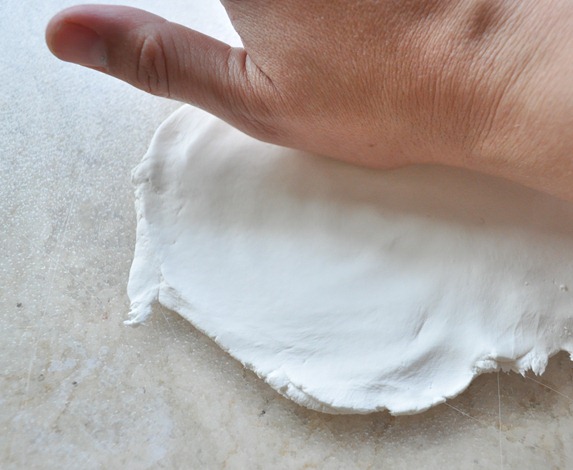
I pulled off a piece and started to roll it out with a small PlayDoh rolling pin I borrowed from the kids’ stash – that didn’t work very well so instead I used my palm to create a smooth flat surface, and learned the warmth of my hand worked like magic.
Again experimenting, I tried different tools but found the back of a butter knife worked best for carving the petals.
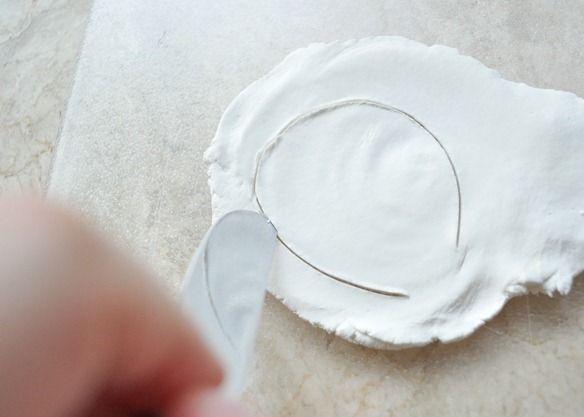
Use the back of a steak knife (another experiment) to separate the clay petal from your work surface, then smooth with your finger you create little petals, like so.
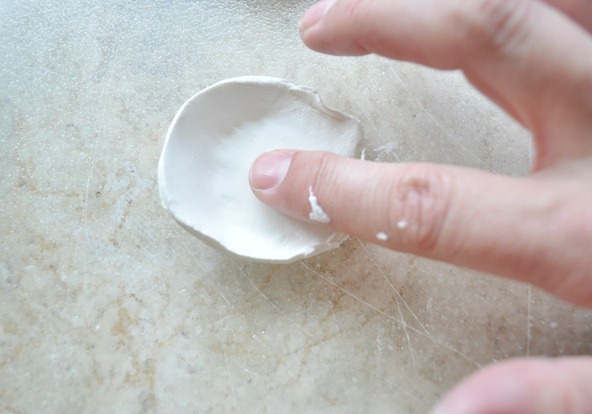
Pinching the petals at the base helps them curl up a little bit more.
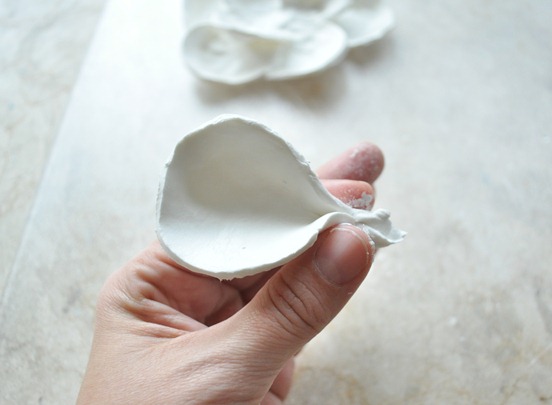
At this moment, you’ve probably concluded that this girl needs a manicure but honestly who’s got time (I don’t) – but I welcome suggestions and I’ve read good things about shellac, is that right? Is that what we’re doing these days? Somebody fill me in.
Build your blooms, large or small, by layering your petals one by one.
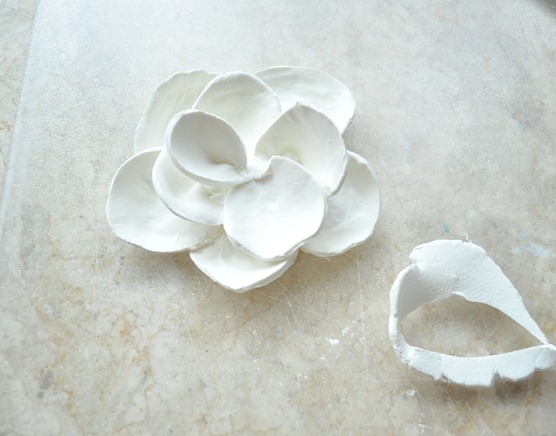
Smooth any imperfections, then leave the finished bloom to air dry overnight (with this particular brand of clay). Once it’s solid, use an adhesive like Liquid Nails to attach the bloom to the vase, but make sure you allow sufficient drying time for the adhesive to cure before standing the vase up.
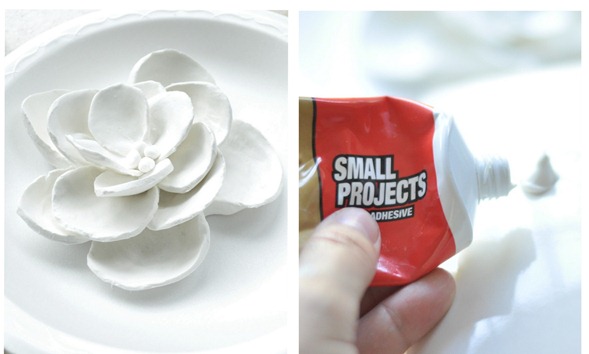
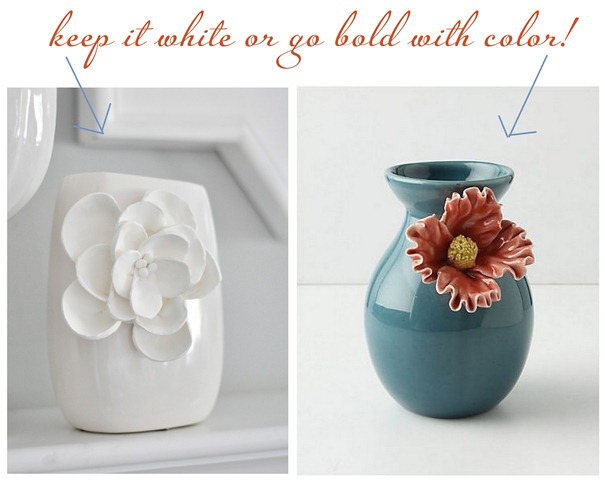
And hey, there’s no need to do white on white – the dry clay is paintable so if you’re wanting color, then go for something more like this anemone vase by Anthropologie. A little craft enamel paint topped with a coat of high gloss will get you a similar look.
Practice with the technique and you’ll end up with your own keepsake clay petal vase.
Who knows what this new found love of stone clay will lead to – I know I’ll definitely try my hand at sculpting more little things if only to make whimsical little figurines with oddly painted faces to humor myself and my children. :) For anyone who’s curious, that ridged ceramic urn is something I bought as a souvenir from my Joss & Main sale a few months ago, but you can find both a small and large version here.
Crafted something for your home for the spring season? Link it up, can’t wait to see it! Links open until Saturday March 25th at midnight.
Please be so kind as to visit the two links above yours and leave a comment!
.

Love how the clay flower turned out. Haven’t played with that stuff in years! I can’t wait to see all the spring ideas posted. Thanks for hosting.
Thanks ladies for all the suggestions on nail care and shellac! I think I’ll try it for the next special occasion !
Kate
Kate, you did a grand job on that flower. I may have to try that out. Thanks for hosting.
That turned out really great! I love the idea of doing it with some color too.
Kate,
Thanks for hosting the Spring Craft Edition of the Spring Fling Link Party!
You are a genius with the clay flower! I am thinking my house will be in “bloom” here shortly.
And the manicure…. I painted mine {about 2-3 weeks ago}… but I totally have chipping going on all over. Not a pretty sight. You think I could take some polish remover to them…. but who has the time? Right? BTW, your nails look just lovely.
HAPPY SPRING!
~Joanne~
Ohmygoodness!! Your vase is so pretty! I love the big flower petals!
Thanks for the party Kate – these are always a lot of fun. I love looking at all of the seasonal projects. And yes – shellac is the way to go! Big difference in how long the mani lasts :)
Love the vase – I will definitely have to try that sometime. Maybe do one for each season in a different tone-on-tone color.
Have a great day!
Shari
Your clay flower is very elegant, great project! I always love playing with play dough, will have to try this grown-up version. :) Thanks for hosting the party, looks like lots of great inspiration!
Hey, friend! I’m pushing the craft envelope with my sis’s orange table, but hey it’s sorta crafty too. Love your vase. You might have a new career ahead of you. :)
You did an excellent job with the clay flower. I hope you get to take a sculpting class someday… sounds like fun. This was such a creative project!
you never cease to amaze me! This is beautiful!
WOW that is really amazing! You should be proud – now I want to go out and buy me some clay.
wonderful flower! If you decide to make multiple flowers, craft stores sell small pasta machines that you can use to roll the clay out easily. You can make it in varying thicknesses – so easy!
Looks great, Kate! I’ve been eyeing that Anthro vase for ages, this is a great alternative. I think you have a good future as a sculpter : )
Oh that vase is AMAZING!! Thanks for sharing the tutorial!
I’m hosting a little Spring Inspiration Pinterest Contest if anyone is interested…HOP ON OVER!
~Liz@HoosierHomemade
LOVE it!!! Want to run out and buy clay right this minute! :D
Wow! That is amazing! I will definitely be trying this! Thanks!!!
Oh I love this vase of yours! Have you tried using paper clay? I’ve only ever found it at Hob Lob, but it’s really fun to play with too. You’ve given me a great idea – I see a butterfly clay vase in my future. ;)
Love it–REALLY love it!! Thanks for hosting for us, friend!
:-)
shaunna
That’s so funny! I just bought some clay this past week to copy that exact vase from Anthropologie!! Yours is simply amazing. I can’t wait to start on my vase now! Thanks for hosting :)
So pretty, Kate. I’ve always wanted to make something from clay too. Great inspiration! Thanks for hosting such a fun party! Looking forward to checking out the spring crafty ideas!
How inspiring and pretty! I love it! Thanks for hosting :).
It turned out beautiful! I’ve always been nervous to work with clay. Maybe I’ll give it a try. Thanks for letting up link up our Spring craft projects.
Thanks for sharing this beautiful {doable} project! I think I might just try it :)
Thanks for hosting Kate! Gosh, so many great projects to look at today! I love Spring!
Hi Kate –
Happy Spring! I hope the weather in CA is getting better after hearing that it has been damp and rainy. Here on the east coast we are enjoying sunny 70 – 80 degree days.
Your white flower vase and pretty pink flowers looks so refreshing. I usually bring in branches this time of year to force open – no need to force open- they are all blooming outside already.
My best- Diane
Beautiful project! I haven’t used clay in ages, but I’d love to do one of those Anthropologie knockoffs. Thanks for sharing and for hosting this party.
Adore it! It looks perfect, Kate! Now you have me wanting to sculpt something…
Love love LOVE the vase Kate! It looks (pardon me….) centsational :)
Very very pretty! I’ve never thought about using clay…but now you’ve inspired me!
Thanks for hosting!
Jo-Anna
Oh my word that is awesome! I think I could actually pull off this craft :) I’m not that great with the pottery stuff. Love the white and bold picture as well. Anthro looking :) Thanks so much for hosting the party. I just linked up.
You have found a new calling. Great craft! I love leaving it white.
Inspiring, indeed – thank you, Kate. Not _anyone_ could smack a homemade clay flower on a finished vase and have it look good, y’know – certainly not moi! It’s a testament to your _talent_ that your result was so professional and polished…and speaking of polish – I was wondering if you thought of putting a coat of shellac on your flower (not your nails – too time-consuming I hear) to capture the same sheen as the vase – or did you make a conscious decision _not_ to put sheen on the flower because you liked the differing textures – or – do I need to dust off my laptop screen because there _is_ a sheen on the flower…’wondering in Washington…
Exactly Kathleen, I loved the matte contrast of the petals with the sheen of the ceramic, but I am thinking of painting the petals pale peony pink, lovely right? All part of the experiment!
Kate
Oh my word, that is just beautiful. Gosh, you constantly impress me with your talents. I admit that I can not even think of this one to try yet. Because I already have such a long “got to do” list from your inspirations you post. Still trying to save money.. lol.
How pretty! I’ve been looking at those vases trying to figure out how to do my own… great job!
Hope you’re having a great week!
Hugs,
G
Your vase is stunning!! I love it. Thanks so much for hosting!
So lovely! Just wondering how you made the colored version?
Kristin, the bold colored vase is from Anthropologie, link is just above!
Kate
Thanks for sharing this great idea! I love how you made your vase completely white. So classy, and it matches any decor. Just lovely! I look forward to checking out more of the great spring projects linked up. :)
I absolutely love the organic touch the flower provides to the vase. This would make an excellent project for a girl’s birthday party.
Thank you so very much for hosting. I have linked up two projects that I hope you enjoy.
I just bought two vases from HomeGoods yesterday (in a bright coral color) that have this same look! Wow! I never would have thought of crafting the look myself, good to know how :)
Damn girl you really are talented. I love how it came out. Thanks for sharing the “how-to”…just might have to try that one day. :)
kate! sorry for the duplicate posting, the URL is all janky in my first link :(
PS, you’re so crafty!
Hi, Kate! Thank you so much for hosting. I linked up earlier on my phone but couldn’t leave a comment.
I looove the flower you sculpted for your vase. Trés lovely! It looks amazing with those gorgeous blooms. :)
Your project turned out gorgeous. I work will clay a lot but use the kiln fired clay. Your version looks so much easier and quicker. Love the vase!
First time partying here~thanks for hosting.
Thank you for hosting this Spring Party!
Kate, whatever you do turns out so beautiful!!
Oops….I added my link, but have no idea where that pic came from! It’s not mine, and don’t want to take credit for whatever it is….have no idea!
Laura
(Oh….and I do love your vase….what a cool idea!)
As I was reading I was thinking about what a great project this would be for a little girls party… probably a slumber party though because of the drying over night thing! Thanks for hosting THIS party, Kate!
Whew…I was able to delete and repost….with my real picture! Sorry about that!
Thanks for hosting, love all the inspiring links!
The flower you created and added to your face really gives it some personality. I would never have thought to do that. Thanks for hosting the party.
Love your vase Kate! What a cute idea! Thank’s for hosting the link party!
Kate, I love it!! You’re such an inspiration.
Thanks for hosting Kate! Now I’m going to have to go get some of that stone clay to play around with… that vase if just gorgeous!
delighted to join the fun, kate. so many fun and inspiring links, thank you for hosting.
xo
molly
That looks great, kate! and I would have believed you made the vase, too! ;) I used that clay on a recent project too, I wrapped it around sticks to resemble antlers…I thought the Crazy Crafter police were going to come after me! You know, when you wonder if your craft crosses the line to too crafty!?! ;) And dang it, I’ve been so busy at work I missed out on this party fun!
Thanks for hosting, it’s fun to look at all these projects! We’ve got to get on something soon so we’ll have a spring project to link up of our own…until then we’ll enjoy this great collection – thanks!
It’s beautiful, Kate! You certainly are a woman who wears many hats! I took a sculpting class many years ago and loved it. Something about getting my hands in the clay, playing around with it and creating whatever came to me. It was great meditation in a way. Your vase is lovely and looks very professional! I like it better than the one at Anthropologie!
What a beautiful vase. I love this idea and definitely need to try it. Thanks for sharing! xo
Love the flower you created – you always have such creative ideas! Thanks for hosting this fab party ;) xo Jenna
Super love this idea Kate! You made it look so easy (actually even your hard projects seem easy when you describe it until I actually try it out! :-)). For sure I will try this one out!
have you seen Heather Knight’s works? her company is Element Design Studio, the clay you used might be slightly similar to what she uses and her works are amazing!
Thank you so much for sharing this!
I’m commenting to fill you in on the Shellac info. I am a cosmetologist and I have been using the Shellac for over 2 years. I love it! (but only if it is done right, with the right product).
There are a lot of products out there that claim to be “gel polish” but in my experience Creative Nail Design (CND) Shellac is the best one out there and you can only get it in the salon. If it is done correctly, it will last you up to 3 weeks with no chipping! Whee! If you decide to get it done, make sure you specify that you want the CND Shellac.
I’m happy to answer any questions you have about it. Just let me know!
I hope that helps~
Clarissa @ A Little Stone House
totally OT but I know a while back you had a post about Picnik closing – the guys who originally built it and funded it (both!) tried to buy it back from Google but Google is not selling. They want people to use Google+ apparently (whatever…)
Anyway, some of the guys who made the orig Picnik have released http://www.picmonkey.com/ Picmonkey and will be adding new stuff to it. It’s pretty much the same as Picnik with regards to functionality.
So there is an alternative!
Thanks Kristen! Yep, I’ve checked it out, in fact they contacte me to let me know, PicMonkey has many of the same features, love it!
Kate
Kate! You are a lady of too many talents! ;) I LOVE this vase… so delicate and pretty. Loved it so much that I featured it today!
http://enjoyerofgrace.blogspot.com/2012/03/friday-treats.html
Love the vase and love your nails! Reason, you are real. I have tried every product out there to keep my nails looking nice. Bottom line, if you do the kind of things we do, even shellac will chip (although rarely) but it will start to wear after about a week, especially on your dominant hand. I have struggled with this for years and still do. Then you have to figure in the cost and the time of it all. However, I love for my nails to look nice, so I have concluded that healthy, clean nails are the ticket. Twice a week I use a good cuticle remover, pushing them back with a orange stick, and then I use a good cuticle nipper. Invest in a high quality one. I have a couple of good files and keep them short and filed on the square side. I also use a cuticle oil at night and in the morning, which keeps everything looking healthy. If I want polish, I use an Essie or OPI light pink or clear shades and do my own. If it wears, it is less conspicuous. I’ve grown to become happy with this. If I’m on vacation, shellac it is.
Very nice! Can’t wait to see what else you sculpt.
The flower reminds me of something I used to do in the early 90s and I’m not sure if the products are still out there or not. It was called petal porcelain. You would take an artificial flower and spray this petal porcelain product on it and it would coat and harden the artificial flower and would look like white porcelain. You would then paint it and add the “china flowers” to baskets, boxes, vases, wreaths, etc. Does anyone know if that product is still available? I haven’t seen it in years.
I am so making this! L-O-V-E
PS great linky party!!
Thanks Kate for taking the time out of your busy days to host this linky party!! I love your clay vase DIY, so simple and classic – you are very ingenious! I have been reading your blog ‘behind the scenes’ for a loooong time, and now am following you with GFC….what took me so long??? :D Please visit my blog and say hello sometime – i love to make new bloggy friends! Hope you have a wonderful weekend!! My family is going to see the Hunger Games movie tonite – should be a lot of fun :) Heather @ settingforfour.blogspot.com
That is such a great idea! And super cute! I’ve been working with polymer clay for a couple of years now and I love it. There are so many possibilities. I’ve never used this kind of clay, but I do know that with polymer clay and many other types, once you have used a tool (like your butter or steak knife), it shouldn’t be used with food or come in contact with anything you eat. Just thought I would mention that.
Love your blog! Always love looking at the new things you’re doing. :)
Awesome vase, I may have to go get some clay to work with!!
Love the clay flower. I am most impressed with your creativity!
Love your clay flower! I’m a practicing artist who uses ceramics to make mixed media sculptures. My suggestion is to use an old pillow case (or ideally a piece of canvas) under your clay when you flatten it, and then it wont stick to the bench. It is easy to peel the clay off the canvas. Also turn it regularly when you are flattening it, and it is less likely to stick. Make sure you wash your piece of canvas regularly as the dust from dry clay is not good for your lungs.
I have pathetic nails, and with DIY around the house and sculpture in the studio my finger nails are a mess. I have used the shellac polish and found it fantastic. Looked perfect for 2 weeks, and ok for 3. It even held up while welding … You have to find someone who uses good product and takes the time to do it properly. The problem I found is that they have to etch (ie sand with a dremel looking thingy) the surface of your nails to get it to stick, then add a primer, etc, etc (sound familiar?). You can imagine after a couple of reapplications that your nail starts to thin. Imagine if you kept sanding back your wood furniture every 3 weeks … Anyway, I found I could get away with 3 applications, and then I had to let my nails grow out so they were thicker again. While they were growing out they looked TERRIBLE. Worse than they normally do, so I stopped doing it.
I will do it again for a special occasion, though. Especially as I am that girl who always dints regular nail polish because I cant sit still doing nothing long enough to let it cure properly.
What a great ideas everyone seems to have this spring! Thank you for bringing them all together!
I love your cute flower vase. I’ll have to give it a try.
Thanks for hosting! Just when I thought I was done with my spring decor I come across all these beautiful project links and well, now I will have re-evaluate! Beautiful blog–and great job on the vase!
Barbara @ Chase-thestar.blogspot.com
I am so impressed with your flower vase. It’s gorgeous. And who knew clay could be sensual!
Thanks for hosting the party. I’m excited to see what everyone has made, because I’m in need of some spring decor around here.
Love this and i can’t wait to dig into the links!
re manicures, i am a big fan of the peel and stick mani’s, sally hansen salon effects and kiss products. they are easy to apply and last for over a week and makes life easy and your nails fun and pretty!
I love love love Shellac! Agree with the cosmetologist: ONLY use Shellac, and make sure they use the CND drying lamp. My people lightly buff my nails and don’t sand them down, so I don’t have the problems the other poster did with it. LOVE it. :)
Love that vase! You better sign up for some classes, because you definitely have an eye for this.
Well, this was my first time linking and I didn’t know what I was doing :) I realize now I should have put Recovered Loveseat instead of my name where it says name. hahaha Live and learn!
I’ve followed your link parties for months and have gotten lots of inspiration — and found some great blogs too — as I hop around and check out the projects that catch my eye.
Your vase flower is so pretty! Not sure I can get modeling clay like that here but I’m going to have to find out. It looks like a fun project, and I can see other uses too… like a flower on top of a plain napkin ring, or decorating a simple picture frame…
The vase turned out beautiful! Love it!
I had the CND shellac put on my nails and it lasted for 3 weeks and looked great. The problem was when they took it off. Becausethey had to file the surface of my nails before they put it on and when they took it off, my natural nails were ruined. I have always had very thick and strong nails. When the shellac was removed, my nails were very thin and weak and broke constantly. They also looked terrible. That was over 3 months ago, and they are just finally starting to grow again without breaking. I would not do it again. I guess if it is something that you are going to keep doing,, it doesn’t matter if your naills look bad and are weak since the shellac would cover that. What’s frustrating is that I asked the girl if it would damage my nails and she said “no”.
Awesome project. I am definitely going to try out some polymer clay now. You have added something new to my “wanna do” list!!! Great link party as well. I will definitely be trying some of the crafts, and I am going to be super busy reading all the blogs that I’ve subscribed to as a result of this party. Thanks again for hosting such a great event!!!
I love it! I want to try to colorful version! :)
What kind of flowers are in your beautiful new vase?! I have silk florals just like them and love them! Thank you for sharing! :)
WOW! Looks beautiful and easy! It reminds of a vase I saw (but couldn’t afford) at Anthropoligie lately :)
That is so pretty, I think I’m going to try that!
I like the white on white though, and the anthropologie is super cute!!
I love how you can make virtually the same thing, for way cheaper.
This is so fabulous.
Ill have to try to play with the clay you are using. Ive been using sculpty but it comes out a bit more bumpy than I would like. This looks much smoother.
Just lovely! I think I could pull that off. Thanks for the inspiration and the tutorial.
I didn’t skim all the other comments to see if this was mentioned previously, but I used Sculpey to make my Christmas gifts this year (dishes imprinted with a doily — I don’t have a crafts blog though, haha) and since I didn’t paint them, I finished them with a high-gloss (air-drying) glaze that Sculpey makes. I found it at Michaels near all the clay. It’s a little vial and you apply it with a brush. It made it look that much more professional — it would match the sheen of your vase. This is a great project you did!
I am freeeaking obsessed with Shellac. I got OPI Axxium on Thursday of last week and I have one slightly wearing on one nail. I only noticed this because I stare at it nonstop because I’m obsessed with how well it stayed. I’ve heard that people can get chips after a few days but I’m definitely doing it again!
I absolutely love this!!!! Am going to try the flower this week.
I can hardly wait and thanks for the tutorial.
Carole
Your floral vase turned out AMAZING … I want to run out to Michael’s craft store now (muuust resist, need to finish a client’s design today first). Psst … i like your floral vase design better than Anthropologie … don’t tell them though :O
so i gave this a shot. the flowers turned out better than expected but they didn’t they didn’t dry very much over night?!?! wonder what i did wrong.
Hi Shannon, maybe give them one more day…. the will dry out eventually, pinky swear!
What a fun idea. Thanks for the printables too, always good to have on hand. I know a few pregnant people at the moment, so even if they don’t have a shower, I could probably still use this.