I’ve had this vision in my head for months now, a vision of crafting a picnic blanket that we could bring on our outdoor adventures, something with a country feel, but with fresh modern color too. We’re a picnicking tribe on the weekends when sunny skies appear, whether we head to the coast, the local park or ballgame, or just movies in the park. Having a cozy picnic blanket is always ideal!
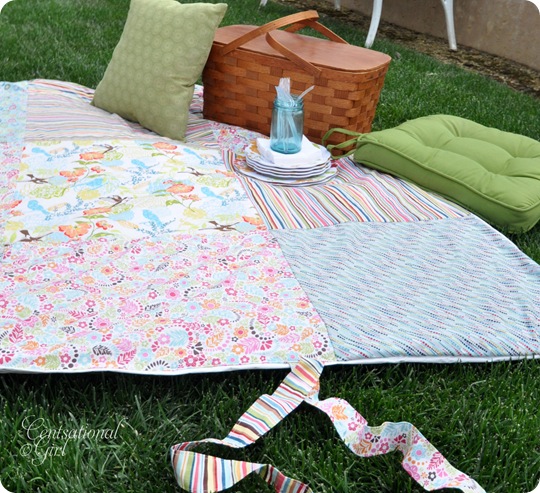
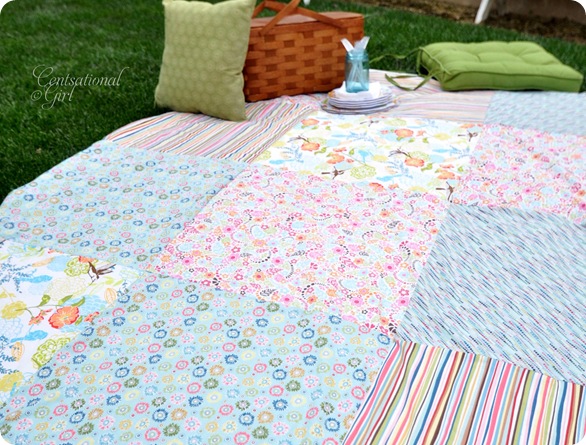
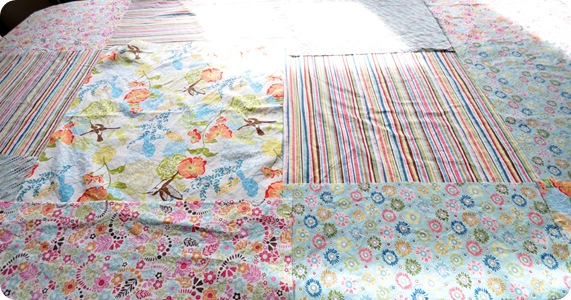
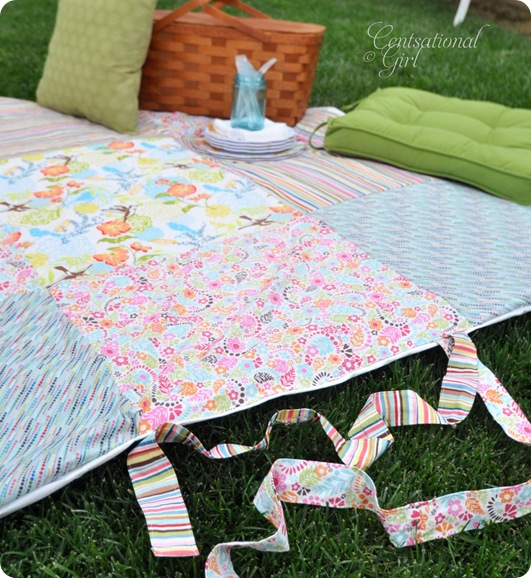
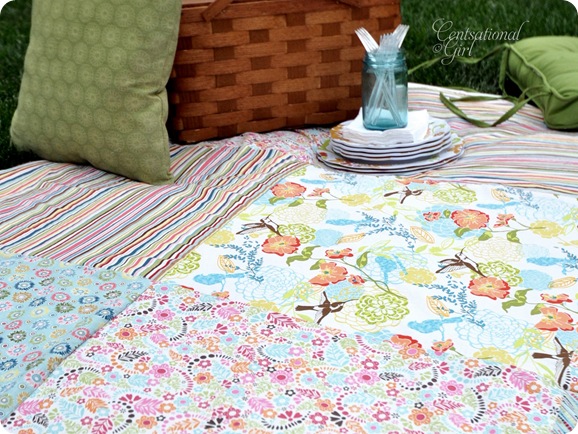
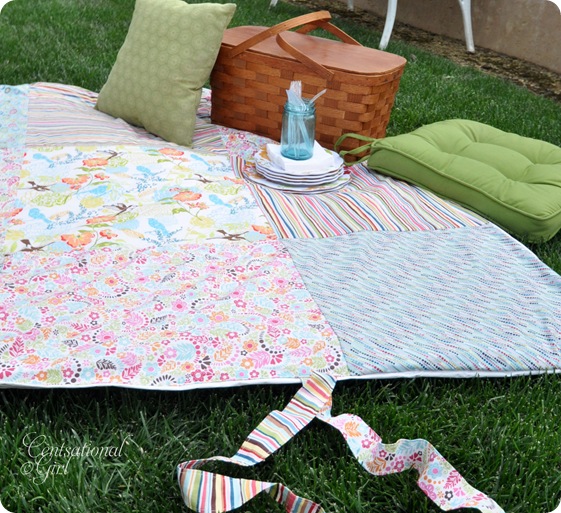
I’ve always wanted a patchwork picnic blanket, and last weekend I finally got around to making this one. I absolutely love the bright colors, the mix of blues and pinks with orange and turquoise. The patchwork nature also has that quilted nostalgic feel.
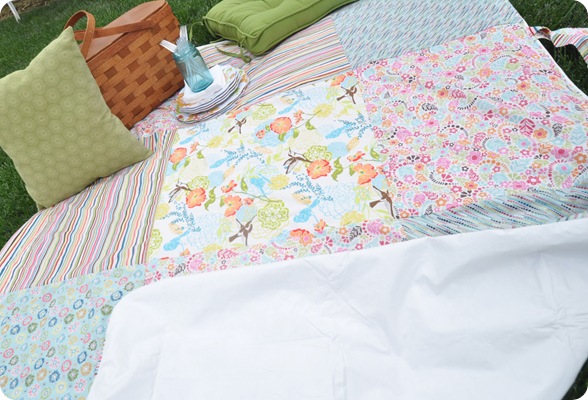
There is one final bonus beyond the handmade appeal. This version is water resistant due to the vinyl tablecloth sewn to the underside. It makes for one blanket I can throw down on any lawn, moist or dry. It also means it still multitasks as a tablecloth !!
How to Make a Water Resistant Patchwork Picnic Blanket:
Supplies You Will Need: complementary fabrics cut into squares; vinyl tablecloth (or other water resistant fabric)*; light quilt batting; measuring tape; pins; thread; scissors; needle; sewing machine. *I found my white vinyl table pad at Kmart for $8, and my cotton fabrics at Joann’s Fabrics.
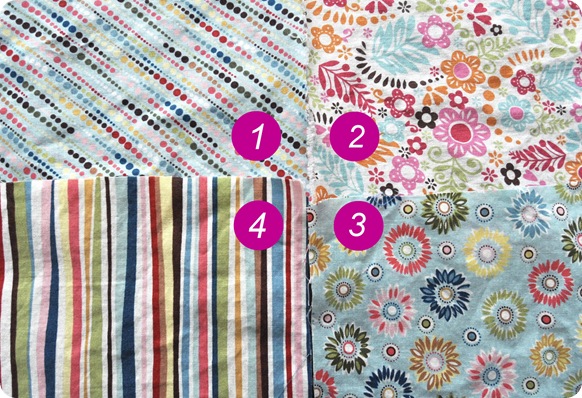
There’s no real magic formula to choosing fabrics, just look for patterns that appeal to you that share similar colors, whether it’s classic stripes or ginghams, or modern geometrics or florals.
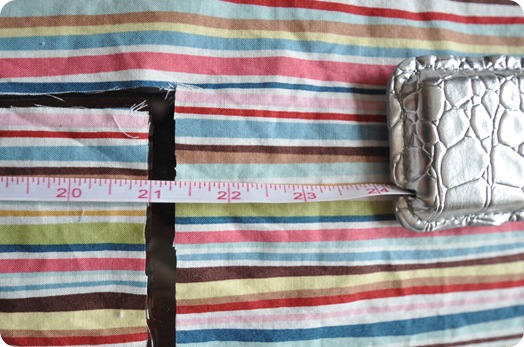
Prewash all of your cottons before you start, then cut your fabric swatches into squares. Since I used a 60” wide x 82” long vinyl tablecloth as my base, I wanted three 20” squares across and four 20” squares in length, so my 12 fabric squares were all cut to 21”, allowing ½” seam allowance on all sides.
Faux croc silver mini measuring tape, how do I love thee? Let me count the ways. 1 inch, 2 inches, 3 inches . . .
Once they’re cut, lay all of your squares down on a large surface and decide where they should fit in your final pattern.
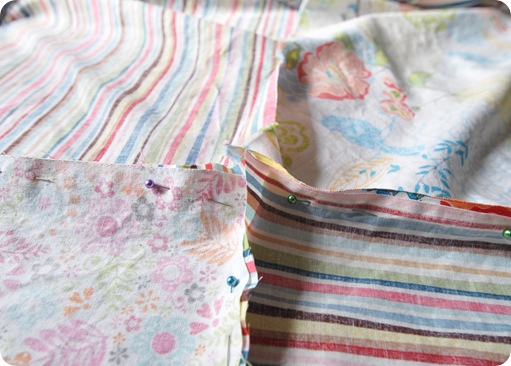
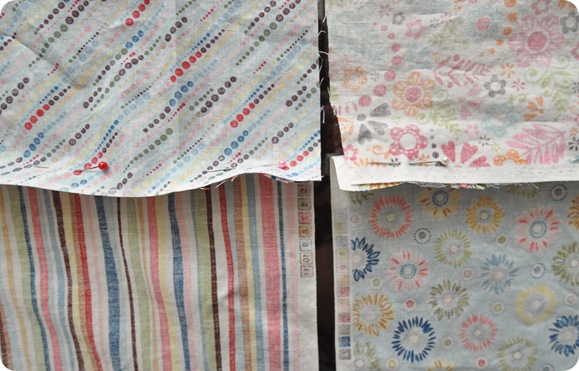
Obviously, the next step is sewing your squares together, so I just started pinning.
Don’t do that cause it ain’t that simple.
I ended up with this puckered ridiculous mess.
Enter seam ripper.
Cue frustration.
Then I thought, well obviously someone else has figured out how to get the perfect seams and how to get your points to match. Quilters must have the secret I reasoned. So I went online. Don’t you just love the internet? When I was young, it was “Hey kid, go look it up in an encyclopedia.” Now we have Google. Amen.
I found a helpful video on how to nest patchwork quilt seams and learned a very useful technique on how to get your points to match. Sound completely intimidating right? “Nest. Patchwork. Quilt. Seams.” Aaaaahhh! I admit, I was afraid. Very afraid. But I watched, and listened, and learned. You quilters sure know what you’re talking about.
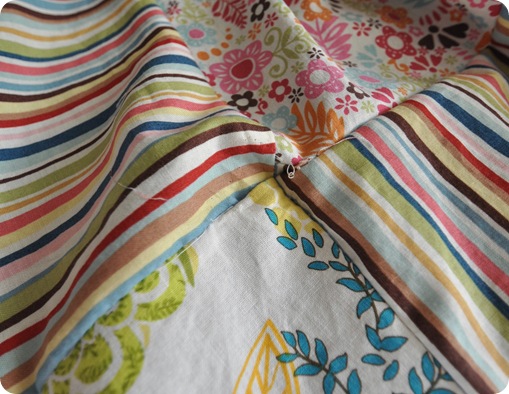
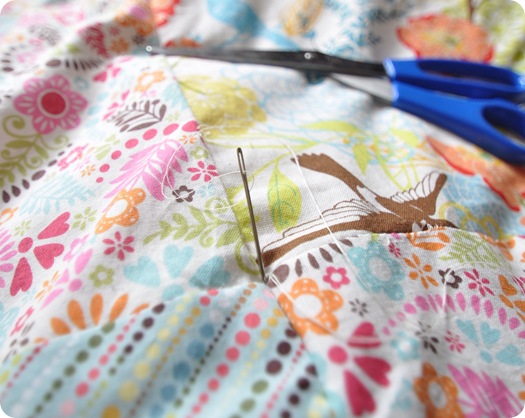
Looky loo at my crisp points!
Never thought I’d hear myself say that. Crispy points! Crispy points!!!
OK, I’m done.
No I’m not.
Here’s how to get those coveted oh-so-crisp points:
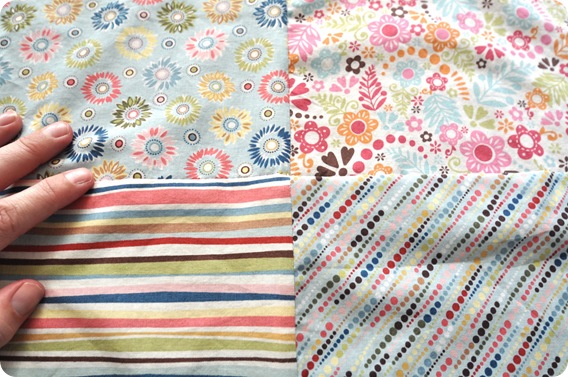
Work with four squares at a time and decide your fabric placement.
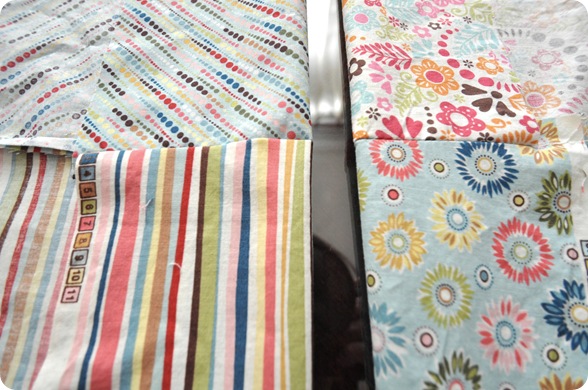
Flip them upside down, and pin squares 1 and 4, and then 2 and 3 together, then sew those sections on sewing machine.
Match up your new seams to each other, then (like in the video) pin them together, and hem for the perfect matching points. Seeeew easy. Hardy har.
Work your way around, adding two more sections at a time, following the nesting corners method. Then pat yourself on the back and have a glass of wine.
Next, flip your completed patchwork cotton patchwork pattern upside down, add the batting on top of that, and then your vinyl tablecloth (also flipped inside out). No pic, sorry, it was late at night. Sew it all together all around, but leave one square open to flip it right side out.
To hold it together if and when it goes through the wash, either sew along the seams between the patchwork pieces, or tack together with a few stitches by hand (like I did) where your fabric meets in each corner.
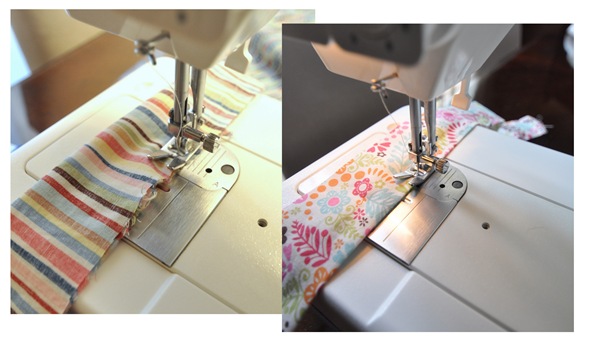
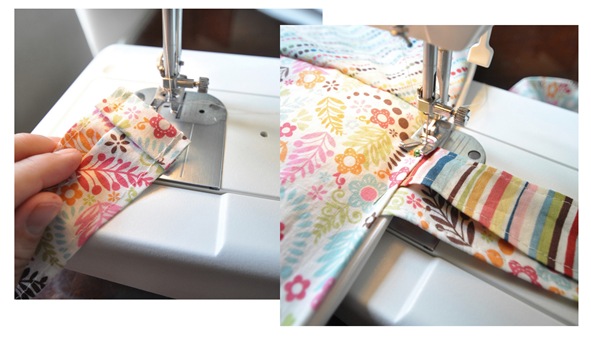
The last step is those charming colorful ties, it’s the easiest part, you’re almost done! With your fabric scraps, make a long tie (approximately 30” long) by flipping a 3” strip inside out and sewing one long seam. Work a safety pin through to flip the fabric right side out, then seam both edges so it will remain flat after it goes through the wash.
Seam the edges, then attach both ties to that final unfinished edge of your last square. Close up that last square of your picnic blanket after those ties are attached.
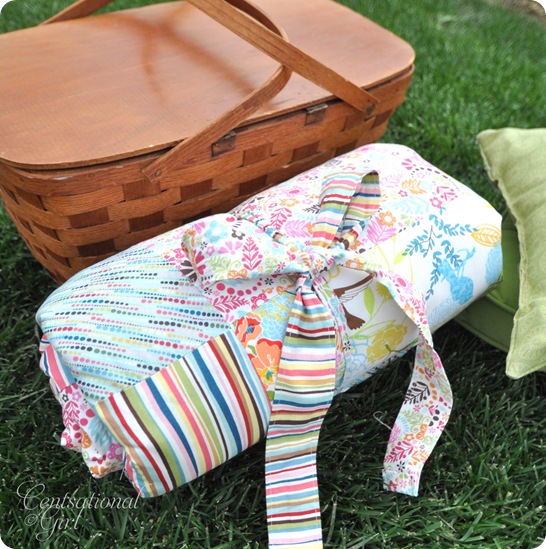
The nicest thing about those charming colorful ties you make?
The perfect package they make at the end of your picnic.
This was a time consuming project, considering my learning curve. It took me 6 hours over two days from start to finish, but it was completely worth it for this new keepsake.
This classic picnic basket was a fun find from an antique store, and we pack it with plates, napkins and goodies on our local adventures, even those as near as our own backyard.
Now let those warm weather outings begin!
.


Great tutorial! I was wondering how you were going to “waterproof” it…the vinyl pad makes sense. :) I love the ties…being able to neatly wrap it up is a huge plus. That could easily be stored in a bin in the car for park picnic days. Such a pretty project! :)
Hi Kate-
I love the fabric mix you chose. All yummy colors. I totally understand your frustration with matching up the patchwork – it is harder than it looks. Yours looks perfect and worth the hours you lovingly put into it. I would like to make one to use on the beach -with beach towels and no lining. Wow! It would be perfect with ties to roll it up and carry it to and fro. Thanks for the inspiration.
My best- Diane
I love the idea of the tablecloth for the back side…what a perfect solution!..good job with your points by the way
It’s beautiful! Where on earth did you get your measuring tape? I’m seriously loving it!
I linked this from my blog, LOVE IT! I can’t wait to make one.
this is so gorgeous, I can’t believe you MADE It! Quilting always looks SO intimidating. I’m happy to see someone who went for it. So nice!!
Sweet! Love it, can I go an a picnic with you?! Janell
That is seriously the cutest picnic blanket I have ever seen! And great tutorial, as usual!
It looks so pretty, Kate. I wish I could say I will now go make it but who am I kidding? Any chance you’ll be making more to sell? Hey, a girl can hope!
What a great project. Thanks for the tutorial. I don’t sew…at all…so it was kind of all greek to me but I am hoping to pass this along to my mom and she can make it for us! I love all your fabric choices. Makes me want to go on a picnic right NOW!
Jennifer
Incredibly cute! I NEED to make this. :-) Just wanted to let you know that I featured your blog and this project in a link-up on my blog!
Thanks so much for sharing!
Have a great day and God bless,
Shannon
Great job on the blanket! I love the idea of making the top patchwork and using the batting. I made something similar last year if you want to check it out: http://thecottagehome.blogspot.com/2010/04/waterproof-picnic-blanket-tutorial.html – I think you’re going to love having the blanket be waterproof – it makes a world of difference when the grass is still wet from the morning dew!! Lovely work!
Beautiful picnic quilt. My grandmother and I used to make these. Lots of fun!!!
Hey Kate,
Great project! I happen to have a stash of May Butler vinyl covered cotton fabric that will perfect for this.
Thanks for sharing with us. Have a lovely California day.
Janet xox
http://theemptynest-janet.blogspot.com/
Sew pretty! Great job, and I live that you can just tie it up!
It’s beautiful, and I love that it has the vinyl on the bottom. I just might have to make this one day when I’m feeling particularly brave. Thanks for sharing!!
This is really cute! I love the Idea of having it waterproof on the bottom! So easy to clean up when your done!
Very cute. TJ Maxx has had some really cute vinyl tablecloths for $5 and I picked up a few just because I knew I could make something cool with them. I think this is it.
My only fear: I am guessing you will machine wash this in cold water on the delicate cycle and hang dry??? I hate to go to all the work and then ruin it in the washing machine.
Wonderful idea!
Susan
I couldn’t help but laugh (in a nice way of course!) at your first attempt at sewing the patchwork together. I remember my first attempt at quilting 6 years ago :) Now I’m an avid quilter
I’ve always wanted to make one of these. Yours turned out soo adorable. Thanks for the how to. I’m very into picnicking, it’s high on my favorite things list.
Emilly
I love it! Beautiful fabric choices. And that tie. Genius. This is too advanced for my level (I’m just learning to sew), but I will comeback to this project. Thanks for sharing!
This was so inspiring! Your blanket is beautiful and will be cherished by your kiddos. :) Thank you so much for sharing, because I’m inspired to make my own and one for my mom for Mother’s Day.
I love love love this! My kids are 5 and 6 – at just the right age to begin soccer and t-ball, hiking at the state park and picnics in the backyard. I’m so tired of schlepping around the camping chairs – this is perfect! I’m a pretty lousy seamstress, but this inspires me. Thanks so much!
I love this idea! I’m thinking of using scraps of my kids’ outgrown clothes to produce the quilt. That would add some sentimental value while making it practically free!
Thanks for the tutorial. I am learning to sew, thankfully my mom is great at it. I think I will add this to my project list. I’m sure I can convince her to “help” me.
SO CUTE! Great tutorial. Now you need the perfect table to go on your wonderful blanket. Check out the one I made for our family to picnic on. http://anythingologyblog.blogspot.com/2010/08/table-in-bag.html
Hey Sarah, the measuring tape was a Christmas gift from a friend, it couldn’t have cost more than $5 bucks and truth be told, probably my favorite gift of the season, so thoughtful!!!!
HI Chelssya, I love that idea too, I fear if I started cutting up scraps of my kiddos clothing from when they were babies (not that long ago) I’d get a little misty, but I’ve kept so many of those sweet prints for that purpose. Someday right? Maybe when they’re teenagers :)
Jen, yep, forgot to mention, but in the wash: a gentle cycle on cold, and yes I’d hang it to dry!!!
The blanket looks so pretty, love the fabrics you choose & the vinyl backing!! Love the how too — i might tackle this project in the coming months :)
I LOVE this blanket-great idea about the vinyl backing-genius!
Just Jo
For those of us in the Seattle area, this could also serve as a great waterproof stadium blanket. It’s officially on my to-do list! Thanks!
GORGEOUS!!! Definitely not skilled enough of a sewer to take this on just yet, but I absolutely love it! So pretty and fun, and springy/summery! Can’t wait for some picnics!!!
Can I just say, I wish you lived in Fresno, although I bet you’re thrilled you don’t live in Fresno. Who wants to live here? ;)But, if you did, I think we’d be great friends. Anyways, love it, and now I have something to use all those Joann’s 40% off coupons for.
Super cute! Kind of wishing I had a picnic lunch to take outside today :)
It’s beautiful… and the vinyl backside is genious!
I would like to place an order for two please :)
So cute! I just made one out of old colorful bandanas that I acccumulated over years of going to camp growing up. I’m loving the pretty fabrics you used!
i love the step “pat yourself on the back and have a glass of wine.” i’d be done with a BOTTLE by the time i got finished with something like this! it’s so pretty!
Love it! Yr so crafty! Thanks for the tips, I am defiantly going to give this a shot.
So cute Kate..
We eat dinner at the beach a lot in the summer. Do you think this could be machine washed with the vinyl inside? If so, I’m gonna make me one of these cuties for the beach. BTW, do you ever sleep?
Love the quilt. I have those exact same fabrics to make a modern quilt for our family room. Love the idea!
Adorable project! I highly recommend a rotary cutter and cutting mat for any future sewing projects. It makes cutting fabric infinitely faster, and the result is perfectly straight and square lines, which then makes the sewing part far easier as well…everything lines up just right. Once you start using one, you’ll be hooked, I swear! Google it…a tool aficionado will not be disappointed!
I love it! The colors are fresh and clean, love the idea of the vinyl underside. Of course I don’t sew a stitch, so I’ll just enjoy looking at yours!
It’s fabulous! Too funny, last year I wanted to embark on a similar project but instead I was looking to use an existing and very outdated comforter that looks like a quilt as my base. Instead of squares I was looking for one large piece of pretty fabric. Now that I’ve seen your quilted picnic blanket, I think it just screams ‘picnic’, it’s perfect!
I couldn’t find fabric I loved that didn’t break the bank but I know JoAnn sells squares of fabric for far less so you’ve inspired me to go back to the drawing board with my picnic blanket projects. The hubbs and I like to do a lot of picnics so it would get a lot of use. I love that you added ties. I saw a few at Target on clearance last summer with ties but they were all a bit too masculine for me.
Wish me luck!
absolutely adorable! i will have to try this! thanks for sharing :)
This is soo great. I sooo need to learn how to sew, well at least buy a sewing machine.
Gorgeous!!!! I love it. Thanks for sharing!!! And what a great idea to waterproof it.
Lovely Lovely! and oh how I want a faux croc silver tape measure!!!!
I LOVE this idea! I’m going to make one for my sister and myself for Mother’s Day!
Do you know how many yards of fabric you purchased? I know I could do the math and figure it out, but if you know off hand, that would be REALLY helpful! Thanks!
I love it! And I’m shocked that you’ve never quilted before, I guess I just assume dyou have. Thanks for sharing.
This is fabulous! Wonderful for baby to play on too!
Really!!?? This is so cute!!
You could sell these……….
LOVE it! I’ve been trying to find a good picnic blanket for awhile now but this is so much better. Can’t wait to make my own.
Great idea! Love that you put the vinyl cover on the underside. It is just lovely and a perfect spring & summer blanket. You’ll be picnicking in style!
What a great idea to have a vinyl bottom! I’ve been wanting to make a picnic blanket for awhile now, but I keep hesitating when I think of getting my nice quilting fabric all soggy and dirty. Thanks for sharing a perfect solution!
Thanks for sharing this beautiful idea!
Kate, wow you did a super job and it WAS hard work, I can see worth it though!
I do have a Giveaway from The Zhush I know you will love!
xoxo
Karena
Art by Karena
LOVE IT! Cutest thing ever. I’m too geometrically/mathematically challenged to make one that looks as good as yours, lol. Great job!
This is a beautiful quilt. Great color choices for your fabric and the plastic lining is a perfect idea to keep the moisture out.
I absolutely love this idea. …May have to copy– in every color! Thanks for sharing!
CC
Okay, this is just perfect! Love the color scheme! But the way it ties up for travel is divine!
One question, tho’. Would it take a larger capacity washing machine to get it more thoroughly cleaned?
Rose
Love it! I am ready to go get some fabric and try this myself.
I love this idea, I am a photographer and decided to adapt this idea to a green grass like blanket I use for bridal shoots to keep the dress from getting messed up ona moist ground. A DIYer at heart, I love adapting ideas I see, and your site is great for them!
Love this idea! I think I will make one for my mother for mother’s day! I second the question though – how many yards of fabric is enough?
I am literally sitting on the floor going through my piles of fabric. I’m going to make two for Easter presents. Too stinkin’ cute.
Hi Abi,
Every 24″ of fabric gets you 2 squares if the fabric is a minimum 44 inch width (most quilting fabrics are) and your squares are between 20 – 22″. Total = 12 feet for entire blanket, or 4 yards.
Kate
LOVE it! Some fabric stores sell adorable vinyl coated fabric. I used some a few years ago to make play mats for little ones. If you found a good deal on some that would look awesome on the back (though not nearly as affordable as the tablecloth)
Great tip Julie! I even priced vinyl backing in the fabric store, and it was $10 a yard, so I went with the tablecloth idea, almost 3 yards for 8 bucks! xo
Kate
Hey! I just saw your blue credenza pic from your office on the Nate Berkus show! :)
Love this — thanks for sharing!
I just posted my completed blanket on my blog. Thanks for the tutorial! http://sweeterthancupcakes.blogspot.com/2011/05/picnic-blanket-for-sister.html
Oh my goodness Kate! We must be kindred spirits! I have squares (smaller) Cut already to make a blanket just like this, but I was trying to find a way to make folding easier (hence the ties)… I came across this post and thought, this is too good to be true! I LOVE it! You have yourself a new devoted follower my dear! :)
I will link this to my website, http://www.periwinklepixies.blogspot.com, soon as I finish mine! :) (i will come back and post the link too)
PS… COme on over and say Hi! :)
Oh have you though about grommets in the corners to keep it tied down?
xoxo
Jacinda
I made this blanket last spring and it has been fabulous! It was so fun and easy to make and the vinyl tablecloth backing is such a great idea! It’s nice to be able to sit on the grass and not get damp. Great for summer picnics and movies in the park!
OMG, I love this! I love how it rolls up and ties too, it can fit right in the picnic basket for storage.
I realize I’m a year late on this, but I just used this as my inspiration for a 5×7 blanket, and love the idea, and the link to the video for patchwork help, each of my square is 12×12, and the many points look fantastic!
Hi Kate: Your picnic blanket is gorgeous – I really like how it all ties up. I’m a quilter and get all my cotton fabrics from the monthly Church Sale in my town where everything sells for 25 cents. Another idea to hold it all together would be to sew colorful buttons on each one of those lovely “CRISP POINTS”
FINALLY making this and trying to figure this out –
“Next, flip your completed patchwork cotton patchwork pattern upside down, add the batting on top of that, and then your vinyl tablecloth (also flipped inside out). No pic, sorry, it was late at night. Sew it all together all around, but leave one square open to flip it right side out.”
Should the vinyl and patchwork go face-to-face and then the batting on top of that?