Whenever I pass the knitting section in the craft or specialty fabric stores and spy all of the beautiful yarns, I wish that I had the skill to knit so I could put those gorgeous threads to good use. Unfortunately, I don’t knit at all.
Then I had an idea to use yarn in a decorative way, by wrapping it around some homemade frames and creating some original wall mirrors for a blank wall space. With this project, I started out with every intention of making two wall mirrors, but in the end, I left one frame as is, just because I like it better that way.
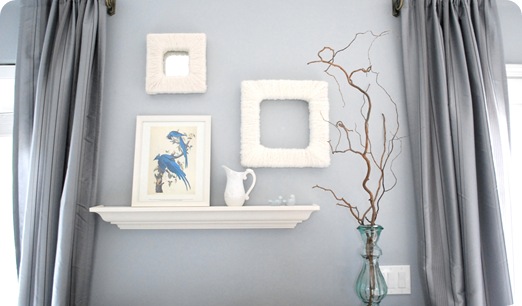
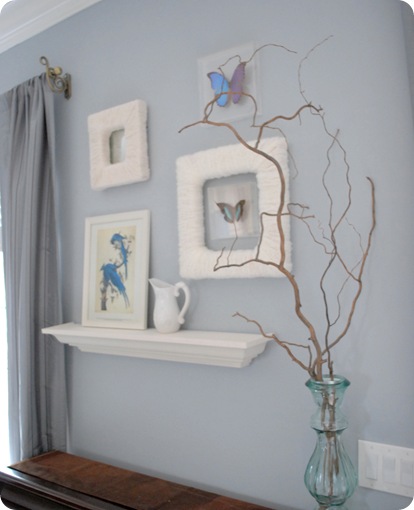
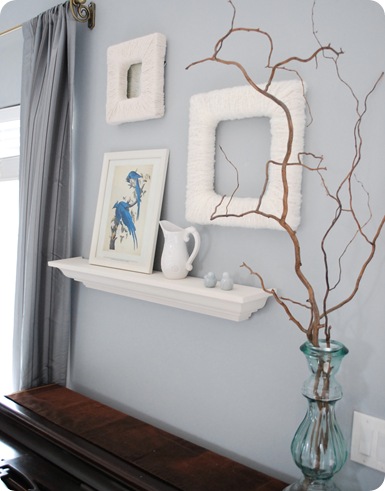
We had a very blank wall between two windows for the longest time and I finally decided to add some decor. I already had the shelf, the pitcher, and the vintage Audubon print.
These days, I’m very focused on adding more texture to my home in creative ways. These yarn wrapped frames seemed the perfect way to do it, and a great project for a rainy weekend.
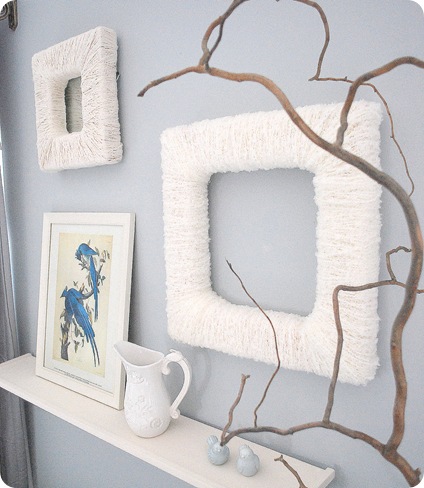
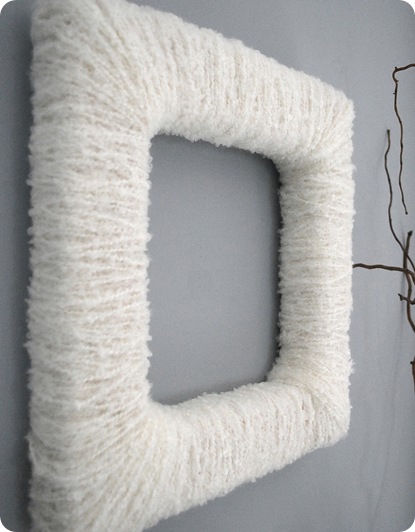
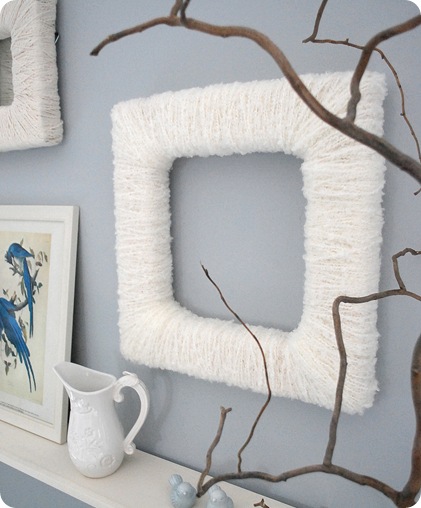
Here’s the bouclé version, more like a square wreath than a frame.
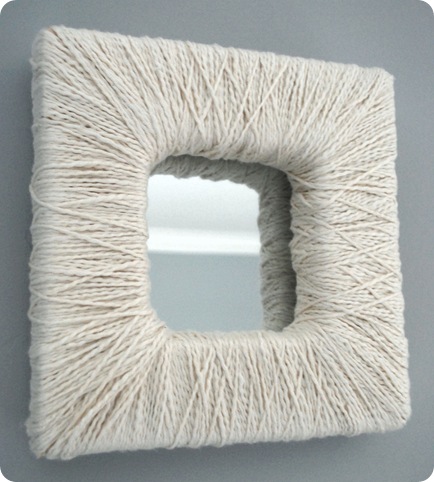
And the cotton yarn version that I turned into a mirror:
You can wrap just about anything with yarn to make a similar version, whether it’s an existing frame or a foam wreath. There are a lot of creative yarn wrapped wreaths during the holidays. If you want to make your own custom frame for your artwork, or create a yarn wrapped frame mirror, here’s how.
Supplies: 1” x 3” x 8’ timber; yarn; square beveled mirror (available at Michaels); hot glue and/or velcro; corner brackets; “D” ring hooks. Tools: hot glue gun, power screwdriver; compound miter saw.
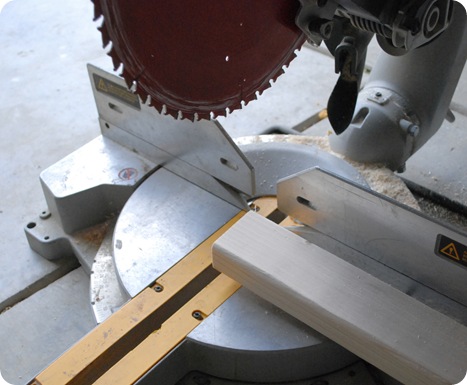
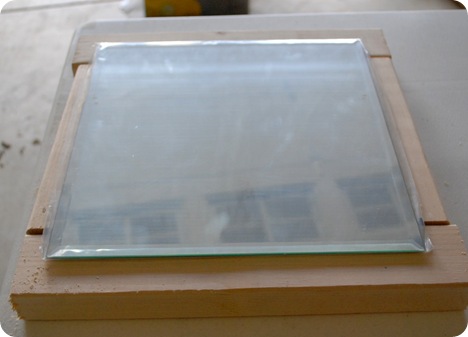
Step One: Cut your wood with your compound miter saw to form your desired frame. If adding the mirror, use it as the template for the size of your frame.
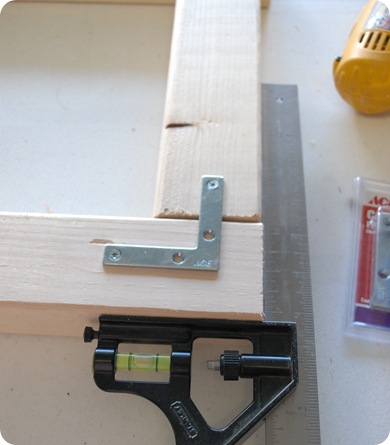
Step Two: Square up frame and attach together with corner brackets.
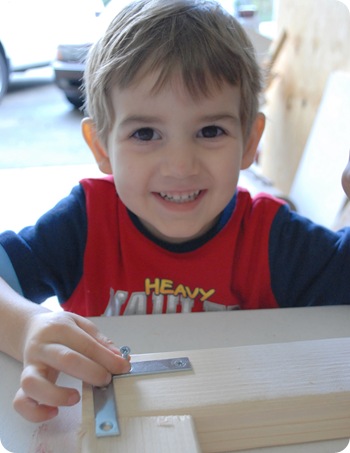
Enlist a little helper if you can find one.
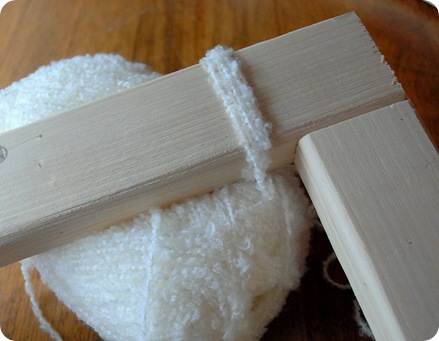
Step Three: Put on a good movie and make yourself cozy because the next step will take about an hour. Hot glue the end of your yarn to the back of your frame, then begin the process of wrapping the yarn around your wood frame.
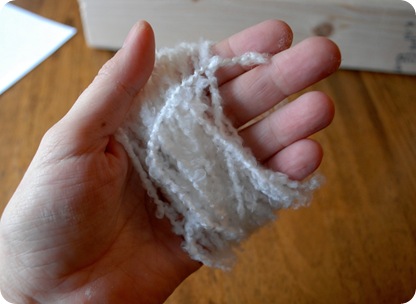
It helps to cut small sections of yarn since you go around and around the inside.
Continue working around the frame until your yarn has covered the wood. Secure with hot glue on the back as you work around.
Create whatever pattern you want.
I added some criss-cross lines to the mirror version to mix it up.
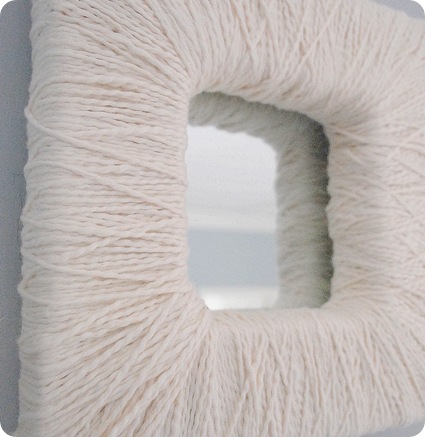 Bernat CottonTots in Sweet Cream
Step Four: If making a small mirror, you can attach your mirror to the yarn with just a thick line of hot glue around the edge of the mirror (along the bevel). For the larger frame, I would likely have used velcro strips along the bevel and fortified with hot glue to secure the mirror to the back of the larger frame, since it’s a heavier piece of glass.
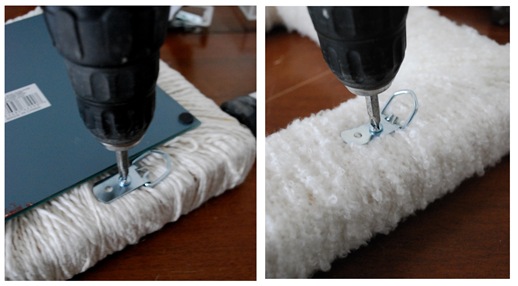
Step Five: Attach “D” ring hooks to back of frames and hang them on the wall.
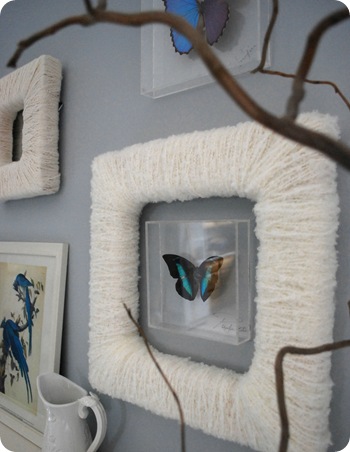
Originally, I had displayed some butterflies we picked up years ago in a specialty shop on an island vacation.
But I’m not convinced the acrylic frames jive with the yarn.
So I went back to the simpler display.
What do you think ? Keep the simplicity with just the Audubon print, or put the butterflies back up ?


I think this is just amazing! And how do you get these easy, but so great ideas? :)
P.S. In my opinion you should put the butterfly back, they look good together!
I prefer it without the butterflies. The texture of the yarn has enough impact on its own. I agree with you that the acrylic frames jar with the yarn frames. I love this idea of wrapping yarn around frames. They have such a lot of texture and impact. Lovely.
I prefer it without the butterflies. It’s soft and lovely, almost like a down feathered nest.
I like the butterflies, but not the acrylic frame (because I agree that they don’t “go” in this setting) Can you find another way to display them or are the in the frames? Or can you find some more butterflies?
I like the simpler version!
What a beautiful project! I love the sticks juxtaposed in front of the frames. As far as the butterflies go, I love blue & black butterflies but I think the simpler version looks better.
Such a neat idea, um…I’ll take three, lol!
Beautiful and so simple! I prefer the simpler version. I find the acrylic box looks too “hard” next to the wool frames. (If that makes any sense:)
I like the simplicity of the empty frame. But that may just be the mood I am in, every winter I seriously declutter and keep things pretty sparse. :-)
I prefer the simpler version too. I have tons and tons of yarn – I do needlepoint and all kinds of stitching and pick up the yarns to add to my needlepoint. But, this gives me a great idea of something else I can do with it! Of couse mine will end up with cat fur and dusty but it will work for a while as a simple display. Time to get the compound miter saw ready to go!
I like the frames on their own! These look wonderful. I’ve kind of had a strange obsession with decorating with white yarn ever since I saw Anthropologie do it in its winter store displays. This is one yarn use I definitely hadn’t thought of!
I prefer the simple version. What a great idea with the yarn frames. An attractive arrangement with added texture. Love it!
Hi, I just started following your blog a few weeks ago. I absolutely LOVE the yarn on a frame idea. I’ve been crocheting for 15 years & am just wild about all types of yarn. I have a ridiculous stash myself & never thought of using up leftovers for a project like this. Great idea! Take care.
I wish I could knit or crochet too…I’ve often thought the same thing about all the beautiful yarn available. And I’ve got to go against the tide here…I like the butterflies in the grouping! :)
I vote FOR the butterflies. :) Love the frames!
Wow, these look so soft and beautiful. Paired with the color of the wall, and those butterflies and the twig….. stunning. And as always, SO stinkin’ clever!! :)
I think I like the simple version, but I clearly don’t know a thing about design, so I say go with your instincts! :) I really like this project, Kate. It’s something even an older child/teen could as a gift make if they had a pre-made frame. Very cute! :)
PS. I once had a knitting lesson that lasted all of 5 minutes when my oldest was around 18 months. A friend tried to teach a few other girls, and I got as far as making the first knot before Natalie decided she was done. I guess knitting isn’t for me. :s
I like it both ways! If pressed to choose, I guess I’d say without the butterflies?
What an awesome idea! I love the texture of the yarn, and I think that’s all that’s needed (no butterflies!) in your vignette.
I agree that the acrylic is so different from the softness of the yarn frames. I’d probably place a tiny hand felt bird inside one of the frames. Laurie from Wool Pets has a pattern for the bluebird in her book. http://www.joggles.com/store/catalog/product_info.php?products_id=16820&src=froogle Or her kit.
Okay, this is another brilliant idea from you. My daughter is on a knitting kick lately and has loaded up on great yarns, I’m showing this to her when she gets home. I know what project we’ll be working on later.
Janell
Not a fan of the acrylic frames – but I do know that Hobby Loby has some sweet butterflies you could just “stick” to the wall in between or even attach to side of the frame.
hope that’s not tacky cause I love it! thanks for the tutorial – I’m definitely going to put it to good use, I think I’ll use a foam form since I’m not so handy with the wood working =)
I like it plain for winter..maybe add the butterflies for spring
Great idea!!! Many thanks.
xo,
cristin
I really like the color the butterflies brings to the wall, but not so much in the acrylic frame. Very cute frames….looks easy to do too! Love that! Thanks again for another great idea!
They look beautiful! I love the simplicity without the butterflies.
i like it better with the butterflies!
Without the acrylic frames. I do love the butterflies, though! Absolutely gorgeous!!
What a fantastic idea! The women in my family are big knitters but I never had the patience for it. I much prefer paint and fabric :). I really love this though. Great job!
what a great idea! I like the simple version – much cleaner. The butterflies look like you are trying too hard. Haha. This is a beautiful display!
i like the simple version, did you buy your vase from t jay max? i anticipate seeing you on hgtv or tlc one of these days. thanks for sharing your talent. love your soothing, simple taste.
Very nice, I love the softness and texture to an otherwise hard object.
Love the white!
I love the yarn! I think I’ve found my next project. What a wonderful idea! Thanks for sharing.
I love the yarn! I think I’ve found my next project. What a wonderful idea!
I love this. They look so cozy!
I just wrapped a wreath in yarn for Valentine’s Day, and as I was doing it, I was thinking to myself, “Surely this would be beautiful on a frame.” And it is!!! Thanks for sharing.
Very neat idea. You always have those brain cells on fast forward. I am sooo jealous. Mine only run on slow and stop!
What a BEAUTIFUL idea!! I love these!!
I love the simple version. And I LOVE how soft and fuzzy the second frame looks! What a great project idea.
Wow, you are a bottomless pit of creative ideas. I love the soft texture of the boucle yarn on what would be a hard edged frame. It makes it more like a wreath. I love the balance of color the butterflies bring but not their acrylic frames–too hard. It does inspire me to make a winter wreath possibly of a heather-type yarn. I have wreath for all seasons (and Xmas) but not winter so this might do the trick.
Thanks for the great ideas and inspiration. I loved your wrapping paper system for your laundry room a couple of days ago, but didn’t get the chance to comment. It makes wrapping so much more accessible. Plus it matches your awesome drying rack.
Fun use of texture! I need to be more conscious of that in my home, too.
And don’t worry about not knowing how to knit – I know the theory and can ‘make the moves’, but the outcome is always horrendously ugly :)
Something I can actually do! I learned how to knit scarves…simple scarves, just so I could play with all the textures and colors of yarn.
I like the butterflies, but I agree the acrylic isn’t “perfect” with the frame. I guess I’d like to see the butterfly alone in the center…don’t think so, do you?
Those are really wonderful! How unique!
What a great idea to add some more texture to a wall! I don’t knit, but I’ll have to get some yarn to try this.
what a fun idea to liven up a “dead” space on the wall! creative!
The person yearning for spring in me loves the butterflies … the other side of me loves the simple look. Either way – you hit it out of the park again!
I like it without the butterflies too. Love the texture of the yarn. Fab, girl!
I’m not a power tool girl. I think I’d buy a cheap, old frame from the local thrift store for a dollar and cover that. Your frames look gorgeous covered in yarn. I love the textures you created with the two different yarns!
I love this project, especially with the butterflies! I say keep them for a fun spring look :).
these look great! I love how soft they looks, like a good pillow… but with a hole in them. I guess they make better wall art than pillows! I may borrow this one down the line. :)
It really does add some great texture to that wall, and that gray color is so soothing on the walls!
I like this project! It can be so versatile…as you have shown. And I vote for keeping the butterflies. They add a spark of color in anticipation of spring.
They are so soft and pretty. I like the butterflies !
I love the butterflies with the frames! I think the juxtaposition is really nice =) I also love the wrapped frame idea – such a cozy, soft idea for something that is usually hard and sharp.
I think it looks better without the butterflies, the frames make enough of a statement on their own. How much yarn did you end up using for this? I love it!!
I kind of liked the butterflies myself. I thought with their beautiful colors – the acrylic just sort of faded out.
How neat! I just saw a fabric wrapped one at an antique mall that was a bit country for my taste, but got my attention. These are fresh and pretty. Thanks for the diy!
What a great project, thanks for sharing. I quite liked it with the butterflies because they are so unusual and bright in colour. I am with the previous poster, you don’t really see the acrylic.
Love the look! And I like the look without the butterflies. It’s more elegant. :)
Wow! This one is definitely going in my idea files. Love it! Who woulda thunk it? Oh wait, you would! You always do, you crafty mama! You inspire me daily! Thanks.
Butterflies! Love them. Add them.
my question is this: how did you hang the butterflies such that you didn’t have holes in the wall when you took them down? Or do you fill in and retouch holes immediately?
I LOVE this idea!!! Definitely gonna try it!
how do you avoid having the yard all bulgy in the corners and from slipping?
I love these! Leaving the one frame empty I think helps to keep these looking fresh and modern rather than country-crafty. I vote no butterflies–I’m not sure about the acrylic frame, and anyway I like the simplicity of just the frames and print.
Oh, Kate! You could totally knit. I knit, for God’s sake. You, with your ridiculous talent, could knit your arse off, my friend.
You should totally try it.
I LOVE this!!! So cozy! Easy and so gorgeous!!
I like the simplicity look, personally. :)
I think this would be fun to do on a monogram!! I have so many, because I’m only slightly obsessed. *grins* this would be a fun way to change it up!! :)
So cute!! I love it with the butterflies, but either way is great! I may have to get some yarn this weekend and snuggle up with a movie.
I like the butterflies and with just the print. However, I think Alicia’s ideal would work as well…an initial in the center of the larger frame would be cute. BTW…I’m sure you have told us before, but what is the color on your walls. Everytime I see it, I fall in love with it again!
These are gorgeous! What a fun way to show-off yarn, I love it. I’ll be linking.
Great idea with the yearn around the frame! Found this via One Pretty Thing.
love this idea! i want to do this with a mirror i just found. check out my blog: meredithtuttle.blogspot.com :) thanks for all the inspiration!
I like it better with the butterflies :-)
I loved how this looked and wanted to try some frames wrapped with red yarn for Valentine’s, however, I can not get it to stay in the corners, it keeps sliding down and bunching too much on the inside corner. Any tips?
Thanks,
Bailey
I am so jealous of you crafty types! I’m an artist, but not so good at crafts and constructing things. I LOVE the bird print you have on that wall, could you tell me where you got that? I love your entire decor. Very jealous!
I love this idea! I don’t usually like frames, but these are so soft and airy. I might just make a few for my sister’s nursery!
wow.. this is so great.. even a kid can do it.. :)
Love them! I tried wrapping yarn around a wooden letter “J” and can’t quite get the curve looking good. What are your tips for going around curved areas, like your corners? Thanks!
I love this project. It reminds me of something my grandma would have liked, yet it has a very modern feel to it. I also love to wander through the yarn section…
I would keep one of the butterflies. I like the one with the brown and blue.
the thing i love about this project is that you can use up all that extra yarn from past projects. i’ve got a bin full and i’m sure most knitters do too. i think you could even mix more than one type of yarn in a frame. thanks for the inspiration!
1st of all I want to say that your work is absolutely beautiful. The frames look snowy cold and cosily war at the same time and the absence of the mirror in the bigger frame emphasizes the design and the uniqueness of it. I will disagree with most people who published their comments and agree with your initial intuition – the butterflies are nice but they diminish the stark beauty of the whole thing drawing too much attention to their lively colorful wings. It is much more classy and striking as it is, the fact that it looks a little unfinished gives it this special quality that draws your eyes to itself.
LOVE this idea!!!! It has inspired me to make a few of these in varying colors in a friends future nursery! I LOVE your blog, dont always need moohlah to be fabulous! Check mine out at http://www.whimsicalworldoflaurabird.blogspot.com/
Oh i LOVE this.
I think i’ll do it for my daughters room!
You can see my DIY Valentines here:
http://loveandwells.blogspot.com/2011/01/diy-fabric-valentines.html
Looks great! I have been very into yarn wreaths lately… I may need to try!
You are a very clever girl. I wish you were my daughter
and I would brag you must have learned it from me.
Continued success!
I have a wintry print coming from Etsy and I was googling to see what I could find because I thought a “sweatery” frame would be perfect with it. Your frame came up and it’s exactly what I had in my head!! Love it! But I am trying to figure how to seat the print behind it without leaving a big gap around the edges. Any ideas?