William Hickson once said, “If at first you don’t succeed, try try again.”
This is the story of my guest studio headboard. A few months ago, I had an idea to convert some leftover cabinet doors into a headboard by covering them in fabric and mounting them on the wall. It was a good idea, but the final result did not meet with my satisfaction.
So I came back for Round Two. This time, I did it right. With some plywood, foam, batting and a discount curtain panel, I created a new and improved fabric covered headboard for my guests. And this time, I trimmed in with some decorative moulding.
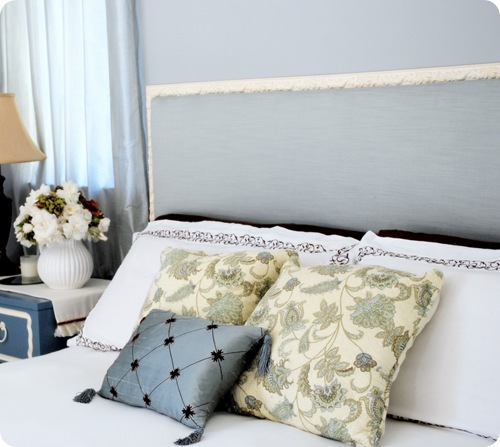
Here’s a peek:
Here’s how I created this romantic and feminine French inspired fabric covered headboard.
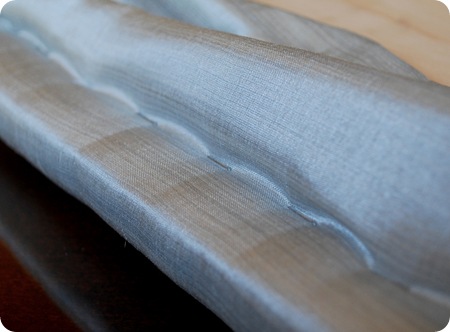
At my local Target, the Blue Strie window panel collection is on clearance for $14 per panel. It was the same panel I used to recover this ottoman for my office, and it is still available online here (though not on sale online). I purchased three of these window panels. One for each window, and one to cover my new headboard.
Ordinarily, I’m against being so matchy matchy with my fabric choices, but in this case I made a deliberate exception. In my attempt to create a soft and serene space, I felt that the coordinating fabrics would work well here.
How to Make a Fabric Covered Headboard Trimmed with Decorative Moulding:
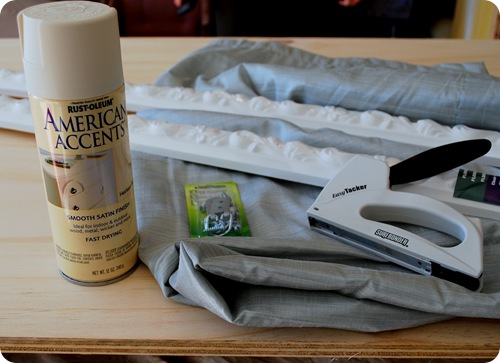
Supplies:
-
Half inch plywood trimmed to fit wall.
-
Fabric of choice
-
Half inch foam to fit
-
Batting to cover
-
Decorative moulding of choice
-
“D” ring hangers to mount on wall
-
Paint of choice for decorative moulding
Tools: Staple gun, screwdriver, level, hammer, finish nails, miter box or saw.
Step One: Choose your decorative moulding from a home improvement store. Then have your home improvement store cut a piece of half inch plywood to fit your wall. My measurements for my Cal King bed were 74” wide x 36” tall. Make sure you subtract the width of your moulding from your final width and height measurement.
Step Two: Layer your half inch foam and batting on top of your plywood and if necessary, secure in place with a few staples on the very edge.
Tufting Tip: If you want to add tufted buttons to your headboard, then measure and drill holes in the back of your headboard with a drill bit, and follow the tufting tutorial I used here and here.
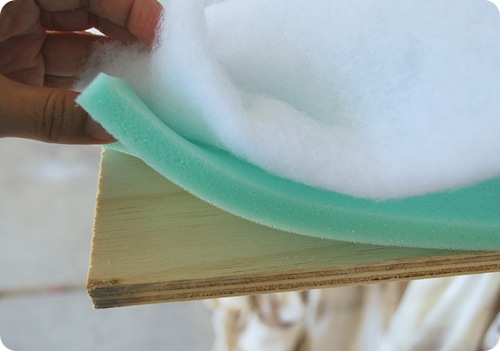
Step Three: Press your fabric to remove any wrinkles. Place your layered plywood headboard on top of the fabric. Pull taught, and staple every 8 inches.

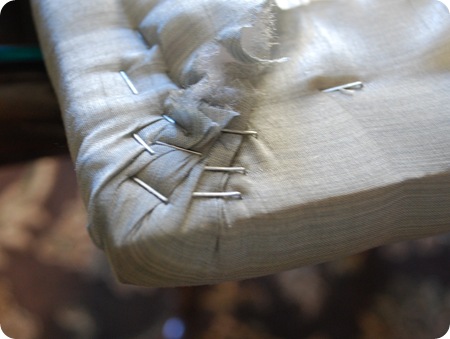
Turn your headboard over and make sure your fabric is aligned correctly. If so, then staple all around every 2 inches. Secure your corners as well. Trim excess fabric.
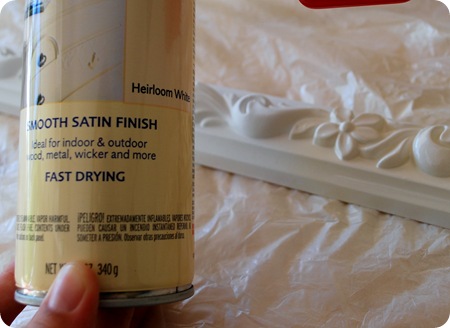
Step Four: Paint your trim to your color of choice. I chose none other than Rustoleum’s Heirloom White.
Step Five: Locate your wall studs on the wall, and measure the location of your “D” ring hangers. Secure your hangers to plywood back with a screwdriver. Hang headboard on wall.
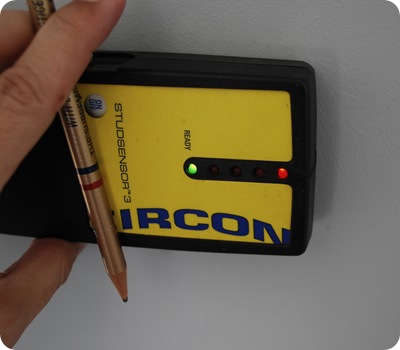
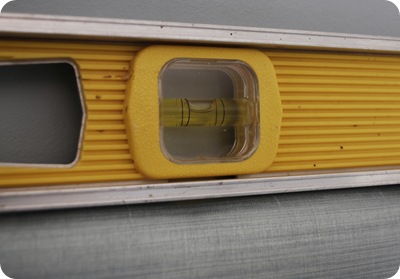
Double check your headboard is level before attaching trim.
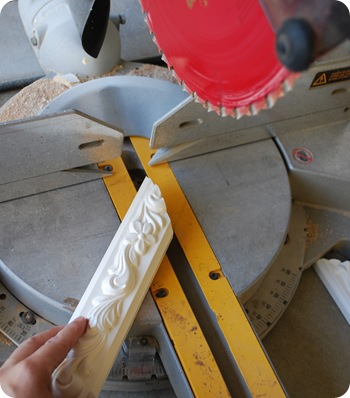
Step Six: Measure and cut your previously painted trim with a miter box or compound miter saw.
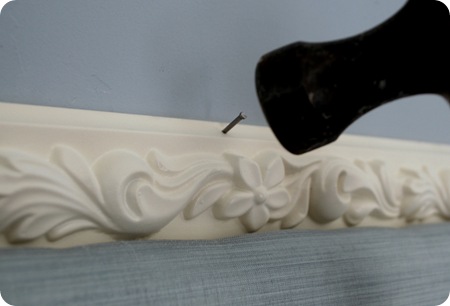
Secure to wall with brad nailer, or finish nails and a hammer. Make sure you pound them in so they are flush to the trim.
Spackle the corners to fill in any gaps.
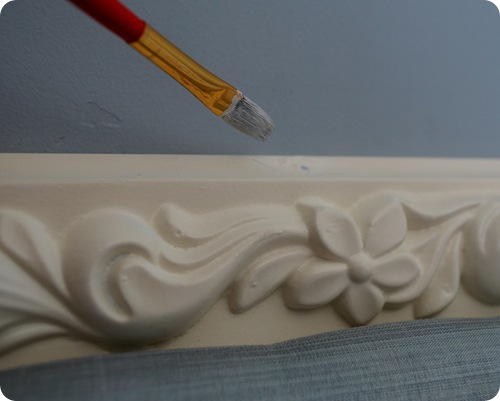
Step Eight: If necessary, spackle your nail holes. Paint over the nails to hide them. In my case, I sprayed some of my spray paint into a plastic cup, and used an artist’s brush to paint over the nails.
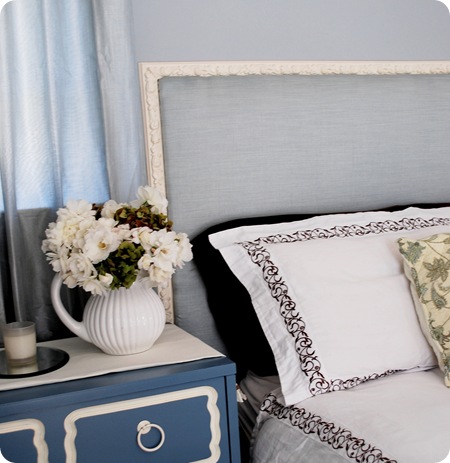
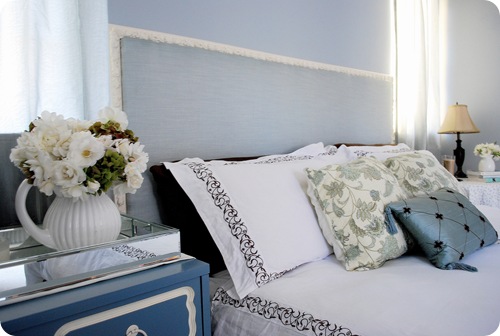
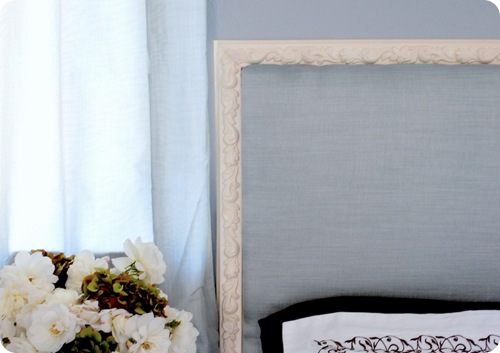
Here’s a few more glimpses at the finished headboard.
Do you spot my painted knockoff Draper chest that I found at a thrift store ?
As pretty as a Wedgewood plate.
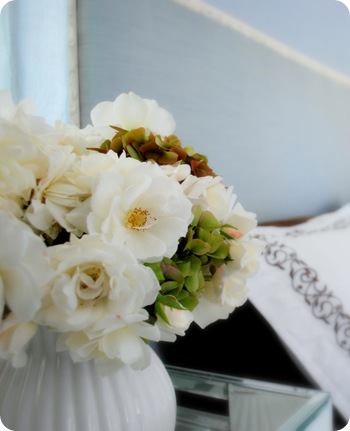
Feminine. Romantic. French inspired.
And inexpensive.
If Mr. CG ever snores, this is where you’ll find me. Zzzzzzzzzz.
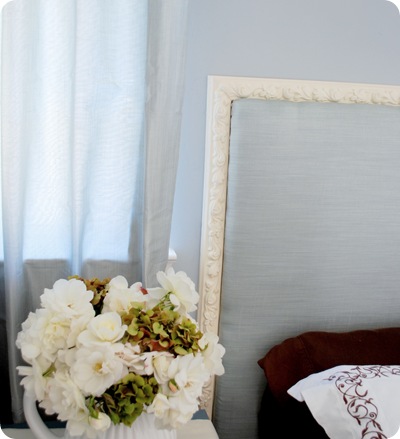


Very beautiful and relaxing. Your guests will feel very welcomed to have such a retreat. I think maybe I’ll clear off my guest bed since it is currently turning into storage! No wonder I haven’t had any guests (that’s good and bad).
Beautiful headboard! What brand/model staple gun do you use? I have not been able to find a staple gun that works well consistently. Thank you.
I would love to stay in that room! So pretty & serene. The headboard turned out perfectly…I love the trim.
I, too, would love to stay in that room and I noticed the draper chest you paited immediately! Great job! You are very inspiring! You have such a talent! Have a wonderful day!
This is fantastic! Very well done- and thank you for the step-by-step instructions!
Any guest would feel extremely welcome and pampered in you guest room. So, when can I come? :0)
xo,
Pam
Great idea and the headboard looks fantastic! I like how you brought the blue down and onto the bed with the pillows, too.
This is so romantic and beautiful. I getting ready to make an upholstered head board and this is great inspiration! And I love the chest. I’m new to the blog, did you make it?
Well ignore my “did you make it?” question.I clicked the link! Ha! Beautiful!I want it!
The headboard is beautiful and I love the combination of colors in the room. So serene and peaceful. Your guests won’t want to leave!
It’s beautiful and looks so soft and inviting. Yep, I love it! Congrats and God’s blessings, Sarah :D
The look of a B and B. Very calm and inviting.
Kate,
Do you mind sharing your paint color in that room? It looks so relaxing and inviting. Beautiful job!
I love that headboard… Excellent work!!!
That is a beautiful headboard. Very nicely done too! The molding frames it perfectly.
Fabulous, just what I’d expect from the Censational Girl! That color is simply beautiful. Do I need to make reservations to come and stay in your guest room? :)
Looks really nice! I might have to steal the idea when we redo the twins’ room.
Okay, when can I come for a visit? ;) That is probably one of the prettiest guest rooms ever! Have a great day! Off to preschool drop-off. :)
Gorg! I love your paint color, what’s it called?
That is just gorgeous!
What a great idea! I LOVE it!
Oooooh, la la………it is tres chic!!! Love it!
suzanne
Um..W.O.W! That’s all I can say. And I love the painted Draper Chest. Very impressive.
Another great tutorial. I don’t know how you find the time to complete so many projects!
LUURRVVV IT! OK, I have to ask, where did you get the linen? And the mirrored tray, I so wish to find one like that for my living room. BTW, thank you for the inspirations.
Oh man! I just saw those at Target and I passed them by…..dang!! I love the headboard! I’m going to try it myself!
It is phenomenal. I swoon….
Wow, I am so impressed! Thanks for the tutorial, I may just have to try this one out!
Boy, do I need a headboard! I just might give this a try!! Thx!!!
m ^..^
Wow, your headboard turned out amazing! I love it! You are so savvy! Thanks for sharing the tutorial!!
Kate, I absolutely love the look of this new headboard. I also loved the old headboad made from the cabinet doors. What I want to know is, was it a pain in the neck to touch up your wall after removing all of those cabinet doors?
This was a great post. It has given me some much needed inspiration for create a new headboard in my son’s room.
Kate, you clever girl! You never disappoint in your DIY projects. This one is fantastic. I’m wondering if the board goes all the way behind the bed too (down below)? It looks so inviting.
BEAUTIFUL! to be honest, I wasn’t such a fan of the cabinet headboard- but I love this one!! The trim looks great!
its gorgeous! def furniture porn to me! i plan on making my headboard soon! and i love the trim that you added and the fabric is beautiful! i think i rather do this then nailhead… hmmmm
Amazing! I’ve been thinking about buying a fabric headboard myself. But your tutorial made it look so easy! Maybe I’ll give it a go…
You guest will absolutey love this room! Who wouldn’t?! Better than any hotel I’ve ever stayed at :)
it’s beautiful!
Beautiful!
Undoubtedly your guests will LOVE IT! Looks wonderful! I love the decorative trim too!
What a great result! It looks so expensive and French :).
This is really nice. I’ve always loved Wedgwood Jasperware, and you’re right: this headboard is reminiscent of that.
Thanks for the tip on using moulding around the headboard. This gives a beautifully finished look to the headboard. I’ve used decorative cording stapled around the perimeter of headboards to accomplish that, but your look here is very refined–more like the piece of furniture that a headboard is!
A lovely, serene space you’ve created. You may want to keep a goodly supply of toiletries on hand, for I would imagine you’ll have lots of guests!
I would love to be your guest! You did a great job! I dont think a hotel would have anything on you! well done! love the flowers on the night stand!
Just found your blog and love it! I look forward to having a house big enough to do these projects! Good work:)
I love it! So pretty. Here’s a chair project I recently finished!
http://refreshdesignstudio.blogspot.com/2009/09/thrift-store-revamp.html
I agree that your guests will like it. I love that you did your own version of an upholstered headboard, and I LOVE the trim around it. I often think that upholstered headboards look “unfinished” Not so with yours!
I love it! I love the idea of framing it – that makes it look so much nicer! I love how easy such a high end look is (and easy on the budget a lot of times)!
So pretty! It does indeed look like Wedgewood. The trim is such a nice touch, and I love the styling in the room.
So soothing. Perfect for a weary traveler. Well done!
Gorgeous headboard. I’m planning to make one too. I’m just trying to decide what fabric to commit to. (I change things way too often, lol) I love that you used thin foam. Such a sleek look! I just covered a chair in pale blue linen that would go so well with this. It’s the most recent post on my blog. http://muchtodowithnothing.blogspot.com/.
Kelly
Gorgeous!
I have heard women talk about their “girl crushes” and my first thought was always “Huh?” but I have to admit it…you’re my first girl crush…now I know of what they speak.
Your blog is fabulous…Love it. Now I just have to break it to my husband… ;)
You could have your own show on HGTV! Great job, wish I didn’t have a bed frame so I could do this…hmmm, maybe my son’s room with a stripe?
I love that you gave this another go, because the second try is so much more in scale and looks custom, upscale and glamorous. I’d really love it if you would do another post deconstructing it a bit (like why the first design didn’t quite work and how you got the courage to tear it down and approach it again). I think a lot of people are afraid of making design mistakes (I can include myself in that) and it would help them (us) to have you talk about not-quite-getting-it-right the first time, but not settling for “just-okay.”
So pretty. And I love the nubby fabric you used as well. Just lovely.
I have no doubt they will like it. You make it seem as if I could actually do this, I love the detailed instructions. It really makes a pretty room, the chest is darling. Your guests will feel very special.
Sue
Love it! This i smy favorite blog to visit.
I must ask, where did you get the bedding? It is so pretty.
Ugh, please excuse my typos. It has been a long day.
Great proyect, una muy buena idea para lograr una cabecera especial. Thanks for sharing.
Hugs.
Charo
It looks lovely. I love how you finished it out with the molding. The shade of blue in this room is beautiful and calming. I’m sure your guests are going to love it!
That looks amazing! I love that proportions of the room allow the headboard to come right up to the windows ~ phenomenal.
I love it! The color is gorgeous.
I am soooooo glad we didn’t make a guest room headboard last weekend, as planned. Now I want to make this one! Thanks so much, I’m super excited about this! I’ll be linking as well.
BEEEEEEAUTIFUL KATE…I love the fabrics you chose. I love your eye for putting fabrics together. I think I struggle with that. I would have been worried about the blue dresser looking right with the blue “curtains.” When I see yours I love it but just don’t have the eye. I love that about you. I said love way too much…I am not obsessed I swear ;-)
I love it!! It’s so elegant and beautiful. Thanks for sharing.
I make headboards all the time and I love the idea of the moulding but I would have never had the guts to just try it.
Thanks for the inspiration
Is it? Could it be? Why yes…….I believe it is……Heirloom White!! tee hee.
This is just as lovely as could be; looking as though it were a Million Bucks!! WONDERFUL JOB.
You truly do inspire.
Hi there ! I just love this bed. Can I come over from France ? This place looks amazing and I’m sure your guests will sleep like babies in this bed …
I created my first upholstered headboard yesterday (you can check it out on my blog http://www.nocesdecoton.canalblog.com), but I’m just getting started on this kind of projects, so I’m getting inspiration and techniques from blogs like yours ! Thanks for sharing !
Gorgeous! I’m in awe!
I likey. Nice job.
I just absolutely LOVE your style. Every color, every frame, every fabric..
I love this! My husband and I are wanting to really make a glamorous bedroom so this could be just the ticket! I was also wondering, where did you get the mirrored tray? It’s exactly what I have been looking for!
I just found your blog today. I can’t wait to read all of your older posts! This headboard you made is just wonderful. My husband and I are shopping for our first home right now and I have a feeling I may be stealing some of your great ideas when it comes to decorating time. We live in Sonoma County too :) Thanks for sharing all of your great projects. I can’t wait to see what you come up with next.
love the guest room and the headboard!
I loved your last upholstered headboard which inspired me to make my own as well and I love the decorative trim on this one. Can you really buy that at Home Depot? Out of curiousity – do you think their is a way to attach the trim directly to the headboard versus to the wall? I was thinking about making a bulletin board with the trim on a smaller scale but not sure how to do that. Thanks for inspring me once again.
Wow, you just solved my problem! I’ve been wanting a french padded headboard, with those curly, carved tops, and they are all out of my budget. This is fabulous and brilliant! Thanks for posting.
Kate,
I would love for you to come on over and see my version of your project! http://littlebignest.blogspot.com/2009/10/fabric-covered-headboard-project.html
Thanks for the ideas! I love all of your projects!!
Lauren
Thank you so much for this tutorial! I made my headboard and just hung it today! It looks fabulous!! :)
me fascina tu pagina, greetting from mexico!!!!! felicidades!!!
How have I only just found you?? Love your blog. Thanks for all the great, and truly beautiful, DIYs :))
Beautiful! Is there a way to make the headboard with the trim attached… w/o nailing it to the wall?
Hi Mary, I’m not sure how you’d keep it vertical without suspending it on the wall unless you built legs and figured out how to keep it flush – maybe the bedframe would be enough.
Kate