I had an old wooden frame that was in good condition, but the glass had broken years ago, and I wasn’t crazy about the gold finish. Rather than replacing the glass, I used it to make a jewelry holder. You’ve seen these done before, put together with an old frame and some screen or chicken wire. I spied a pretty one at an Antique Fair last month so I was inspired to make one of my own, but I wanted it to be backed by pretty fabric.
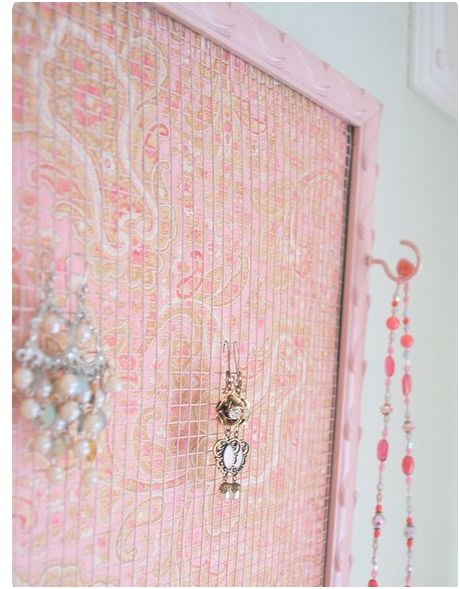
How to Make a Recycled Frame Jewelry Holder:
Supplies:
-
Recycled picture frame
-
Fabric of choice
-
Spray paint
-
Screen, chicken wire, or ‘hardware fabric’ from your local home improvement store
-
Wire cutters
-
Box cutters or craft knife
-
Foam board
-
Hot glue gun
-
Staple gun
-
Hooks (optional) for screwing into wood frame
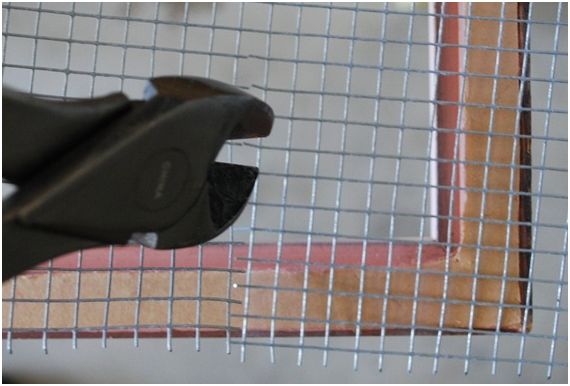
Trim your wire mesh with wire cutters to fit inside your recycled frame.
Trim your foam to the exact internal measurements of your frame. You can use the cardboard that often comes with a frame, but since I didn’t have any, I used foam board, available at any craft store.
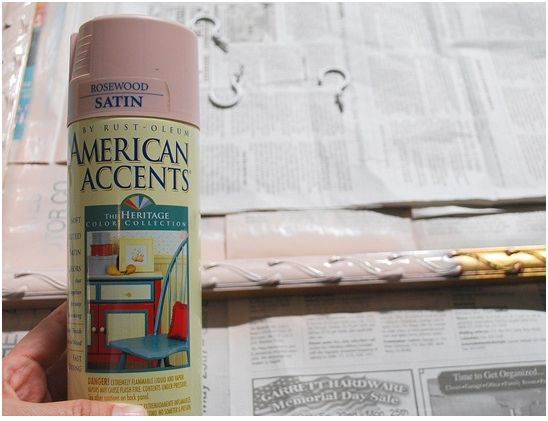
If you don’t like the color of your frame, then spray paint your frame in the color of your choice. I chose a Rosewood tint by Rustoleum. You can also spray paint your wire mesh for a cohesive look, if you don’t like the rustic quality of the metal. I also spray painted the little hooks I used to screw into my frame for additional jewelry display so it would all be the same color.
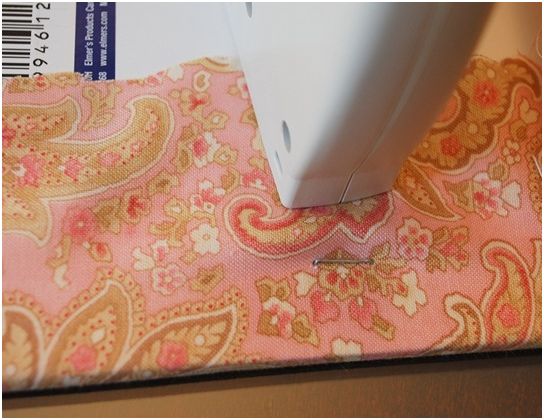
While your spray paint dries, staple your fabric to your foam.
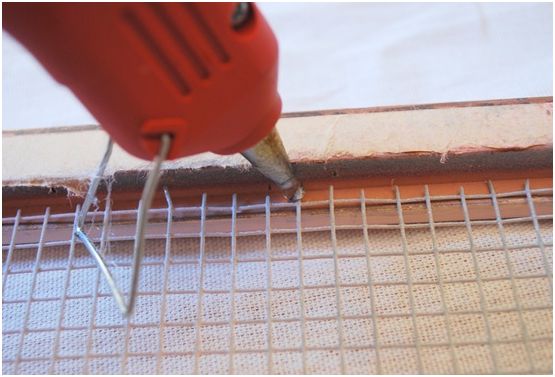
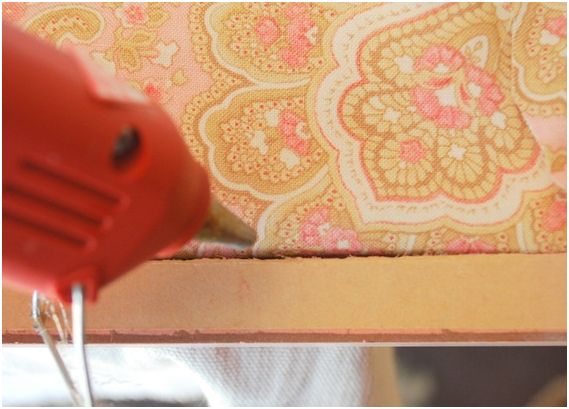
Once your paint is dry, use your hot glue to secure your wire mesh to the inside of your frame. Then use more hot glue to secure your fabric covered foam to the backside of your picture frame.
(optional): If you’re using a wooden frame, you can screw your hooks into the frame for added display.
Display your jewelry holder anywhere you please.
.





Have I told you that I’ve fallen in love with you? (Was that awkward?)
I have seen some like that that I “like” – but this one I LOVE. Love the fabric background, and I’m officially on the lookout for a frame. =)
So pretty! I love the fabric you chose! :)
Beautiful! I have seen one of those but yours is gorgeous! I’m going to try to make one! Thanks!
Oh my! This is just beautiful. Love the cup hooks on the side. Pink-licious.
This turned out so cute! Now I am looking around at some of my unused picture frames to make one for myself!
I am obsessed with your blog!
Your daughter’s room is shaping up to be really gorgeous! I can’t wait until mine is old enough to start doing some similar projects. She’s only just turned one though.
It looks great! I will definitely add this to my “to-do” list of projects, because I totally love it! And I’d say it’d be a great gift for someone.
Your daughter’s room looks fantastic.
Ok, it’s official – sheer genius! I don’t really have the wall space for this, but I’m wishing I did . . .
I love the paisle… and the jewelry!
The fabric back is such a great idea! I love your attention to detail. I’ll be linking.
Perfect – and something I am sure I will need in the future with my two girls.
I absolutely LOVE this idea! Thanks for the tutorial…can’t wait to try it! :)
So adorable for her… aaaand also anyone OVER five years old with a penchant for pink. *Hands in pockets, whistling*. :) I’m going to do the same with a corkboard/bulletin board… put up pictures for inspiration!
wow, you did a wonderful job with that!
xox
So pretty!
That has to be the best wire screen-type jewelry holder I’ve seen! Great attention to the details, such as spraying the screen and the cup hooks, too. LOVE that fabric!
That’s awesome. Another job well done. It doesn’t look too hard to do that, but you always make things look easy. :)
What a cute project.
Funny I just hung up a frame in my daughters room for the very same purpose , mine is smaller but wow great minds think a like. Maybe I will go make mine a little better , thanks for the inspiration .
Love this idea! I just found your blog on Lisa’s at “Living my Life, Outside the Box’, so glad I stopped by! I am now a follower! I am all about being a DIY woman! I am definetly going to have to do this idea for my 14 yr. old daughters room! Fabulous!! I would love for you to stop by my blog and see some of my diys too! I am having my first giveaway and I think you will like it!! Have a great weekend!
Hugs,
~Victoria~
Oh, I grabbed your cute button too to add on my blog! Love it and now I am off to look around at all your great posts~!
I don’t know if you answer questions on here, but I was wondering what you do for stud style earrings. I have been inspired and want to try out this project ASAP but wondered if you had any ideas for what to do with all those studs… LOVE your blog!!!
The fabric background makes such an amazing difference on this seen before project!! WOW. I am definitely adding this one to my list of things to do… maybe even make some for Christmas gifts!
I must have been living under a rock for the past 29 years because I have NEVER seen one of these before! This is exactly what I need to do in my room so that my lovely 2 year old daughter can't access my jewelry. (She has ruined two necklaces by "playing" with them…boo hoo.) I love the functionality as well as it is beautiful to look at. Oh my, I can see my to-do list is going to get longer and longer…
Genius!! I have the frame, I have the big chandelier earrings, I can get the rest. Thanks for solving my earring storage dilemma. Currently I am using a wire cooling rack – same sort of idea but yours is so much more stylish!
ooooo I’m loving this! I wonder what I should do about the studded earrings?
Great idea…I’ve always searched for effective jewelery display solutions as I have a huge collection and sorting gets difficult..but none except this were good for a huge display..This was just what i was looking for, so thanx a TON for coming up with the idea!!
I have an old window frame with screen. There is a piece down the center, which will be perfect for my 2 girls, who share a room! I will paint one section pink and one purple! I will use small S-hooks, because it is a smaller screen. I have been meaning to do this for so long, but them saw your blog and saw this with the material in the back!!! I love the material, it makes the item! Thanks so much, I will be back!!!
This is the prettiest frame jewelry holder idea I found online! thanks so much!!
So happy you put this in your blog today- I hadn’t seen it yet- LOVE!
this is gorgeous and I want to go out on a cold wet day and find a frame now, thank you so much for posting, truly inspirational xx
OMG!!! I have to have this! I put my earrings in an old box. I hate it when I want to put them on and just can’t find a pair! I’ve been looking to buy a frame jewelry holder, but just can’t find the right one. Now, I finally found the one! Plus, pink is my favorite color. Thank you for the easy step tutorial! You really make my day :) I’ve done craft projects as well. Thought you might be interested in checking out my works on http://www.makemania.com Feel free to promote this awesome project from your blog!
What a fabulous tutorial! How can I sign up to be one of your “followers”?
Wow – that’s a really great idea !
Wow, thank you for breaking it down – I’ve been planning to do something like this for a while but with pegboard but chicken wire is even better – it looks great especially with the fabric, what a clever idea…!!! :D
I love love love your blog!! And this idea is soooooo cute!
This idea is fabulous! I’m going to try to make it this weekend and if it turns out well for me, I may make more as Christmas gifts for my mother and friends! Thanks for posting this idea!
Terrific work! That is the kind of information that should be shared around the net. Shame on Google for no longer positioning this submit higher! Come on over and visit my web site . Thank you =)
Great tutorial! Can’t wait to try this out on the coming weekend :D
This is the best version of these I’ve seen! I will be making it this weekend!
I was thinking…. For stud earrings you can put a hook on the bottom of the frame and hang a tiny bucket or something from it to hold studs… Just a thought.