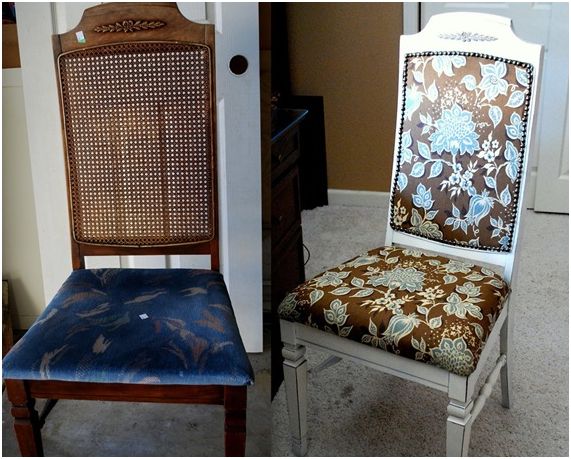
This dusty old chair was sitting at the local thrift store with a $3 price tag. I gave her a makeover, and bibbity bobbity boo, now she’s Belle of the Ball. Or at least, the belle of my office.
Before and After:
If you don’t have a handy magic wand, then gather these supplies:
- Fabric of choice
- Nail head trim kit with rubber hammer/mallet
- Spray paint (I used Rustoleum’s American Accents Heirloom White)
- Baby wipes
- Tea light candle
- Polyurethane (I used Minwax Wipe-On Poly) and latex gloves
- Foam (if necessary to add cushion or reinforce seat)
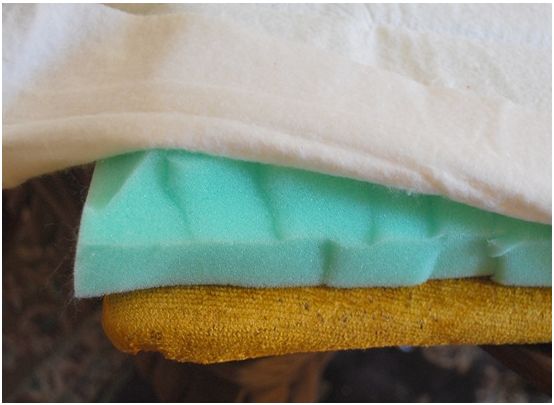
- Bamboo batting (see photo below)
- Medium grade sandpaper
- Hot glue gun
- Stapler and Staple gun
To start, remove cushion and give chair a light sanding. This removes dust, any leftover finish, and helps adhere the paint to the wood. Wipe down chair to remove dust, let dry 5 minutes.
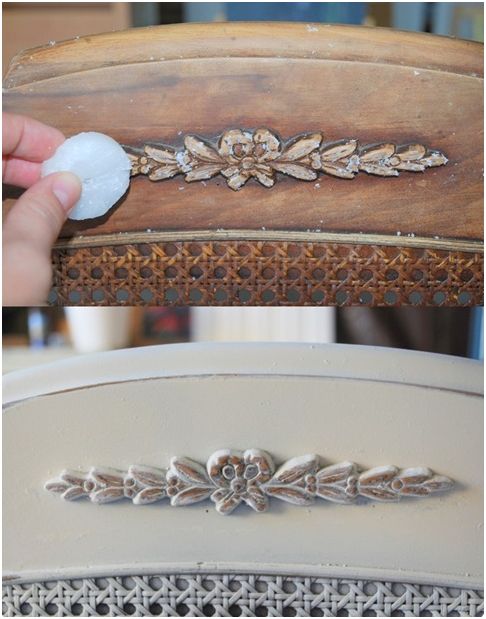
Rere’s a handy trick: rub tea light candle over edges of chair, wherever you want the wood to show through the paint. Lightly remove any wax crumbs with wipes. Apply spray paint to chair in a well ventilated area. Use moist wipes to wipe away the paint where you applied the candle wax. This allows the piece to have exposed wood edges and gives it that antiqued look. In my case, I had a nice bow detail on the top, and I wanted the wood detail to show through the white paint. If you’re doing more than one, note that it takes an entire can of spray paint to cover one chair.
Cover the entire chair with two coats of spray paint, and let dry for 24 hours.
Now it’s time to recover your seat cushion. Remove the old fabric, and consider reinforcing the old seat with a piece of foam. In my case, the chair only had a board with a small amount of cushioning and it was a bit uncomfortable. I purchased a piece of medium density foam from the local fabric store, and some eco-friendly bamboo batting to cover the foam. Trim your foam and your batting to fit your chair seat. Staple the batting tightly to the seat to secure the new foam.
Center your fabric on the newly cushioned seat, and attach with staple gun.
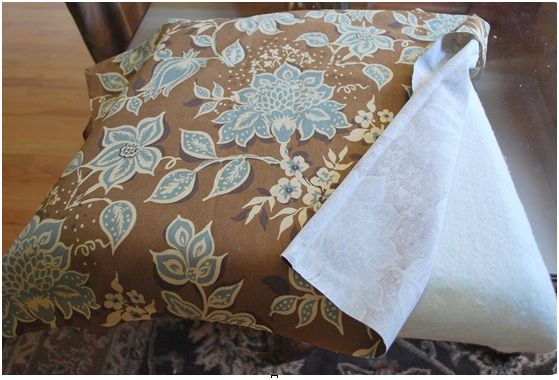
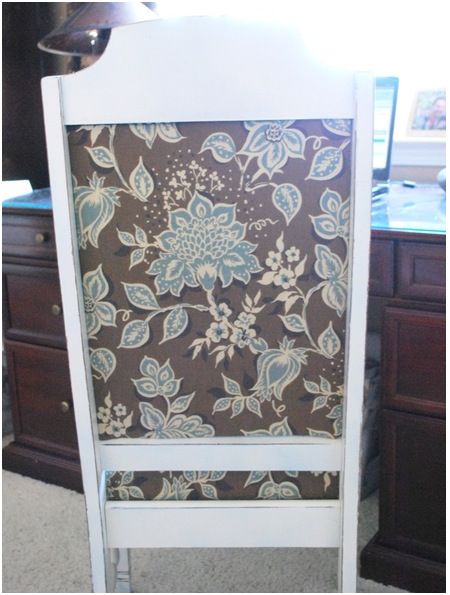
If you have a rattan back, you have the option of covering it with fabric. On the back, create a rear cushion by A) forming a cardboard skeleton, B) stapling the bamboo batting to the cardboard, C) hot glue the fabric to the cardboard, and D) thread the new cushion to the rear side of the rattan using a needle and thread, and secure the cushion to the rear with more hot glue to solidify the thread.
This is how the back will look when done:
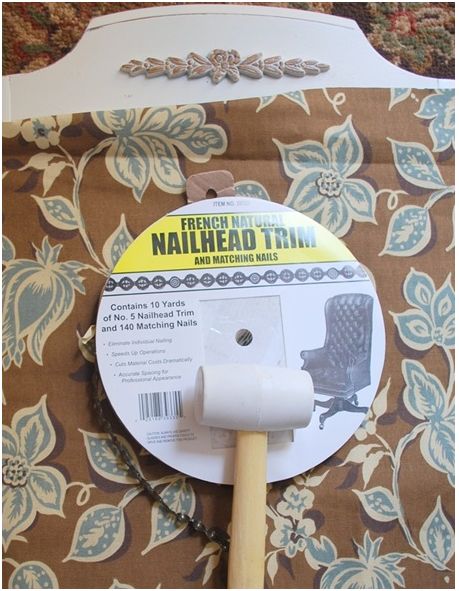
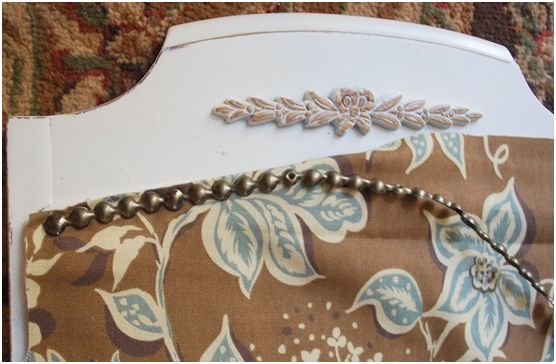
Trim your batting and fabric to just beyond the edges of where you’ll apply your nail head trim to the front of the chair. In my case, I chose a French natural color nailhead trim kit. Fold under your fabric, and work the trim kit around the chair, using the rubber mallet, to secure the batting and the fabric to the chair. Note: You cannot use a regular hammer, since it would destroy the delicate nail head. You must use a rubber head hammer or mallet to pound the nail heads into your chair.
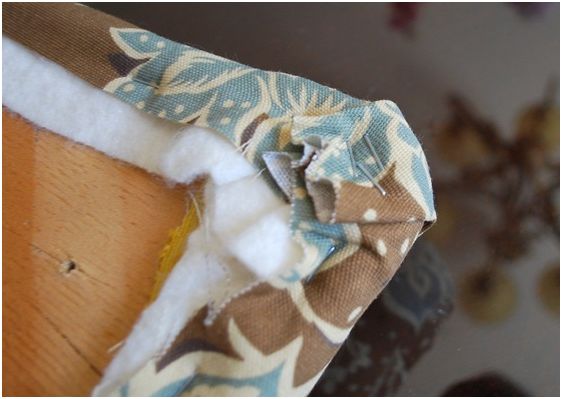
Needle nose pliers are a great tool for clipping back the edges when you make the turn.
Next, reattach seat cushion to chair.
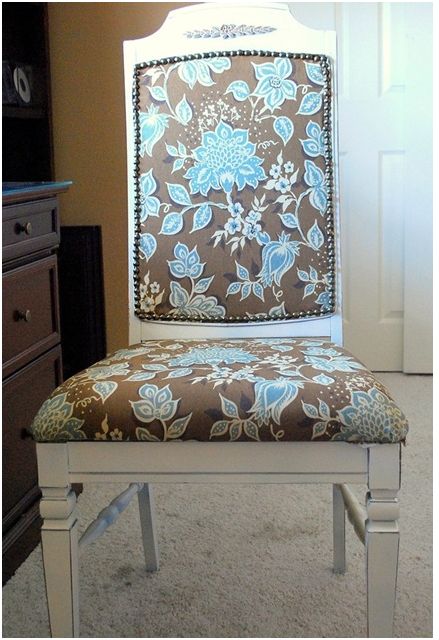
Here is the final chair:
Isn’t she lovely? Now, imagine doing this for an entire dining set… fabulous !
.


I am so glad I stumbled upon your blog!
Several years ago my uncle gave me his old dining room table and chairs, that look similar to the one you just revamped. I’ve been trying to figure out how I can make them work in my new house, and this tutorial might do the trick. Thanks so much for the inspiration!
it looks amazing, i love your projects
Absolutely love it! You have such fantastic taste. I sure can take some tips from you.
Love love love it! It would certainly would look good in my home. I love the fabric.
That looks amazing! Thank you so much for sharing this post. I feel inspired
Karen
http://www.simplylovelyideas.blogspot.com
That is fabulous! I almost bought that material for my dining room chairs…love it!
(And to answer your question…I don’t have anyone design my blog…I just do it myself…I figure out what I want from what I see in other people’s, then google it…(Like.”Take border off of header in blogger”) then follow the directions with bated breath. It’s always worked for me!
She’s beautiful!!! What a save and a bargain all at once.
Your site comes highly recommended by our friend, Elise. She can tell you that the 2 dollar thrift store chair is totally up my alley ;) I will be back to see what you come up with next! Enjoy your new chair…
I just discovered your blog from This Young House and I LOVE this chair makeover! Great job :-)
That is one fab chair transformation. I just found your blog from This Young House and I’m going through back posts as I’m liking what I see.
cheers,
Blueberry
Just found this from One Pretty Thing and HOLY COW! Love it!
The before is soooo similar to the dining room chairs I used to have! Ohhhhh how I hated them! The “after” is about 873568230497578234890900023 times better than the original!
Love the chair! I guess I’ve been doing something wrong according to your post. I was using actual paint. Out of a can. Geez, was I takin the long route OR WHAT???? Now I’m really ready to tackle my headboard!
-Shannon in Austin
Shut the front door! This is incredible–you have such an eye for treasures in the rough CG! Excellent job, it looks amazing!
very cool, I love how you covered the wicker
This is so great! I have an ugly bench I purchased because I planned on refinishing it. I hope mine turns out as good as yours did.
OMG I inherited four of these hideous chairs. Thanks to your fabulous blog, I can finally take off the almost as hideous chair covers and get rid of that ugly caning! You are my Shero! :)
O
M
G
I have identical chairs.
And a 40% coupon to Joanns.
Guess what I'll be doing this week?
They are AMAZING.
Hey-one more thing-how much fabric do I need per chair?
I have 6 chairs total.
Thanks!
If you have time to answer–what is the name of the fabric you used?
I love your chair redo and the fabric is fabulous.
I have had this Cinderella chair in the back of my mind as I have been refinishing my own chair. And it, too, is a Cinderella story! The transformation is unbelievable! I would love it if you stop by and check it out: http://thousandsquarefeet.blogspot.com/2009/11/goodbye-ugly-hello-beautiful-diy.html
Thanks for your many inspirations!
Absolutely amazing! Thank you for the succinct directions! I love the chairs!
hi there, I love this. I am trying to find the nailhead trim that you used, are there any local stores like home depot or lowes that sell it?
Hey, I was wondering if you wait for the paint to dry before rubbing it off where you have applied the wax or do you do it right away? Love the technique and want to re-do our kitchen table and chairs that way.
I was wondering….Do you use Primer before painting?? I have this weird thing about priming EVERYTHING FIRST. but it wasn’t listed on your supplies. just curious.
thanks
Jessica
I stumbled across your blog,and now I can’t stop reading it! YOU inspire me! to get some old furniture and give it new life! :)
I love the antique look of this! One question — I’m assuming you sand (or wipe?) off the wax before you do the poly coat?
Thanks!!
Awesome chairs! Where do you find the nailhead trim kit? I looked at Joannes and Home Depot and couldn’t find them?? Thanks so much!
Hi there-I have a question-how many yards of fabric are needed per chair? Additionally, how many yards of nailhead? I’m going to try this on my 6 dining room chairs and want to make sure I have enough material before I start…
Thanks!!
I recently spray painted a few dining chairs (first time!), and, much to my disappointment, the finish is rough. Can I use any sort of sealant to protect the finish and to also leave it smooth to the touch?
Thank you for any guidance!!
The way you’ve shown the work involved in restoring that antique chair displays true artistry. Excellent job, truly excellent.
I just stumbled upon your site and cannot stop reading! I see that you’ve used nailhead trim on this chair and a few other projects, can you only use the nailhead trim on fabric or does it work directly on wood? Thanks!
I did not quite understand the steps involved for the back portion of the chair. Did you have a catboard piece for both the front and back sandwiching the original cane back?
I have the same question as Anna – how did you attach the fabric to both the front and back of the chair?? I inherited a dining room set with these rattan backs and would love to cover them in fabric. Please help!
I just used your tutorial for my own chair and can’t tell you how happy I am with how it turned out. I.AM.IN.LOVE. Thanks a billion! http://thecraftcrazymom.blogspot.com/2011/07/meet-ophelia.html
I just followed the tutorial for my own chair and I am delighted with how it has turned out.
Many thanks!!!
You inspire me…
Terrific work! That is the type of info that should be shared across the net. Disgrace on the search engines for not positioning this put up upper! Come on over and talk over with my site . Thanks =)
your tutorial (and blog) are great! But the pictures arent working? Hope its not just for me :)
Hi Linda, fixing this weekend, thanks!
Linda…
sadly it is not just you…
I know you are busy.. so I will just keep peeking to see if it is up and running again! ;)
I am sorry to complain, but why do you put these up only to disappoint us by not having the pictures functional? These are not very helpful without them. I find many of these to be like this–it is always a big let down from an otherwise EXCEPTIONAL site.
I’m so sorry Anna, it’s a problem with 2-3 months worth of posts from summer 2009 and I’m slowly repairing them, each one takes about 30 minutes, please be patient, and I will repair them soon, the tutorials like this one are on top of the list.
Kate
Hope the pic problem is resolved soon. I have a china cabinet I’d love to experiment on…
Wow! I just stumbled upon this on pintrest. your blog is fab! Do you have any experience/tutorials with upholstering or re-doing ladder back chairs? I’m wondering if anything can be done to change the appearance of the back rest.
Simply WONDERFUL !!! I just stumbled upon this on pintrest. your blog is fabulous! Do you have any experience / tutorials to make chair covers complete with ruffles at the seat with padding? Thank you in advance! Everything you do is beautiful! Have you an ebay site ???