Today I’m back with another progress report on the Nevada house renovation, this one focused on the flooring! Two weeks ago I shared we chose to remove the old carpet and tile and replace it all downstairs with Daltile’s Forest Park in Sugar Maple (see the "before" here).
As I mentioned in that post, if the downstairs floors had been all plain white porcelain tile we might have kept that tile but because it was mixed with three kinds of dingy carpet we decided it all had to go to achieve a seamless more contemporary look from room to room.
Matt and I considered demolishing and installing the flooring ourselves for about 45 seconds, then came to the sane conclusion that professional demo and installation was a much smarter idea. 1,100 square feet of demo and tile installation would surely send us to both marital and physical therapy.
Also, these floors have to be perfect. The kitchen is a pass through and is located in the middle of the house with the living room on the right and the family room/breakfast nook on the left. Connecting the tile through the kitchen and around walls without anything wonky happening was essential and that made us nervous to tackle the install ourselves.
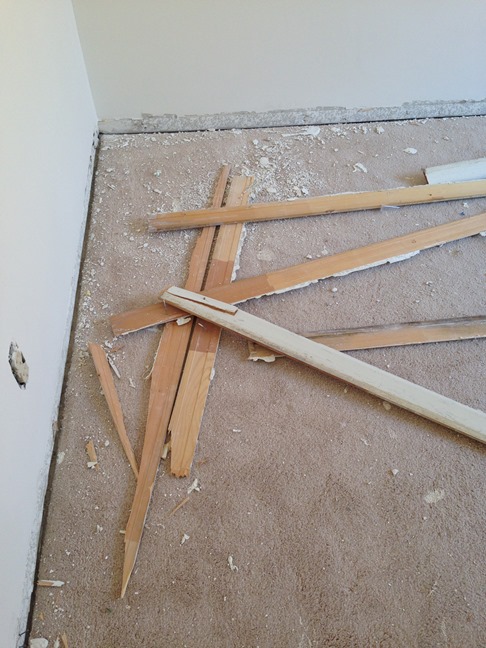
Someday I’ll write a post about when we DIY and when we hire out but this flooring project is the perfect example. We gathered three bids and chose the one we felt could do the work in the most timely and professional way and for a reasonable cost. Demolition began with the carpeted spaces and baseboard removal.
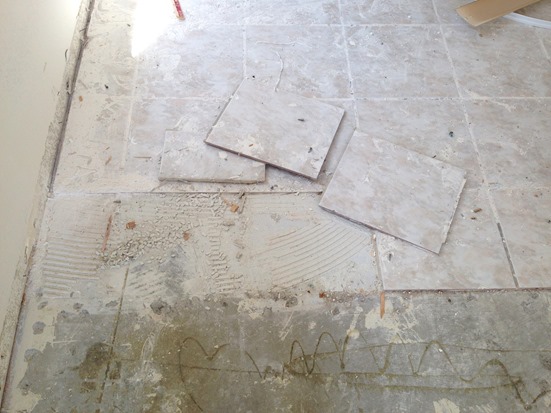
Tile removal is a lot harder, first just getting the tiles off the floor takes strong tools and muscles…
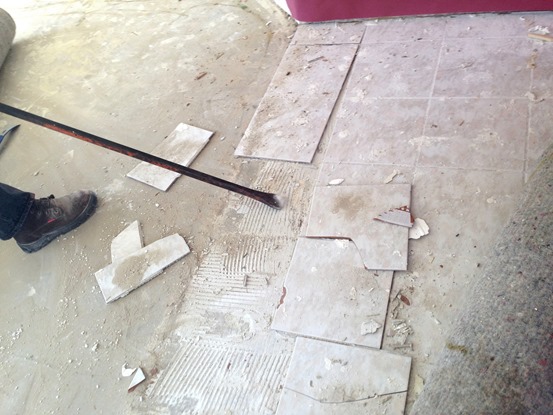
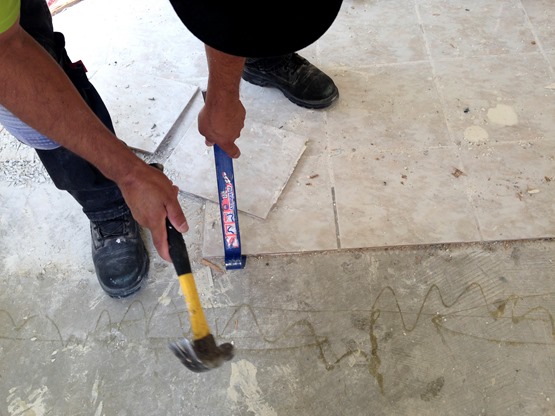
The first tool the crew used was a heavy pry bar and the tiles popped off pretty fast but broken pieces went flying everywhere (protective eyewear necessary!). We really appreciated that before starting demo they papered the freshly smooth textured walls (that burgundy paper shown), it was conscientious of the hard work from last week.
Another tool they used was a hammer and crow bar to pop them off one by one.
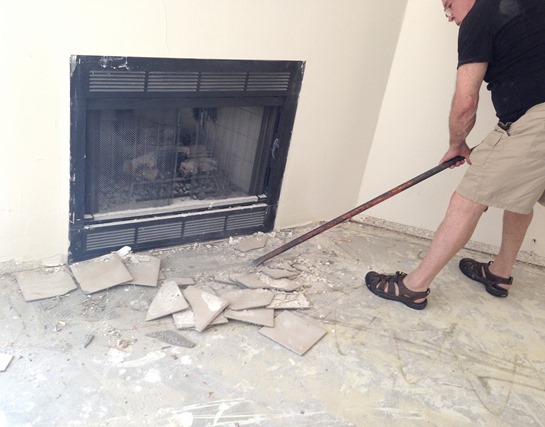
My Dad wanted a piece of the action with that pry bar so he took out the tile under the fireplace in an oh so appropriate shoe choice for tile removal. :)
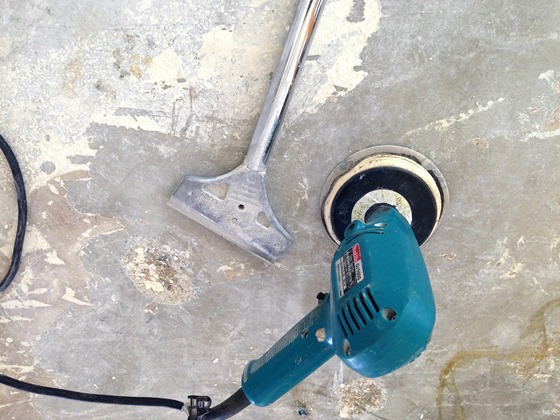
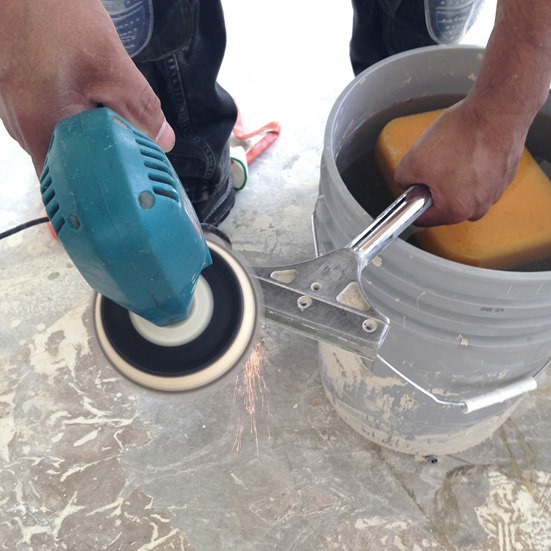
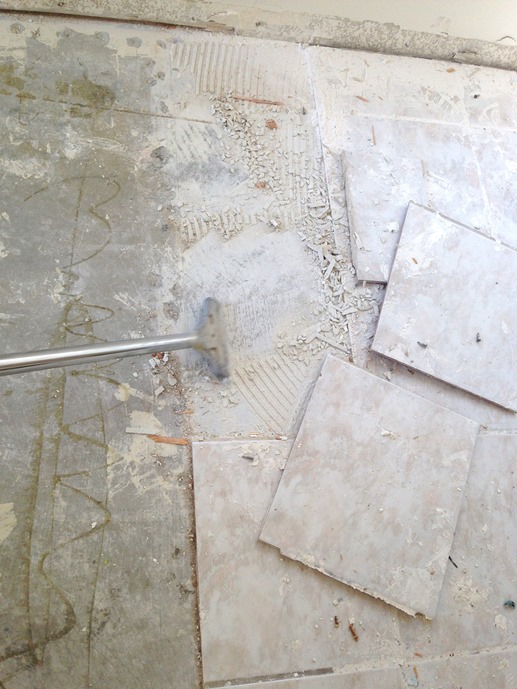
For thinset mortar removal, the crew used two tools, the first was a scraper, they used a sander to sharpen the edges a few times throughout the day.
This smaller scraper works well for removing old thinset mortar and scraping down to the slab concrete foundation. I volunteered to do a 4′ x 12′ section myself to get a feel for it for future projects. Therapeutic and a great arm workout but I was sweating buckets!
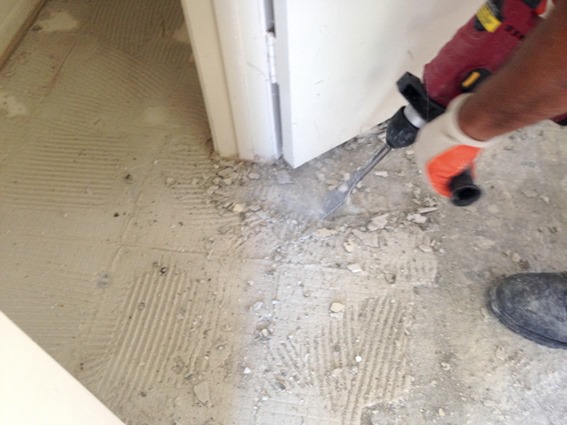
For more stubborn thinset they used a small jackhammer and it came off easily.
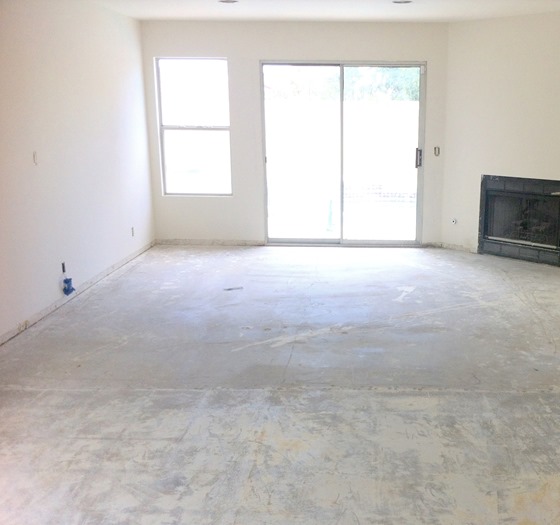
Once the tile and thinset were gone we came back in with a Shop Vac to clean every bit of dust off the floor to prep for the tile that was coming the next day.
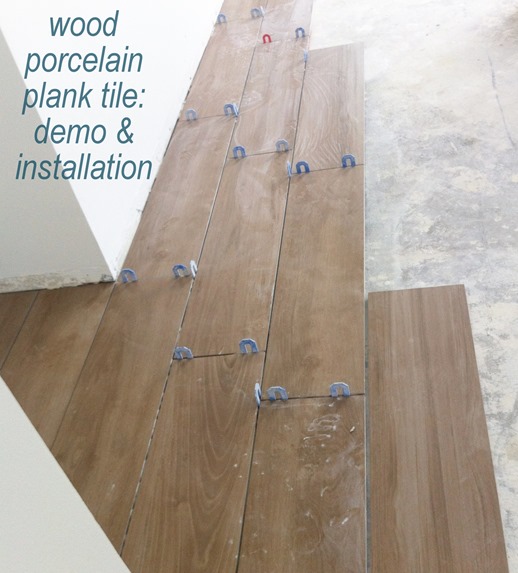
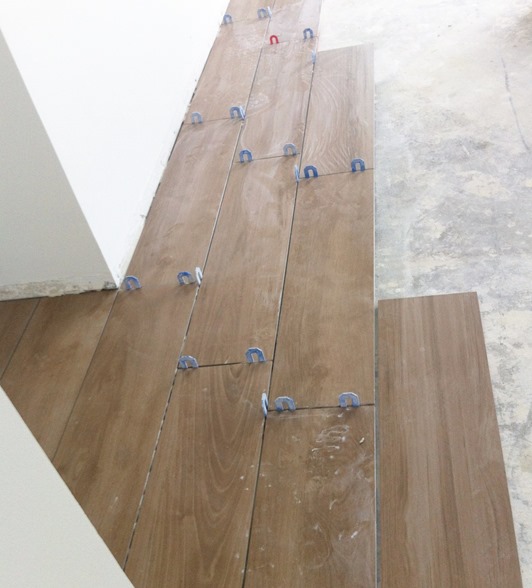
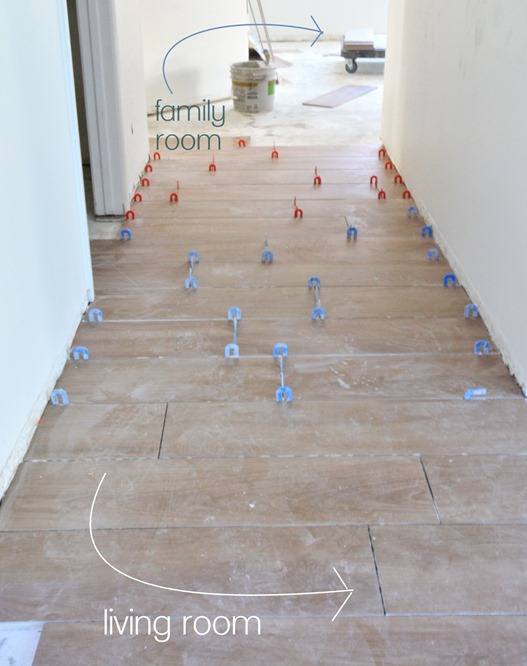
After much discussion we decided the best place to begin was in the most visible line of sight in the living room on the left wall. It’s the first place your eye naturally goes when you enter the home and where the walkway will be so it made sense to start on that wall instead of the opposite.
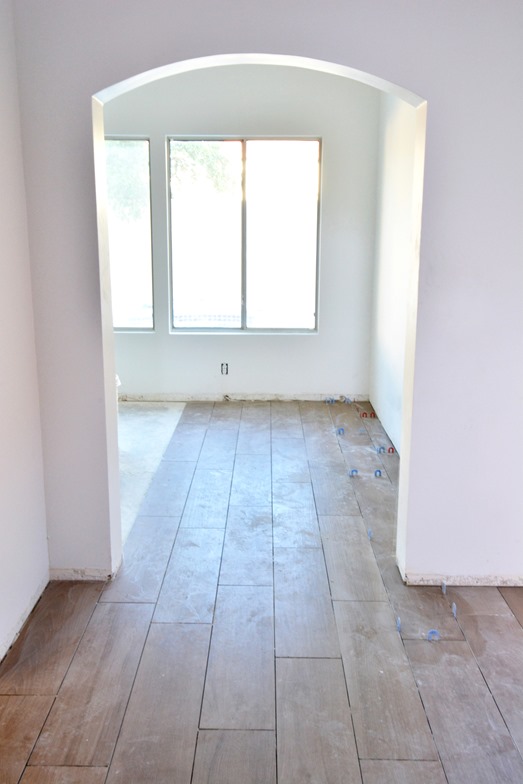
The crew is using chalk lines to measure the distance between walls and to ensure the tiles run straight and a level to make sure the floor remains smooth across the long surfaces (not shown, forgot to take pics!) They are weaving their way from the living room/entry through the kitchen and hallway and into the family room.
The 9 x 36" tiles are being installed in a random pattern much like real hardwood planks. The product recommendation calls for 1/8" spacers, though I personally wanted to use 1/16" for slightly thinner grout lines. But since both the installer and the manufacturer recommended 1/8" we went with that. We chose a grout that’s a match to the colorbody so those lines will be far less visible when the floors are grouted.
We’re thrilled so far with how it looks in the house, we’re getting everything we want, a wood look product in a cool contemporary porcelain tile with a seamless flow room to room throughout the downstairs.
I’ll share the final pictures of the flooring next week once the tile is grouted and cleaned and once we install the new white baseboards, so far we absolutely LOVE it!
*Disclosure: all Forest Park Sugar Maple tile for this project provided by Daltile™. (We paid for the demolition and installation.) All opinions are my own!

Beautiful! Great choice. I was considering a similar tile to do a modern fireplace wall. Have you seen it used that way before? If so, what do you think?
I know the tile was provided by Daltile, but I’m curious as to whether you can tell us how much it WOULD have cost if you’d purchased it?
Hi Erin, I don’t know what it retails for in their showroom per foot, I’ll find out!
Kate
Looks very nice. The only thing that concerns me is the lack of insulation below the wood flooring. Have you considered some sort of insulation or whats ‘s the reasoning behind not putting any?
Greetings
Not necessary in Las Vegas Nelly, it’s the desert!
For grout and glue removal, we’ve used the same equipment that you mentioned. For our second demo, we discovered a machine at a rental place that is a 15″ scraper on a machine that hammers at the glue/grout just like a jack hammer does but with a much wider blade. It still gives the arms a workout and I feel like I’m vibrating for a couple of hours after using it.
Love the wood grained tile. I got rid of some fugly tile and had laminate put down a few months ago and had considered doing the tile demo myself as it would have saved $1000. But after seeing 5 strong young men work on it for a solid day, I realized I’d be doing demo until next April Fool’s Day. Never mind hauling away all the debris in The Mighty Honda one bucket at a time.
Oooo I love that colour!
We have a 2nd home in the Phoenix area. It currently has wall-to-wall carpet in realtor beige which is always filthy. The house is kept at 80 degrees when we’re not there and 70ish while we’re there. Considering the low humidity and high temps., what other flooring options would be appropriate? We’re considering renting it so want something easy to care for and durable. This looks like a perfect desert, hot environment floor covering.
Hiring out was so smart! As someone who just took tile out of my entry and downstairs bath I hired out the tile removal from my kitchen. Tile removal is no joke! Hardest work I have ever done. Your new floor look fabulous!!
Beautiful. You guys always pick the perfect things!
that tile looks fantastic, great choice! Is it common in your area of the country for whole levels of a house to be tiled? I’ve seen that pop up on a few blogs lately, but that’s not something I’ve ever heard of before.
WoW! SO incredibly beaUtiful!
Excellent selection of materials, color, application and so on! Can’t wait to see the finish–
Catherine
I always thought you needed to put something like hardibacker under tile? Is there something different about this tile that makes it so you don’t need some sort of underlayment?
with a first floor slab foundation no hardibacker needed Suzie but we will use it on the second floor for the bathrooms in this home – back home in California we use hardibacker under tile for raised foundations on the first and second floor
Ha! Our house looks just like your photos right now! In the thick of tile demo and soon will be laying engineered hardwood! Can’t wait to to see your outcome! It’s going to be beautiful, Kate!
Love that tile you chose. Very smart decision to rip out all the carpet! I can’t wait to see your next demo project!
-Sayeh, The Office Stylist
http://theofficestylist.com/
I love this look and want to use it in my master bathroom – would that look weird?
I think that Porcelain tile has really come a long way. I just used it in my laundry room to match some slate that I had already installed throughout my first floor. It’s super easy to clean and maintain (much easier than wood or stone) and it’s level so great for furniture and appliances.
If you click this link http://marielovestostamp.blogspot.ca/2014/07/laundry-room-reno-continues.html you can see the “slate” porcelain tile I used to match my slate.
Can’t wait to see your finished pics!
Wow, already looks a million times better. Can’t wait to see the end result!
Never had the ability to be a DIY person but the satisfaction you must get from completing your own project. Wow!
I forgot to ask – How do you decide which pattern to lay this tile? It seems like yours is offset but what is the repeat?
It’s a random pattern Marie, no true measurements, just eyeballing it as they go to avoid a predictable repeat. :)
Looks gorgeous! Excellent selection on the tile :) Thanks for sharing!
WOW! that really looks gorgeous!! I have been seeing the wood grain porcelain in more and more whole home installs – and I really love it! I just installed 12″ x 24″ porcelain in my 3ft x 6ft tiny half bath and I LOVE IT!!! I love how sturdy it feels under foot (we had to use hardibacker under, on our wood subfloor)and how easy it is to clean, and the larger tiles somehow make the room look larger!!??!. we also used matching grout color, and it looks just beautiful! We definitely will be using the larger scale porcelain tiles in our upcoming full bath reno -and I think you have convinced me to go with a wood-grain pattern. I really love the ways yours looks!! and I love the lighter color you chose… can’t wait to see the completed project, thanks for sharing these details!
I have a question, what kind of wood do i need to use to fit with a nice white marble fireplace? I have a carpet atm and i want to replace it with a nice set of hard wood floor and i was wondering what would be the best can you give me some insight on what to use?
Amazing outcome! I can imagine what else you can build! You probly do get a lot of enjoyinment from all of this keep it up!