I’ve received a few emails about how I created shapes around images of products featured in the Holiday Gift Guide and in some subsequent posts since then. The answer is by use of a basic process of layering shapes and images with the clipping mask option found in Photoshop Elements. (For those that don’t have this software, Adobe is having a sale, you can purchase it for $70 before Dec 28th.)
This doesn’t take any advanced skills just a basic familiarity with the tools in Photoshop Elements. Follow these seven steps and you’ll be on your way to framing any image inside a shape of your choice or creating patterned or textured lettering. Both are helpful for blogging or scrapbooking or card making, or simply for having fun with photo editing or getting creative with fonts.

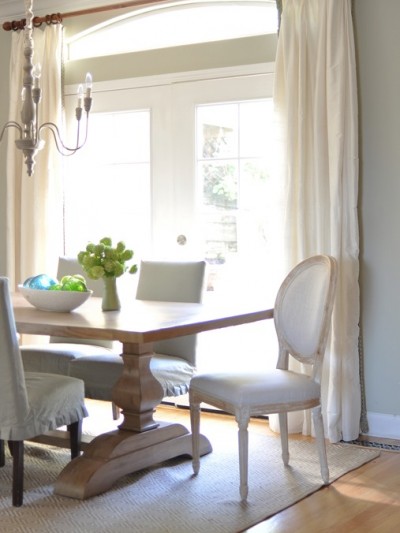
For demonstration, I’ll use this pretty Cambria Dinnerware image from Pottery Barn. Open the image you wish to frame inside a shape in Photoshop Elements.

1) Double click on the image thumbnail that is visible in the sidebar Layers window to unlock it (it’s automatically named “Background” by PE). Rename it anything, I usually use the default name of “Layer 0”

2) Select the Shapes tool and pick whatever shape you want to use to frame your image, from an ellipse to rounded rectangle to hexagon. In this example I’ll use the ellipse (or oval).

Note there are a lot more shapes you can use with the Custom Shape Tool selections, you’ll find hearts, stars, diamonds, frames, etc. Holding down ALT while you click on the Shapes tool allows you to scroll through the options.

3) Click on the image and drag the shape over the top to create the size of the shape (it can be adjusted later). A new layer and thumbnail will automatically be created.

4) In order for the clipping mask to work, the shape must have a colored fill, but it’s easy to do. Click on the Paintbucket tool, select black, then fill the shape with the black color by clicking on the shape.

5) The last step before applying the clipping mask is to reverse the thumbnail layers in the open Layers window. Click and drag the shape thumbnail down below the image thumbnail so that they are reversed.

6) Once the shape thumbnail is below and the image thumbnail is on top in the Layers window, select “create clipping mask” from the drop down Layers menu in the above navigation bar.

Pat yourself on the back because you’ve just used framed your image inside a shape with a clipping mask!

7) To adjust the size or position of the shape, click on the image thumbnail in the Layers window then click on the Move tool. Nudge the shape back and forth with the arrow keys or drag the image so it’s larger or smaller inside the shape. Clicking on the shape thumbnail below allows you to alter the size of the shape itself.

To preserve the background as transparent, save it as a PNG, if you save it as a JPG the background will be white. Those are the 7 basic steps to framing any image inside a shape using clipping masks.

You can use the very same technique with fonts installed on your computer combined with patterned backgrounds to create letters with a pattern inside. 
gold glitter background + wide latin font / striped background + quicktype font
Simply treat the patterned background as the image mentioned above (open it first in PE) and the font overlay as the shape layer, the steps are the same.
Enjoy framing images inside shapes and creating patterned or textured lettering with this clipping mask technique!
.
.

Thanks You! Thank You! Thank You! Awesome tutorial! I can’t wait to frame and clip EVERYTHING!
Thanks for the great tips! I love knowing how to do those things, but I hate messing around with programs trying to figure it all out. Thanks again for sharing!
You make it seem so easy and by the sound of it, it really is that easy. If I can find a friend who has Photoshop then I can get to try it. Thanks for sharing.
Thanks for this great tutorial! I am always look for photoshop tips and tricks!
I am getting Photoshop Elements for Christmas and I can’t wait to play around with it!:-). Thank you for this tutorial!! Did you learn to navigate it mostly by trial and error or do you have a go to book or website you would recommend? Thanks, Kate!
So great Tamara! I had my brother show me a few tricks to demonstrate how “layers” work because it was all Greek to me at first, but after he introduced me I just started playing around and reading online tutorials too. I recommend Layla’s Photoshop Elements tutorials, follow the “Shoot Fly Shoot” link in my sidebar to get access!
Kate
OMG thank you so much! I’ve been dying to learn how to do that to the letters but I couldn’t figure out how to search it on google! You rock!!
xo
This is great, thanks so much for being there for our learning curve. But……. I can’t help but ask about your dishes, I love them!!! Would you mind sharing were you bought them?
Thanks so much and Merry Christmas to you and your family!!
gosh I wish I was that good. Still learning how to use the photoshop. Really nice article, and as always useful
love
Ewelina
xxxxxxxxxxxxxxx
chiclifestyleofewelina.blogspot.com
Thanks for the great tip on adding texture to fonts… You can also use the cookie cutter tool in elements (the star beneath the “T” type tool) to crop layers into various shapes in one step.
Great tip Steph, thanks !
Your pictures are always bright and interesting. I’ve also found a quick way to create pictures in a shape using Microsoft Word. I open Word, insert a picture, then use the Picture Tools to format the picture. There are many shape options under ‘Picture Shapes’ and it is also fun to use ‘Picture Effects’.
Happy Holidays!
I love this! I am so new to PS so I love tutorials like this :)
I love this tutorials Kate! I don’t have a brother-n-law or any other family member to show me tricks like this, I only have you :) Your posts are always so rich in visuals thanks for passing along your tips!
Awesome tutorial! I’ll have to try this, it looks so easy but really nice. It would even be great to make Christmas Cards.
Thanks!
Thanks for the tutorial! I’m trying to learn as much as possible about photography, photo editing, and photoshop as I go through the process of taking great pics and sharing it in a beautiful way.