A few months ago I imagined for the window seat project a piped cushion cover with a zipper enclosure. When I finally took the time to tackle this project, I realized I just didn’t have the desire (or maybe the energy?) to make something fancy when something simpler would do just fine.
The only thing I really cared about for this window seat cushion was 1) straight clean seams in the front and 2) a cover that could be removed for washing since this study is a kid space. I settled on a simple knife edge box cushion cover, one without any piping or even a zipper. This one’s stitched in just a few obvious places, and kept together with velcro in the back!

Since I wasn’t doing piping and just a straight edge in the front, I was able to save money by not having to buy extra fabric for the piping (welt cord requires extra fabric cut on the bias so it curves around corners easily).
Instead I bought 3 ½ yards of green outdoor canvas fabric for $9 a yard to cover the length of the window seat and a piece of 24” x 2” foam as long as my window seat to fill the cover. And a package of velcro strip.

Because I settled on a simple edge with no piping, I didn’t bother to cut the length of the fabric in two long strips. I decided to work with the perfect crease that already existed right down the middle from the way the fabric was folded on the bolt. Why cut the fabric in two long strips when I’m just going to sew them back together? What if I just sewed that middle crease to form the first seam? So I did.

And that’s how I achieved the first straight edge for the front of the box cushion.

Next I needed a second straight edge to wrap around the cushion and form the second seam, so I used the foam as my guide and pinned the second point where I would sew the front edge of the box cushion.

I chopped off a piece of the extra foam and used it as a guide, sewing that second straight edge all the way down the length of the cushion with the sewing machine.

It worked! I ended up with two straight seams for that front edge of the cushion.

For the corners, I cut 4” x 26” strips (see diagram) and pinned them to both the top and bottom then sewed all around to form corners.

Instead of a zipper, I used velcro strips and sewed them to the hemmed back of the cushion cover.

It closes up tightly with velcro but removes easily when it needs washed.

Simple!

Some velcro strips and (lazy) sewing was all it took to get a simple removable box cushion cover for the window seat.

Thankfully, it meets with the minimum requirement for window seat relaxation. :)
.


My friend told me about you and I’m so glad she did. My sister-in-law asked me to cover a window cushion and I was thinking I had to do piping, but I’m doing it this way it looks much easier. Thank you.
-Gina-
Great tutorial! I will be trying this for sure. Yels x
I love smart sewing shortcuts. Another benefit of this method is that you save time and potential mistakes by not cutting those long seams on the front of the cushion. There has been many a time when my cuts have been too narrow and the look was wrong. With your method you only need to rip out the seam and correct your seam.
Awesome tutorial!!! I would have never thought about cutting off a piece for reference!!! Just brilliant! That should make this somewhat easier!!!
Thanks!
Tammy!
I love it and I love the fabric and colors!
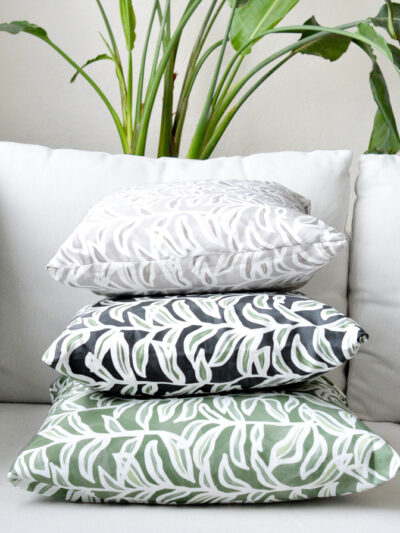
Nice job! It makes a lot of sense to keep the seat cushion basic and then use pillows to add color and texture. And, a great way to save a few dollars too!
This is perfect…..i never thougt of doing the front like you did…..wow! Good thinking!
I love the curtains behind the window seat! Would love to know if you sewed them and what kind of fabric. Love your window seat and your great taste in fabric!
Kate the window seat looks so pretty. I like all your blues and greens together.
Great job! I especially like how you figured out you didn’t need to cut the fabric into a top and bottom piece. How much easier to use the existing fold in the material for one seam, then measure the height of the foam to sew the other seam…genius! I have tried something like this in the past and didn’t make any seams at all, just wrapped like wrapping a present, then used velcro to hold it all together. I like your idea much better; a much more tailored look.
Thanks also for the explicit instructions and very helpful photos.
You have NO idea how timely this post is. Thanks for the great idea and tips.
What great tips to simplify making a box cushion cover and make it quicker too. Thanks for such a good idea and great pictures!
Sewing is on my list of things to learn how to do. So jealous I cannot yet create anything like your wonderful box cushion Kate\
Michelle
The window seat looks beautiful and great job on the cushion.
Cynthia
Two summers ago I tackled some bench seating on our screened in patio and one of the things I found hardest to do was to make both of those seams straight on the front edge of the cushion- in spite of all my measuring and re-measuring. It never looked the way I really hoped it would. I’m re-doing the cushion this spring and have bookmarked this post. That thing you did with the foam is genius and will undoubtedly solve the issue I encountered the first time. Thanks for the solution!
The window seat turned out perfect! I love all the colors!
This is a great tutorial!!!! But…..I’m not a fan of velcro so I made one using pretty buttons instead so it looks good no matter what side I have it on. Plus…..I added piping to mine. Your colors are fabulous and I too love your fabric choices. Thanks for posting!!!
Thanks for the awesome tutorial! Love it!
Leslie
I have 2 of 3 cushions finished on my window seat for over 5 years! I gotta gotta gotta finish the middle cushion. Thanks for the push. Jo @ Let’s Face the Music
Kate. What a great tutorial. It gives me an easy way to recover the cushions on my rattan sofa without having put in zippers! Thanks so much!
This is awesome, thank you so much!
This is super cute!! I love DIY projects… I need to make a pillow for the floor in my kid’s reading nook…right now I have pillows around the bottom leaning against the wall…and a sheer canopy hanging from the ceiling with rainbow heart paper garlands hanging from the top of it…. I had an extra cozy blanket of ours folded on the ground for comfort, but it was a bit too bulky & would get messed up when we had other kids over. This is a GREAT idea even for a little extra cushion on the floor area! Thanks for posting!
I love tips that use the fabric as is…and making the most of edges! This is a great idea, and yay to not having to make piping!
This looks so easy Kate and so nice in the window seat..My your little girl is growing up to fast isn’t she..So pretty like her Mom!
Oh man, I really need to get savvy with a sewing machine. This looks awesome and you make it look so easy!
Looks amazing, Kate! And LOVE the velcro!
I love your window seat! What is the name of your green fabric, and where did you get it. It’s just the color I need.
Thanks!
This is gorgeous! Where are the trellis drapes from? I am looking for something similar for our nursery.
The window panels were from Lowes!
Kate
Hi Kate! Once that fabric stretches from use and gets “baggy” looking, you can wrap the foam in polyester batting (yes – the puffy kind like the inside of a comforter) and stuff it back into your sewn cover. A BIG tip for keeping those boxing strips looking perfectly straight: ALWAYS tuck the seam allowance towards the boxing strip…not towards the top or bottom!
I have pinned for future reference. my mother and I just finished making a rolling cubby bench which I want to put a cushion on top. I just need to find fabric of the appropriate weight in a colour and design I like… harder than you would think to find.
Thanks – I bought a second hand set of sectionals for the porch and the only yucky thing were broken zippers and stained fabric – you will save me sewing with this method – THANKS
That’s a great thinking of using velcro strips instead of a zipper,and sewed them to the hemmed back of the cushion cove.
I know you posted this a while ago, but I’m just getting around to making mine now. Quick question: did you secure the cushion to the bench to prevent it from slipping off at all? My bench is an Ikea bookcase on its side, so I’m worried that the cushion will slip right off once I’m done sewing it.
Thank you for this simple solution! I am not a seamstress and I feel that even I can do this nicely.
Hi from the England! Thanks so much for this brilliant tip! Have just made a box cushion for a bench in our porch, and it was so quick & easy using your method. Fantastic!
Love the window seat. What is the paint color on the walls? LOVE it.
Hi. I’m kind of stuck! Can anyone help me with the corners. I can’t get the diagram up and I can’t figure it out. Pleeeeeeeease! Thanks
I did the front seams as described then got completely lost. How did you do the sides and then what in the world did you do in the back?? I am not understanding how to get the sides connected to the back and then how to finish with Velcro! Just butchered the entire job!! Please help as I am in tears!!
Oh no I am so sorry! I know it can be a bit tricky I struggled with it myself. Email me, hopefully I can walk you through it!
Kate
There are some questions about how to do the corners, hopefully these images will help! I recreated it with a piece of paper. Not the same as fabric I know but hopefully the visual will help. First, after you’ve sewn the seams along the long side of the cushion you’ll have what looks like a long three sided figure like this: https://centsationalstyle.com/wp-content/uploads/2018/01/step-one-cushion.jpg
Pinch the inner corners together tucking them in at a 45 degree angle to create the corners that wrap around the sides of the cushion, pin them in place: https://centsationalstyle.com/wp-content/uploads/2018/01/step-two-cushion.jpg
Turn inside out and sew together to form corner of cushion so it looks like this: https://centsationalstyle.com/wp-content/uploads/2018/01/step-three-cushion.jpg
Email me with any further questions!
How do you cut the Velcro part