Wow, what a weekend! After six weeks of renovation, we finally finished up the kitchen over at our Alma Project at I snapped a lot of pictures, can’t wait to show you the transformation, it’s such a great before and after story! Thanks for all the sweet comments on our blue balcony from last week. As promised, here is the four step easy peasy lemon squeezy way to sew your own removable pocket pillow covers.

First things first, grab yourself some outdoor fabric from a local fabric store or online (here’s a great list of online fabric sources!) I used two yards of P. Kauffman Conservatory Aquamarine for two rectangular lumbar pillows and two yards of Waverly Meridian Medallion for the square versions. (Depending on the size of your pillow, you often can get away with only 2/3 of a yard per pillow, but I ordered 1 yard for each pillow to be safe.)
For each pillow cut the front piece to fit the size of your pillow giving yourself extra fabric for the “pouf” of your pillow insert – also allow an extra inch for sewing the seam for Piece A (the front) and an extra inch on the sides of Pieces B and C.

Step 1: Roll under the sides of the edges of Piece B and C and hem the one side.

Step 2: Lay pieces B and C pattern side up on your work surface and layer the pattern (or repeat) so they are lined up. Allow about 3 inches of overlap for your pocket opening so the pillow form doesn’t bulge out from the pillow cover.

Step 3: Lay the front piece on top, pin the pieces together inside out, then follow the pins all around the four sides with your sewing machine, it takes just a minute or two.


Step 4: Trim any excess fabric, turn inside out, then stuff your pillow insert inside the cover, pretty simple!

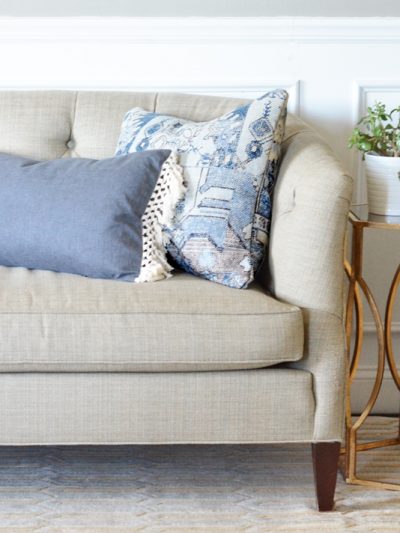
I follow these same four steps when I make a removable pillow cover for both outdoor or indoor pillows, it’s my favorite way to make pillow covers with new fabric that are easy to wash and change out with the seasons. The same method works for any size pillow insert. If you don’t have a sewing machine, you can still create your own pillow covers with fusible web, see this tutorial for no sew pillow covers.
Cheers to alfresco decorating!

Coming up tomorrow, a fun announcement and also the pictures and story of our Alma Project kitchen!
.


such a great tutorial!
I love your pillows! My cousin, who is an upholsterer, advises making the pillow cover 2″ SMALLER than the pillow insert, so the pillow is fully “stuffed”. So for an 18″ cover, you would insert a 20″ pillow form. I know this sounds totally illogical, but since I have been making them this way, I am much happier with the results. I also either tie off, or rubber band the corners, before turning right side out, so you have nicely finished corners, with no pointy “ear” look.
Hi Bernie, I’ve heard that too! I usually sew mine pretty tight to the pillow but yes it’s true less (fabric) is more (fluff)!
Kate
You make it look like a cinch! I just bought some darling fabric remnants to make pillow covers. Can’t wait to see how mine turn out. L
I am loving your color scheme too!
I’m a beginner at sewing, so I haven’t tried this pillow method yet, but it looks easy enough so I want to try it! I have also heard that you should buy an insert that is 2 inches larger…
Great tutorial Kate!!! Seems pretty easy even though I haven’t sewed in many years. This would be so much better then having to always buy new pillows or find a place to store them. I started buying just the pillow covers when I find ones I like, but they don’t always sell them in very nice patterns. This would be the answer to it all then. ;)
LOVE that fabric!
Love the blue and white. I make pillow covers like this too and it’s so easy! One thought -I place the pins perpendicular to the seam line and it makes pulling out the pins easy as you stitch.
Great tutorial. Love the fabrics. Thank you.
That looks so cute and easy. I have a sewing machine that I haven’t used yet so maybe this will be my trial project!
Question: Is there a disadvantage to using one long piece of fabric, with A as the center and B and C as opposite ends? Then, after hemming the short edges, you just overlap B and C (right sides together) over A and sew up the two sides. That’s the way I would do it, if this makes any sense.
I always see tutorials like these and plan on doing them but I am limited by my crippling lack of creativity. But this feels like it’s in my wheelhouse! I’m gonna try it!
I love the fabric you chose! I can’t wait to try this for myself. But where do you get your pillows?
Hi Ashley, I buy my inserts at Joanns and I’ve found a few at West Elm too!
Kate
Love those pillows!
This really does look easy. I think I could handle this. I have recently fallen in love with outdoor fabric and all it’s uses.
I agree with using a larger pillow than your pillow cover. As the pillow is used, the fluff will get pressed down and if you use a smaller one, your pillow will look flat and lifeless. There is some advantage to using one piece of fabric, but the edges of the pillow will not be as crisp. It’s also good to stitch one or two diagonal stitches in the corners rather than doing a 90 degree angle, your pillow corners will look better, don’t forget to trim away the excess fabric in the corner and use a pin to pull the right side out for a crisp look.
Thanks for the tip Jessica!
Kate
These are really pretty – love that you used the same color in various patterns.
Super cute! One of my goals this summer is to improve my sewing skills… these look doable.
I never tire of blue and white. Lovely! I’m going to add another pillow tip. To avoid the “dog eared” corners that square sewn pillow have, I taper my pillow corners 1/2″ (as long as I’m not dealing with stripes) beginning one-fourth of the length of each side down to the corner (i.e. on a 20″ x 20″ pillow piece I start tapering 5″ from the corner).
Thanks for the tutorial! You did a great job. :) Pillows are on my to-do list!
Great job Kate. I have a suggestion for you and your readers. When pinning an article to sew, place the pins parallel to the needle and foot, in a railroad tie fashion. This way the needle will glide over the pins because the feed dog of the machine will pull the pins through and the pins will not have to be removed until after you are done sewing the seam.
Thanks Chris!
Kate
Thanks so much for this tutorial! I am planning on making some pillow covers this week, so perfect timing! :-) Happy Monday to you!
These are such gorgeous pillows, i fell in love with the fabric last week when you did the reveal to your balcony. Looks perfect! The tutorial for the cushion is very easy to follow as well. I need to get rid of my fear of the sewing machine! How long did the whole process take to do all the pillows?
Thanks for the easy tips and tutorial! I love the chevron rug as well – is there a source available for that?
Thanks for reminding me just how easy a pillow can be. No need for a zipper. I love your fabric choices. The patterns work so well together!
I too fell in love with the fabrics when you revealed last week. It looks beautiful! There’s something so crisp and cooling about blue and white together. But the designs in the fabric completely kick it all up ten notches!
Luuuuv that fabric. Thank you so much for the tutorial!
Thank you!!! We have an outdoor sectional coming in soon and we’ve been thinking about throw pillows, but looking at stores and not sure if we’ll like the pattern with the cushions. I think we’ll now go to Fabric Row in Philly and pick out some outdoor fabric and I will DIY.
Awww. I love the fabric you chose. Sort of “colonial” and very clean-looking. This doesn’t look too hard, thanks for the tutorial. :)
Mel at themeaparty
Love the fabric you used! It’s gorgeous!
So excited to see what you do for the Pinterest challenge!
I could eat that fabric up! It looks so summery and outdoorsy. We badly need cushions on our outdoor chairs, so I’ve been casually looking for a fabric I loved. These might fit the bill!
Love the fabrics you used! Thanks for such a great tutorial. I am horrible at sewing and feel this is one even I could tackle and come out a winner LOL Hoping to update our patio furniture soon and this project is perfect!
He heee… I just came across this via The Nesting Game… it seems great minds (and names) think alike… I did basically the same thing with with some vintage tea towels back in February!! I got some great tips from your tutorial too, I hadn’t done one before, and the way you set yours out is super user friendly :)
Here’s the link to the ones I made: http://www.littleadelaidekate.com/2012/02/tea-towel-cushion-tutorial.html