It has been said to me by my mate on more than one occasion that when it comes to decor I have champagne taste on a beer budget. You’ll get no denial from me. I’ve long been in love with lacquer nesting boxes like these and these ~ they are such glamorous little vessels for storing everything small from jewelry to keepsakes. I happen to find them completely irresistible, but the problem is they’re pricey, up to $80 a box (or more!) for the designer versions.
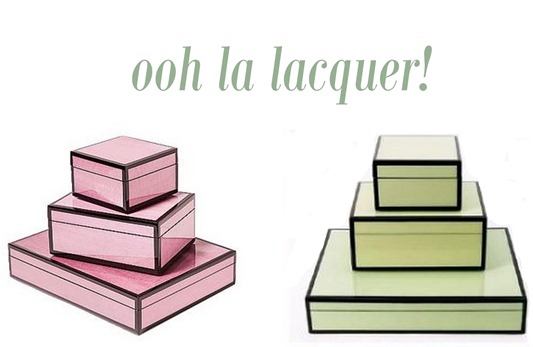
So last weekend I decided to do my thang and mimic the look of these beauties with a few supplies from the craft store.
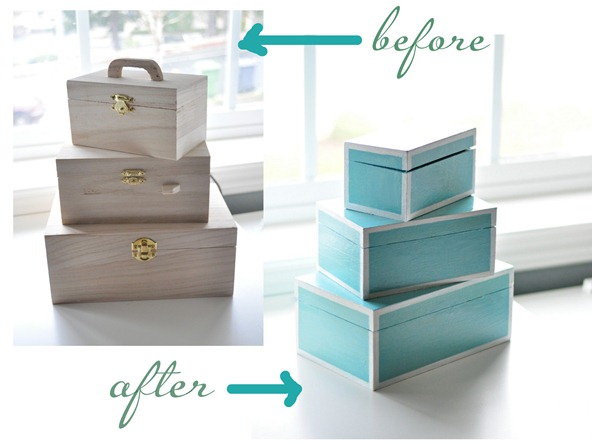
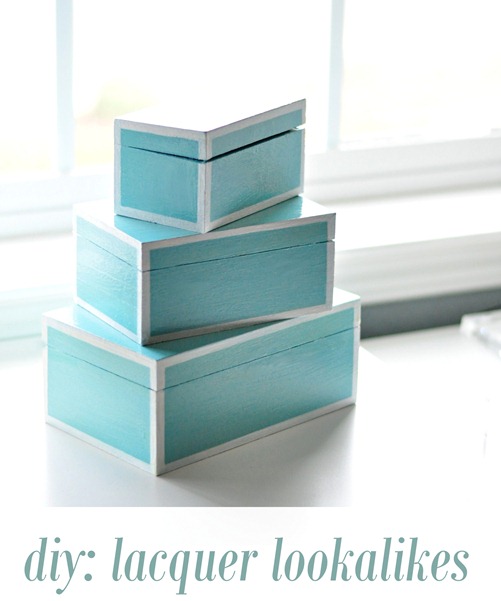
To make these yourself, here’s what you’ll need: wood jewelry boxes from craft store, small Phillips head screwdriver, paint colors of choice, wood filler, painter’s tape, medium and small paintbrushes, fine sanding wedge, high gloss coating.
First, remove the jewelry box clasps with the screwdriver but keep the open-and-close hinges in place. Fill the holes with wood filler (or wood putty) and sand the box to get it smooth. Paint the boxes with your base color of choice, but be sure to use painter’s tape in the opening, otherwise your paint will seal the box shut.
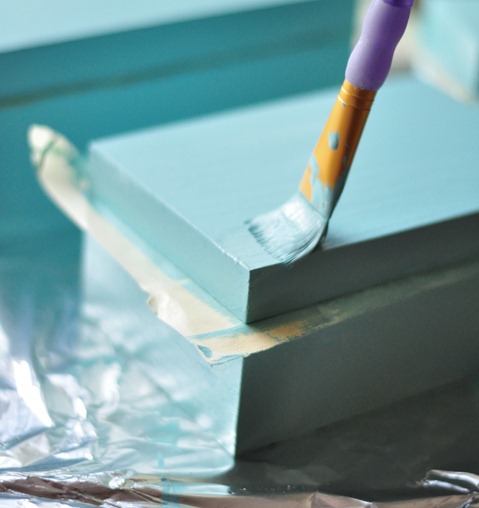
Once your base coat is fully dry, give it a light sanding if necessary to get rid of heavy brush strokes and tape off the box with painter’s tape to form your stripes.
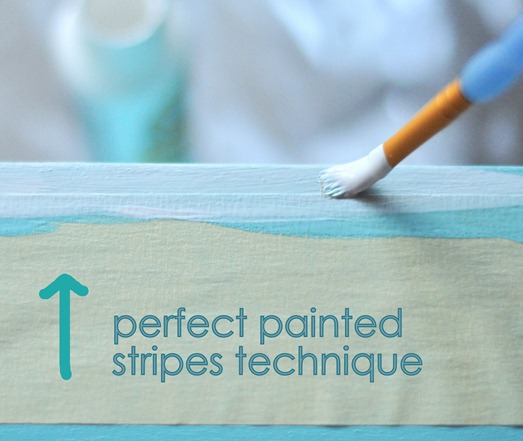
Do you know the best way to get perfectly painted stripes? I learned this from readers (thank you!) and wrote about it here. Use the base paint to seal your painter’s tape, then paint over it with your stripe color. Peel up the tape while the second coat of the stripe color paint is still wet, it works every time!
I took my time with the stripes, painting the horizontal ones in the morning and waiting till they were fully dry, then finishing the vertical ones at night. Allow the paint to fully cure (at least 12 hours) before giving it the protective coat. The final step is to give it two coats of a high gloss, if you want a super shiny finish, or you could just leave them more matte, your call. I tried Martha’s High Gloss for this project, and it was pretty good, giving the boxes a nice glossy shine.
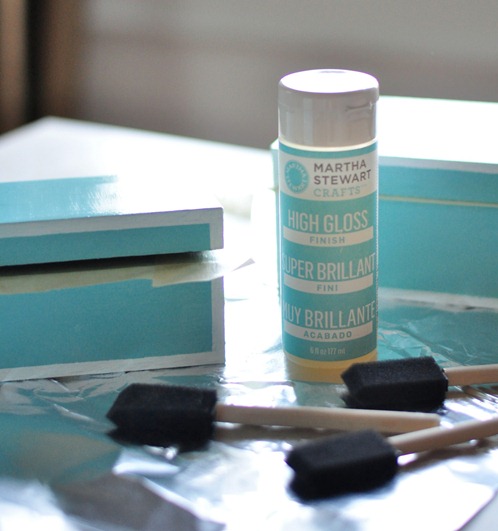
Allow the nesting boxes to fully dry, and there you have it, lookalikes for a fraction of the cost. Are they perfectly smooth like the real thing? Nope. Is there some visible wood grain? Yep, a little. They’re certainly not as perfect as the expensive lacquer versions but they look just as pretty to me.
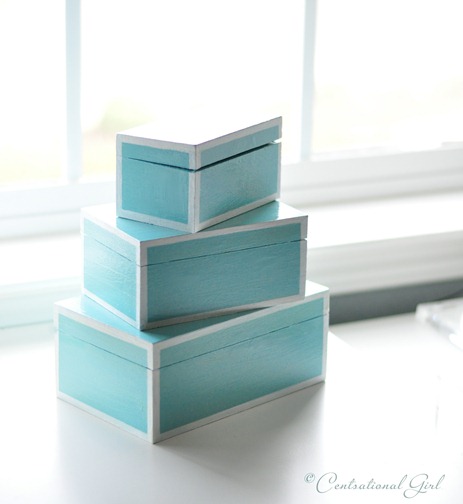
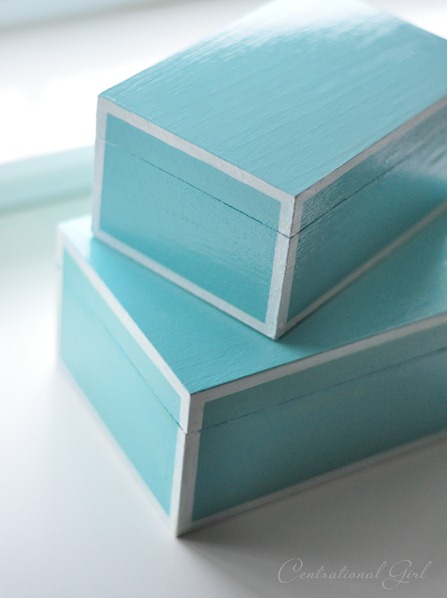
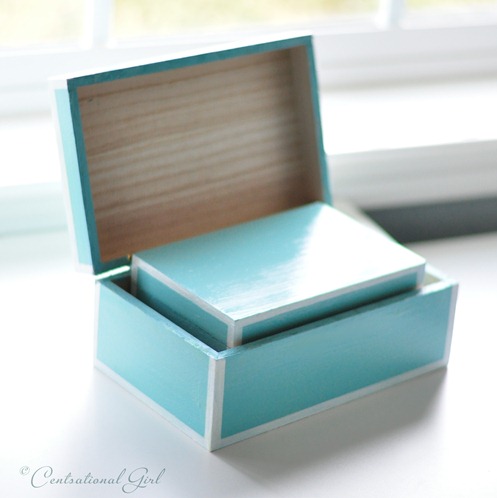
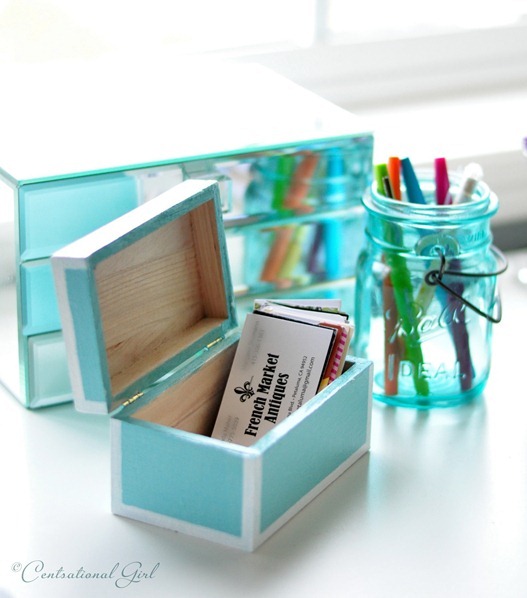
I’ll use them to store keepsakes, cards, or other tiny things. The little one now holds all my business card contacts in my office … sweet!
.


I love these! Pinned them to my ‘things to make’ folder.
Kate I love your “Tiffany ” Lacquer boxes, they are beautiful!!
xoxo
Karena
Art by Karena
Love it..and the color you chose. I just bought that “Martha” paint in black!
LOVE IT! I need to do this! Such a great money-saving idea. About how much did you spend total on the project? I love the look of these boxes for stylish storage. http://www.justhadabrightidea.blogspot.com
-Morgan @ A Bright Idea
And I was looking for boxes for my desk :)
yay those look awesome!
i love those lacquer boxes too but i’m afraid of chipping them and therefore wasting money. at least with these it’s easier to repair the wood if need be and you can paint over them if you ever want a different colour!
Love this whole thing… but honestly? The tip “be sure to use painter’s tape in the opening, otherwise your paint will seal the box shut” was a huge *facepalm* moment for me.
DUH!!! Grrr! So that’s what I’d been doing wrong when I’d painted wood boxes before! That alone was worth the read. Thanks a bunch :)
Great job. I seem to learn something from my projects and I say … next time I do this I’ll know … but most of the time I never do the same thing again. I wouldn’t have thought to tape the inside edge soas not to seal the box … and that would have been my “okay next time moment”. I do a lot of painting and I too love the tip about sealing your stripes with the base color first … darn, why didn’t I know that years ago? By the way … I’ve found you notice differences only when they’re side to side. The wood grain etc. looks like it’s suppose to be and looks great. You’d never know they were different unless they were side to side. (I learned these tricks a long time ago … i.e. if you want to look better…always stand next to someone heavier than you) It’s all relative :)
Really nice work…as always
[email protected]
I have some leftover Rustoleum oil-based enamel I could try this with! That stuff is suuuuuuper shiny and has awesome coverage. We’ve painted a dresser and our yucky old bathroom tiles with it. Magic, I tell ya.
These look great! For sure worth a try to avoid paying for the real thing, which are NOT in my budget either!
They look great! The little one is my fav.
These are adorable! You can never have enough little storage containers, it secretly coaxes you into being organized. Love it!
I always see the lacquered boxes in stores but they are always too expensive or beat to death. This is such a great alternative! Thanks so much for sharing!
Awesome job Kate. Love how they turned out. I think I actually like them better then the expensive ones. Thanks for sharing! :)
Love! On my screen, they are a beautiful Tiffany blue. So pretty. :)
Love this idea! I def want to try it! Love your color pick too:)
what a fabulous idea! i have some lacquer boxes that look just like that! tiffany blue with white trimming.
These DO look as good as the real ones! I love them, and your color choice, too!
That is such a great idea. And the best part is it is very inexpensive decoration.
This is funny. I just finished painted a jewelry box I found at goodwill and I wasn’t really feeling it. I think this little idea will put it over the top….Thanks!
Lovely! I had no idea that lacquer boxes could be that expensive.
I love them! They remind me of Tiffany & Co boxes.
Xo
Too stinkin’ cute. You have such great ideas!
Love the choice of colours!
They are beautiful!!! And a lovely robins egg blue, what a coincidence!
Those look great. To funny too because I just picked up some boxes like that at Michaels yesterday because my daughter loves them. Unfortunately for me she wants birds stenciled on them. I can do it, I’m just wishing she liked these stripes more.
Great job and wonderful instructions. Pinned!
those are darling! great diy project!
I just saw these on Pinterest a few minutes ago! So cute and fairly simple, something I can do! I have so many wood boxes in all shapes includin birdhouses that I’ve picked up from Michaels. This could be fun. Thanks Kate!
I LOVE these! I’m adding this my list of to-dos. I’m already thinking about two sets: one for my office, and one for my daughter’s room when we re-do it, but that will be a while. LOL! Fantastic job on these! They look GREAT!
So cute! I love the way these turned out. Now, what about some cute paper lining the inside?
Great idea for lining them Heather! Yep, you can always leave them natural wood or line them with a fun or funky fabric or paper!
Kate
These are so gorgeous!
These look beautiful! I can’t wait to try it myself, thanks for the inspiration!
Brilliant! My library is painted that exact color and I’m always on the lookout for accessories to bring that Tiffany blue color into other parts of the house. To be honest, I actually used a real box from Tiffany on an Ikea dresser (the box had contained a baby gift) just to fancy-it-up. Thanks for the idea!
Love them! You are just so darn creative! So cute.
These are beautiful, Kate. Tiffany blue is such a gorgeous color.
I love this! Yesterday I used a very similar “before” box to create this little keepsake — would love to hear what you think :)
http://simcoestreet.blogspot.com/2012/01/easy-diy-baby-handprint-box-dollar.html
Jenny
xo
Oh and one question — without the jewellery box clasp hardware, do they have any trouble staying shut or do they sit a tiny bit open?
Hey Jenny! The bottom two have no trouble, but as you can see the littlest one doesn’t want to close all the way! Oh well. :) Something to do with the hinges perhaps…..
Adorable lookalikes! I’ll have to try this out.
What a beautiful project Kate! I love the colours you chose…just perfect! Wishing you a wonderful week! Angie xo
I love your boxes!! Did you know that if you paint the boxes with primer first, then sand, then paint your color, that you will get a much smoother finish?? If I’m looking for an extra smooth finish I will sometimes use two coats of primer and sand between them. And now I’m off to paint some little wooden boxes, too!
Thanks for the tip Luann!
These are beautiful and I can’t wait to make a set! Can you please tell us the paint color you used? Thanks so much!!
Your boxes are stunning! We’re trying to declutter our house, so I’m not sure if I’ll be making any of my own in the near future. I have long wondered why my wooden boxes seal themselves shut every. single. time. I close them, though. Thank you so much for that part of the explanation!
If/when we get our place cleaned up, I’ll have to come back and take another look. These really are beautiful, and I especially love the color.
i absolutely love these!!! thanks for tutorial :)
These turned out so pretty! Thanks for the great tutorial. Would you mind sharing exactly where you got the boxes?
Hi Lori, found them in the wood craft section at Michaels, $2 for the small box and up to $5 for the larger box.
Kate
I think spray paint would give a smoother, more lacquer-like finish, although there would be less of a color selection.
They’re beautiful! Thanks for sharing!
Very cute!!!
-Diana
I totally am in the middle of a project just like this!!!! Love , love, LOVE!!!!!:)
Just beautiful and I need to do some!!
awesomeness. just awesomeness.
I like them even better than the expensive ones because they’re personal and made with love! I think I have a new project to do…!
Cuteness!!! Def on my list of things to try!
AH, I LOVE this! I’m gonna make this for a baby shower gift! Thank you! Andrea
Oh I love it! I don’t have a thing for lacquer boxes so the fact that the wood peeps through doesn’t bother me- they just look adorable. And this is a small enough job that I can try doing it on the porch of my new apartment. I really want to pretend that porch is a garage and just have at all kinds of projects :)
Love the color and detailing you added to the boxes!
Can you please let me know what color paint you used? I love the look!
Hi Katie! I mixed my own color, it’s half Legendary Blue by Pratt & Lambert and half Waterscape by Sherwin Williams… but two close matches on my fan decks are Pool Blue by Benjamin Moore and Mariner by Sherwin Williams!
Kate
These are super cute. You did a great job. I think I’m headed to Michael’s to get me some boxes! These are perfect for cute, chic, yet affordable storage. :-)
So cute Kate! I had to go out and immediately get some supplies to make this (besides, I had an A.C. Moore coupon burning a hole in my pocket!). :)
I had been looking for an excuse to try out some of the gloss acrylic craft paint, so this is my chance. And I will end up gifting the boxes (most likely an end-of-year teacher gift), so it works out well for everyone in the end! Thanks for sharing this project with us.
I discovered your blog this week and I love it. I would love to interview you for a blog I write for Redwood Writers. Send me an email when you can and we’ll schedule a phone interview. (I live in Santa Rosa.)
Love the color. Such a fun project!
Those boxes came out really nice. I have done them but with paint and paper. Gave them out as X-mas gifts to co-workers to keep their paperclips in.
Very cool!
LOVE this post!!!! Can’t wait to try this project!!
Wow those are super cute!
-Elyse
For Elyse Clothing Online
Wow, this is an awesome DIY! So glad I came across your blog. Side not question – have you spray painted wood like this before? If you have do you have any high gloss finishing spray you’d recommend?
Hi Bettina, yes you could spray paint them, being such a little project, I chose to hand paint them instead, but yes you could. Also I know both Krylon and RustOleum offer clear gloss spray finishes, give them a try!
Kate
love love love this! i have fallen in love with so many lacquer boxes only to have my heart broken by the price tag… a must try on my DIY list
xx
Great idea! I just started thinking about such a project, thank you for sharing the idea. Big fan of your blog!
Asia
For a smoother look, paint a couple layers of gesso on, sanding between coats with rottenstone ir diatomaceous earth (pool filter grade works just fine) to keep it glassy smooth.
Then do a couple of coats of your topcoat, sanding between coats, ending with the high-gloss spray.
Tsu Dho Nimh has great advice for making them look more like real lacquer. I do know that real lacquer is made from multiple thin coats of, well, lacquer, but there’s a product on the market that is a pour on finish that would give great lacquer-like results in one coat. I think Michael’s, AC Moore, and JoAnn’s probably all carry, though I’ve not looked for it in years. While it’s definitely pricier than other finishes, by the time you used enough spray or paint on finish as it would take to make the thick glaze of the pour-on kind, it might be pretty close money-wise and a whole lot easier work-wise. You’d have to take the boxes apart to use it and stand them upside down on something so the finish could drip off and you’d probably have to sand the edges where the box closes, but it would give that thick gloss like lacquer. It might be over the top for boxes, but would be great on a table top or chest of some sort… By the way, I stumbled across your website just last weekend and have already read almost every post. Your projects are amazing and you write with a very accessible and entertaining style.
I also love lacquer boxes. I was looking around for some for my daughter’s room but found them too expensive. So I decided to give your idea a try. I changed it up a bit but looks just the way I wanted it to. Thanks so much. You have such wonderful ideas. Keep up the good work. Here are some pictures http://tumblingheartfirst.blogspot.com/2012/02/diy-lacquer-jewelry-box.html
Love this tutorial – and it was so easy to follow – thank you so much for sharing. I made a few of them you can check them out here –
http://designingjewels.blogspot.com/2012/04/diy-project-series-lacquer-boxes.html
Love your blog – you are very inspirational! =)
I had a great time with this project. I decided to put a bright neon twist to it. Here is what I came up with:
http://caughtonawhim.blogspot.com/2012/07/diy-neon-edged-boxes.html
I’m completely smitten with how they turned out. Thanks for the inspiration and tutorial! :)
PLEASE HELP. I LOVE THESE BUT HOW DID U REMOVE HANDLES. I CAN’T. THANKS
I mean remove the handles from the boxes. I’m in a tizzy
Ty. Karen
Hi again. Sorry to ask again, I know you are our of town but I want to give these as gifts next week. I’m hoping you will let me know how to remove the handles. Thanks?