Two months ago, I met up with my blog friend Cristin in San Francisco to catch up and do a little shopping on Fillmore Street. It’s so nice to meet up with a pal who speaks “blog” and loves great design, and we had so much fun together!
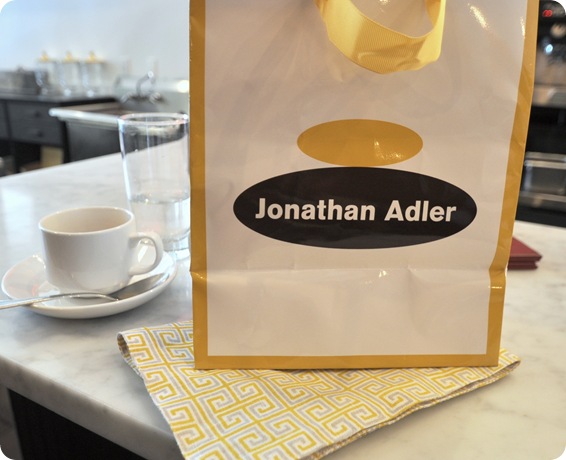
That day we happened to visit the Jonathan Adler store, where I spied the Mykonos placemat and instantly fell in love with the gray and mustard yellow Greek key fabric. We discussed its awesomeness over lunch and coffee.
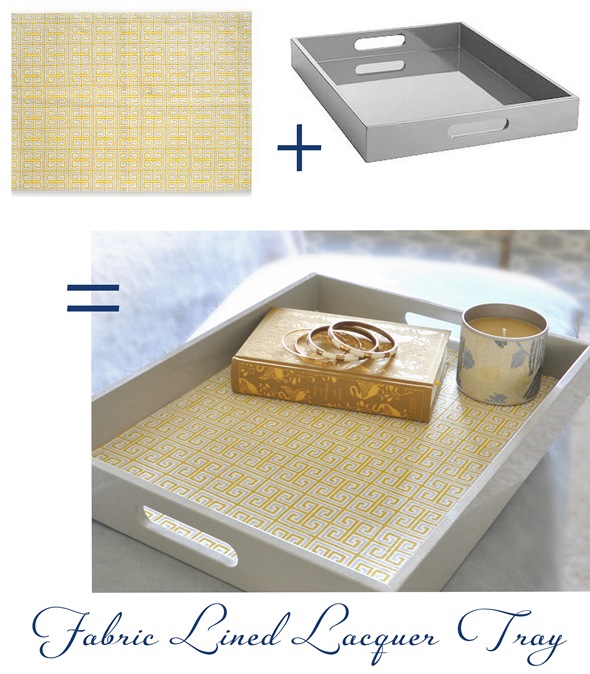
I could only justify buying one, so I bought it with the intention of making an accent pillow. After some thought, I decided it would be better put to use to line my gray West Elm lacquer trays I bought a year ago.
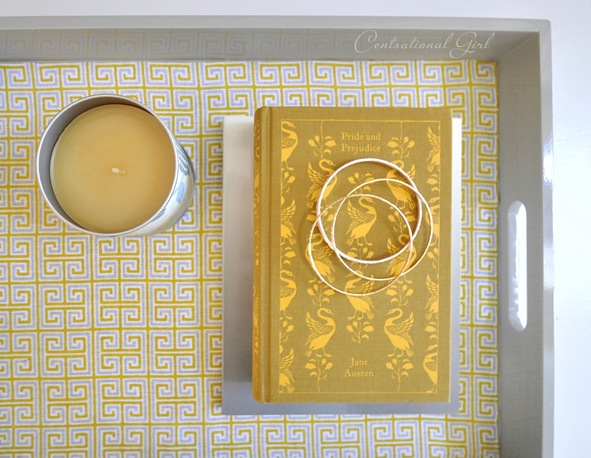
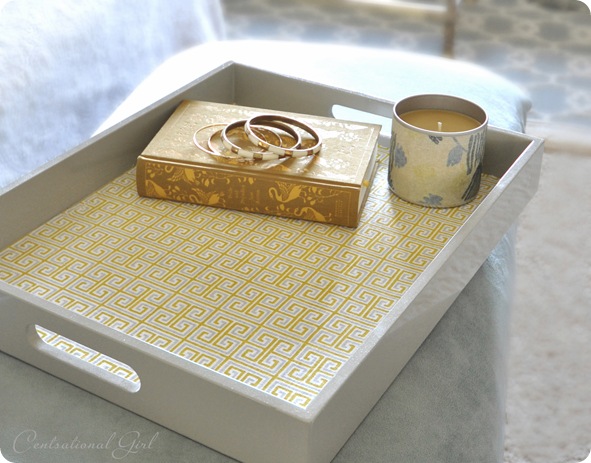
The other day, I finally got around to combining the two, and I couldn’t be more pleased with how this simple DIY project turned out! Adding pattern to the bottom of a tray, whether with fabric or paint, is the simplest way to transform a solid color tray into a statement accessory.
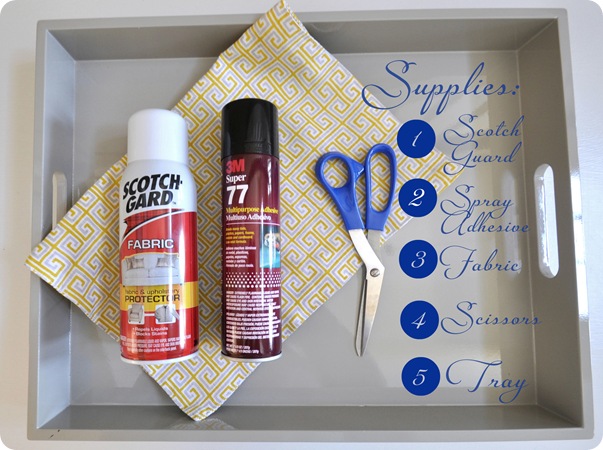
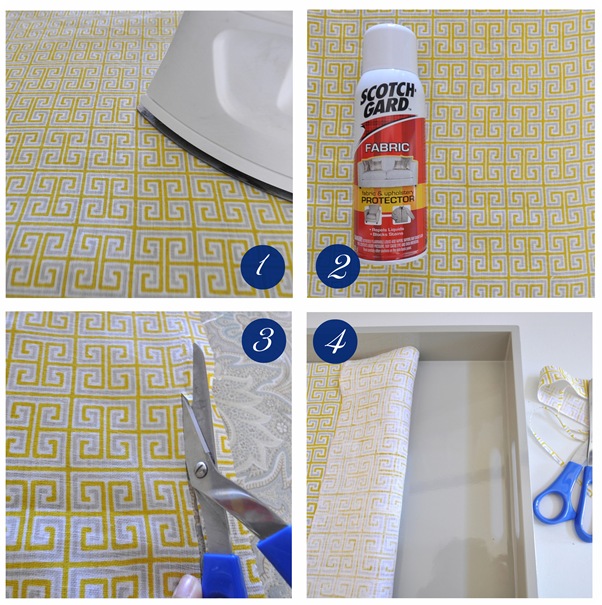
Here are the simple steps I followed. First, I gathered my supplies, which included Scotch Guard (to protect the fabric from spills or stains); spray adhesive; scissors, fabric and my gray lacquer tray.
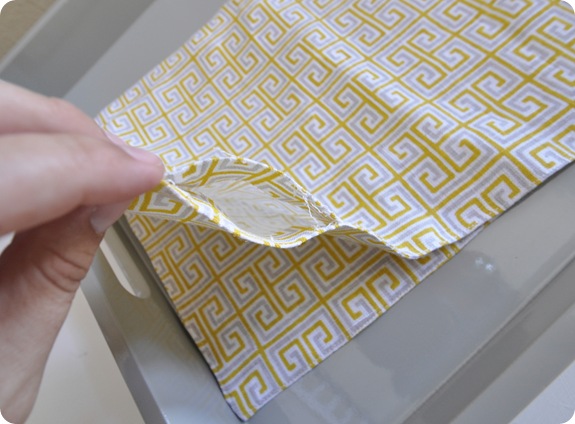
I started by opening up the placemat with a seam ripper. You could use any placemat for this project if it fits your tray and avoid pulling out the seams, but because I have two of these trays and wanted to line them both, I needed both sides of the fabric.
After I pulled out the threads, I followed these four simple steps. 1. Press your fabric with an iron to remove any wrinkles. 2. Treat the fabric with Scotch Guard to protect it from potential spills or stains (optional).
3. Cut your fabric to the precise width of your tray. You could use some sort of fray prevention treatment for the edges, but if you cut your fabric just right, I found you don’t need to worry about fraying edges if your fabric sits perfectly inside. 4. Align your fabric on the inside of the tray, then fold ½ of your fabric over. Spray a light coat of adhesive on the bottom of the tray, then carefully fold the fabric back over to fit the inside of the tray. Repeat this step on the other side as well.
That’s it, easy peasy, yellow lemon squeezy.
I’m loving this color combo ~ JA’s Mykonos yellow fabric complements the gray lacquer perfectly.
This pop of yellow might be just what my master bedroom needed . . .
These are a great gift idea too, so next time you’re looking to create a stylish handmade present for a friend or family member, grab yourself a tray and some fabulous fabric, and create your own version!
.

Oh, I love how the project turned out. I am going to have to try this. xoxo
Love the fabric. Great use of a placemat.
great idea!
You can also have your local glass store cut a piece of glass to fit your tray. Your fabric is protected much better and you can use the surface for cold things like drinks without worry. Looks gorgeous!
Hi Kate, you make it look really easy peasy lemon squeezy! I have a tray, and it needs something else…. you have inspired me!
You took a fabulous tray and made it even more fabulous. ;) Love that Greek key pattern–the colors are so nice. Great update!
This.is.awesome. Thanks so much for sharing, and making it look so easy! Will have to try it! Beautiful fabric, and awesome results!
Gorgeous!
Love the tray, and that’s my favorite candle from anthro!
Love how it turned out! Looks really, really nice! Will try it too ;) Thanks for sharing <3 xoxo
– Urska @ Live.Create.Inspire
Ooh! I have an old ugly Christmas-y tray that I’d love to repurpose and this is absolutely perfect!
This is gorgeous! I LOVE grey and yellow. So crisp, clean and cheery.
This looks fantastic! Love the fabric you chose to use!
I love the grey and yellow combo. I’ve been trying to find a way to get the combo in my house and I like this a lot
Love how you repurposed the placemat and great idea to use additional stain protector on the fabric. I have a couple of old trays lying around my house….think I’ll give this a try.
Oh I love how your tray turned out. Well done! If you wanted to further protect your fabric a trip to your local glass cutters for a piece of glass or plexiglass (since you have little ones) would be an inexpensive touch. I got lucky and had a tray that was 11 x 14 in size and bought a cheap frame at the dollar store and used the glass to line the tray.
Love it Kate, quick and easy but packs a big punch.
Soo lovely!! What a great idea. : )
kate, this looks so awesome. i am bookmarking this idea!!
This is so wonderful! Off to the fabric stash I go….I already have a tray…actually a shadow box frame with a glass to protect the fabric! Can’t wait to do it. Thanks for the inspiration…maybe I will do a post and include your directions so I don’t have to write my own :) Thanks!
Very cute! I’m loving the soft gray and yellow together!
Love, love, love, love, LOVE!
That is all.
This is Fantabulous! These colours totally represent the Living room re-design I am working on! Such a great and simply fantastic project Kate!
What a great idea to treat yourself to a very small something and make it have a much greater impact! I wouldn’t have thought to line a tray with fabric – just with paper. Leave it to you to think outside the – er – tray. :)
Great project! I bought a skanky wooden tray at Goodwill and painted it with Chrome paint, lined it with silver pattern scrapbook paper and coated with decoupage. Turned out great (one day I will actually blog and post a pic) I Love your placemat idea. Especially getting 2 out of one. Thanks for the inspiration!
What a great idea! I have an old bed/food tray (the kind that the legs fold in for storage) that hides in the closet when it’s not being used. A little bit of paint and a fabric cover would be a perfect makeover though. Thanks for the inspiration — great project!
I have done a similar project but instead of using the actual fabric, I made a color copy and used that with a decoupage finish. I saved my fabric for other uses but still had the look on the tray.
This is SO smart!! Love the idea! It’s the perfect way to add a little design pattern to a room.
swoon….you inspire me
Fun and easy!
You are amazing and creative!
I wanted to let you know that I am giving you the versatile blogger award, check it out on my page to get the rules
http://jbraggs.blogspot.com/2011/08/versatile-blogger-award.html
Have a great week!
So fun! I see we share our love for yellow. I could see that fabric in so many forms and rooms. Love it! Great DIY!
It’s amazing what you can do with something as simple as a single placemat. This would also be great with fabric remnants. Thanks for the inspiration!
So pretty! I totally “get” the “it’s nice to hang with someone who speaks blog!” :)
This fabric is gorgeous!!! I have gender-neutral nursery on the brain and think this fabric would make gorgeous curtains or a crib skirt for a nursery appropriate for a girl or boy. The tray looks awesome!!
Love this!
love this project! gorgeous
It’s beautiful! You always do everything with such class, Kate.
Yes, yes. The fabric is awesome. Well done as always.
But oh my stars, wherever did you get that GORGEOUS edition of Pride & Prejudice!
It’s so lovely! Could you share what edition that is?!
I guess you must have just tons of stylish pieces all around your home!!! Love it, you think of everything!!!
Wow! Love this! I’m definitely considering making one for myself and putting it on my desk to hold all of my little desk accessories :) Thanks for the great post!
That is GORGEOUS! I’m thinking you make it look so easy to get that fabric aligned perfectly…I’m not so sure mine would turn out as well:)
This looks amazing!
Love that color combo and great project idea!
love it!!!!! Will try this one soon!
What a great project…simple and so pretty! Love it!
I love HOW the project turned out. Great color combo. I bought the reprints of the lit classics at Anthropologie also (I’m a junkie). Now I have a great inspiration!
Love it! My Mom has done something like this before but she put a piece of plexi glass over it for protection. Thanks for sharing!
Kate,
I love the napkin in the tray! It’s so chic.
Loved our day in the city!!!
xo,
cristin
no way jose!
i just saw these this weekend & flipped over them, but since i need SIX , i could not justify their $12 a piece.
i must go back & grab ONE!
& then whip this up
my new fave color to incorporate. & since i have the book, it’s a must do diy!~
you are wonderful!
OK Kate love it…you inspire me!!
I’m inspired! But I totally want a cherry blossom fabric to do this with.
Hi! I love this idea, and I definitely want to get that tray for this project! What size did you get? They have a variety on the West Elm site.
Thanks! :)
Hi Amy, I bought it last year, not sure they still carry the pale gray color, but I did find it at West Elm.
xo
Kate
Just saw this DIY project of yours – I really need to do this!!!
Beautiful! But — how did you manage to spray only the bottom of the tray without having a residue of sticky spray on other parts of the tray? Are you just that good? I’m afraid I might need to cover the little walls before I spray – not as fun.
Just use some painter’s tape Sue to protect the sides!