Hello! Hope you all had a wonderful weekend! We shared a lot of food and great wine with a huge gathering of friends and family over the long holiday, it was so relaxing and such a great party! We also had the opportunity to show off our new stone patio, wanna see?
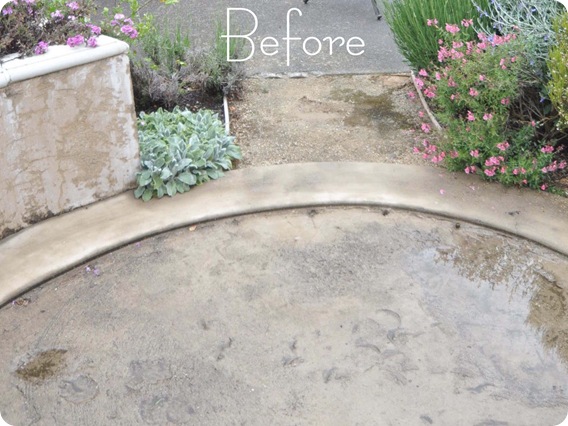
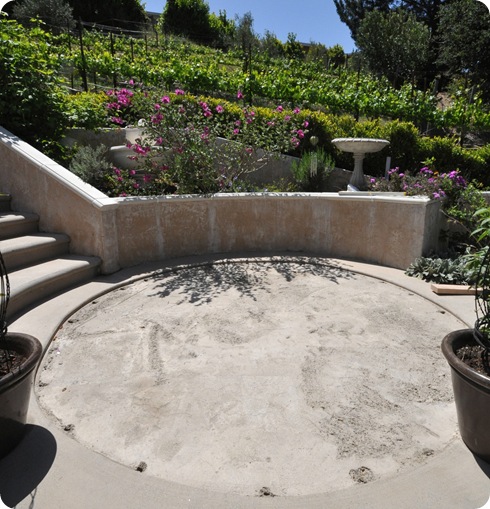
Here’s a glimpse of a few weeks ago:
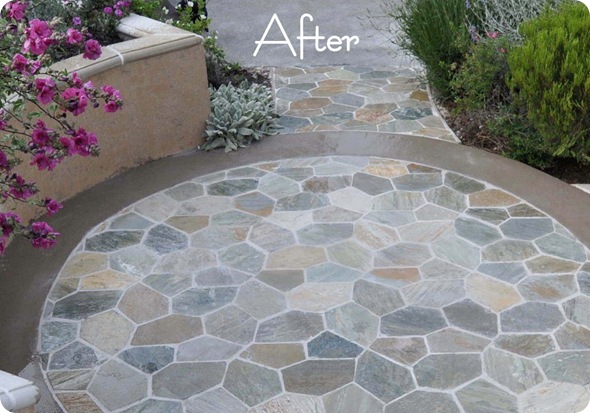
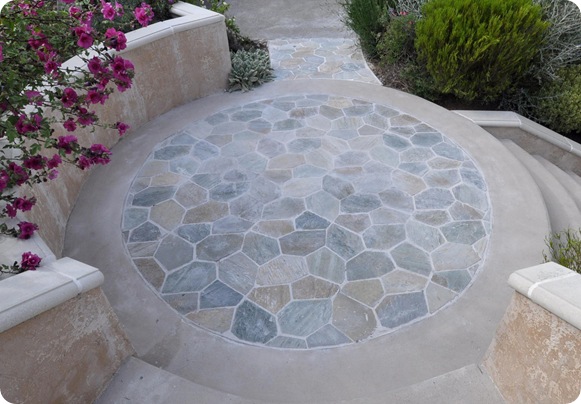
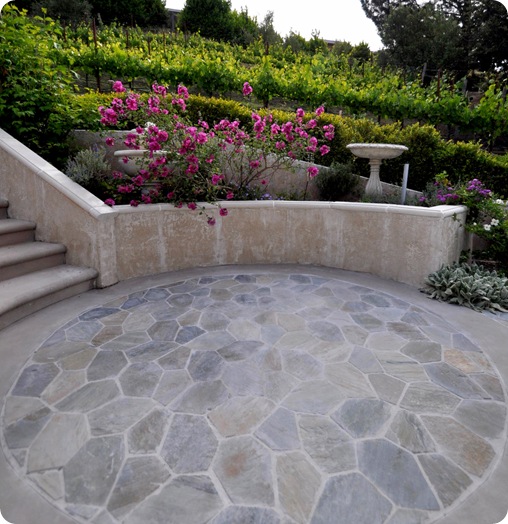
And now
Pretty fancy, right? This has been a project we’ve been meaning to finish for many many moons. This patio has been sitting empty since we regraded the yard and built the retaining walls over five years ago. I mentioned it as one of my Home Goals for 2011, and I’m soooo proud to be checking this one off my list!
Two weeks ago, I spied a natural stone at Home Depot that I thought would be just perfect for this space. I redeemed some American Express Rewards points for a gift card at Home Depot, and we got to work!
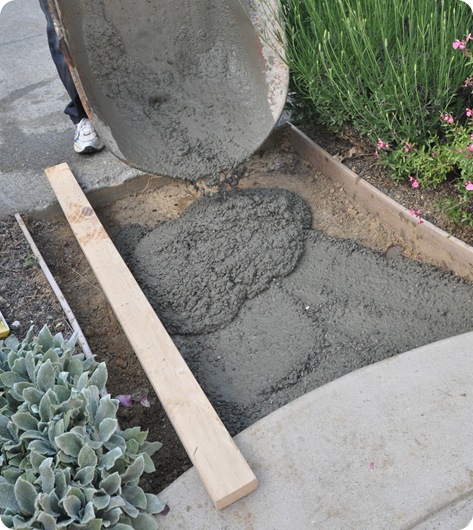
Before we could bring in the new accessories for the adjacent patio (beyond), we had to address this longtime problem of our unfinished circular patio. The first thing we had to do was fill in the small walkway that connects our two patios. That was accomplished with some concrete as a base filled to one inch below where we intended to lay the stone.
We did our best to keep those pesky critters out.
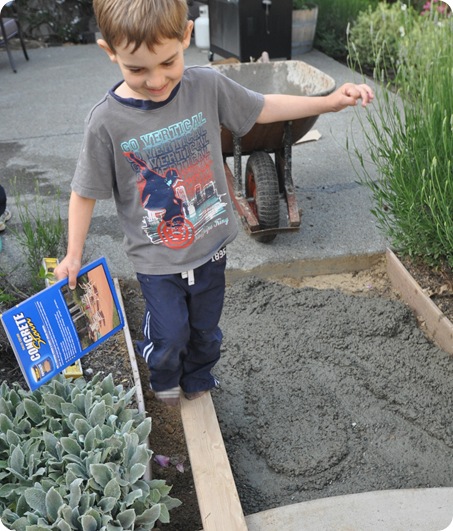
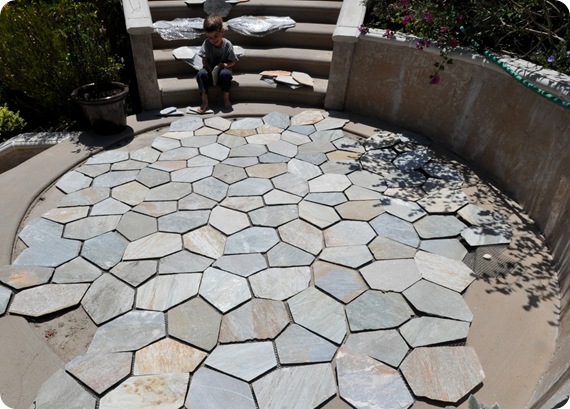
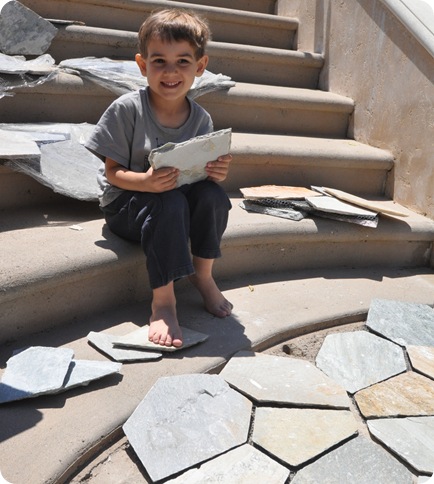
The next day, I designed the pattern inside the circle with a little helper.
My little boy was fascinated with this “puzzle” !
These particular stones are called Arctic White Quartz, and they come with six stones attached to a mesh. They’re designed to be installed in a grid, but have the appearance of a random pattern, gotta love that! At my Home Depot, they were $8 a piece and they measure 21” x 29” each.
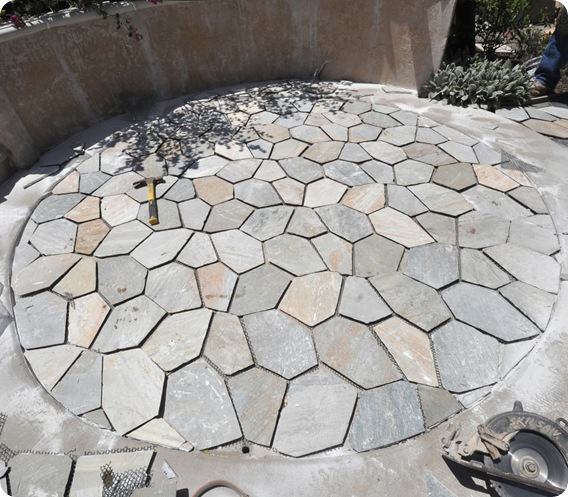
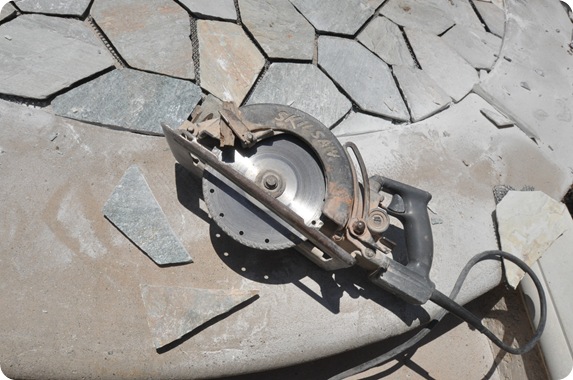
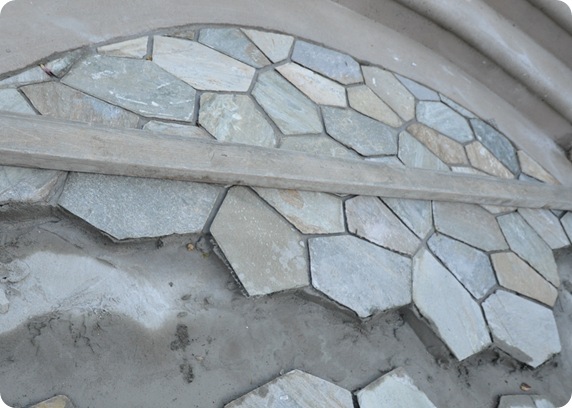
All of the outside stones were cut with a masonry diamond blade on a circular saw.
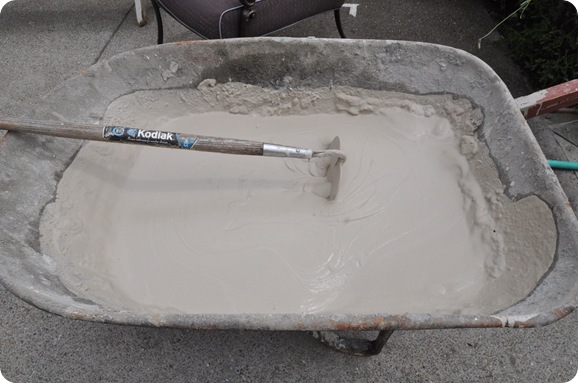
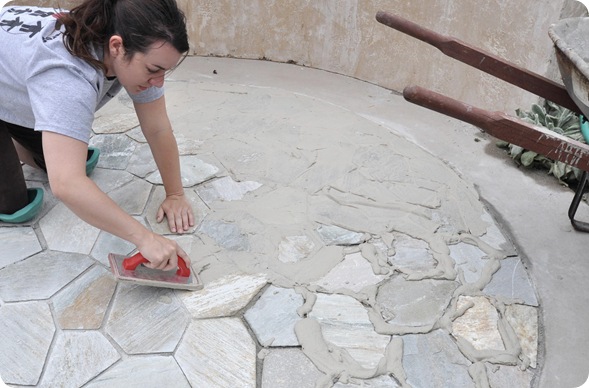
I hired a friend to help me do these cuts, which was a great learning experience for me, because as he worked, I studied his technique! He showed me how to lay the stones in the mortar, which needed to be built up very thick due to the depth of the patio. I think we used about five 60 pound bags of the stuff.
The stones were kept even with the outlying edge of the patio with the use of a long 2” x 4” piece of lumber stretched across the circle to keep it all smooth and level.
We let the stones dry in the mortar overnight, then went back to grout the next day.
My mister and I worked together to get all the grout into the crevices, first with a grouting tool, followed up by a sponge.
A word to the wise, you should definitely wear gloves when working with sanded grout. My hands were a complete mess the next day, they were so dry and they look as if they had aged ten years. Not purty. Gloves. Wear ‘em.
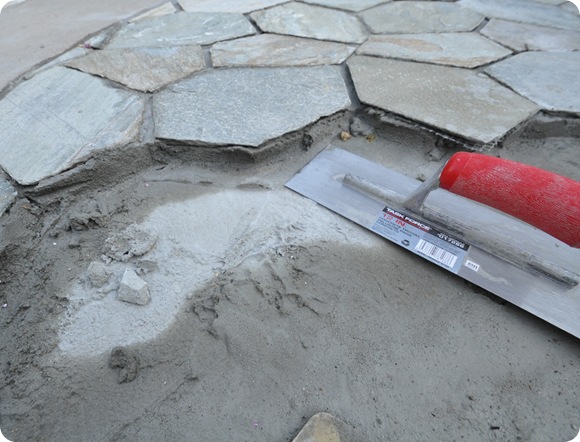
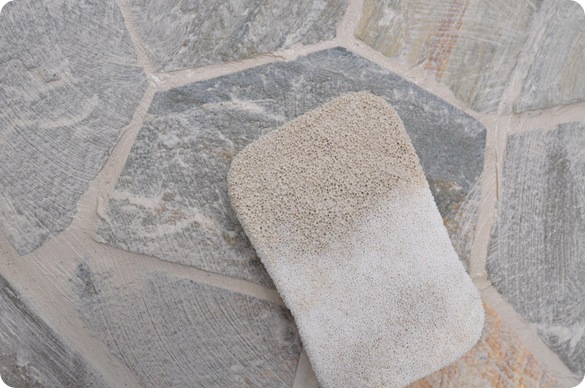
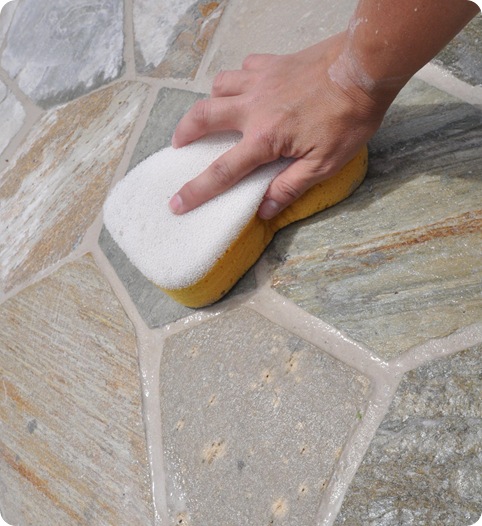
I bought this two sided scrubber sponge at Home Depot, and it worked great for the first round of scrubbing ~ we had to first get the grout out of the ridges in the natural stone.
On the other side, a sponge for smoothing the grout as it set. Gorgeous!
Not my hand silly. The colors in the various stones.
We smoothed and rinsed, and smoothed and rinsed, and smoothed and rinsed until we just couldn’t smooth and rinse anymore. I was bent over for two hours and by the end of the day, my back was killing me! I have so much respect for anyone who does this kind of labor for a living, my word you’ve got to be strong.
But all that hard work paid off!
Another glimpse of what our patio looked like before we started:
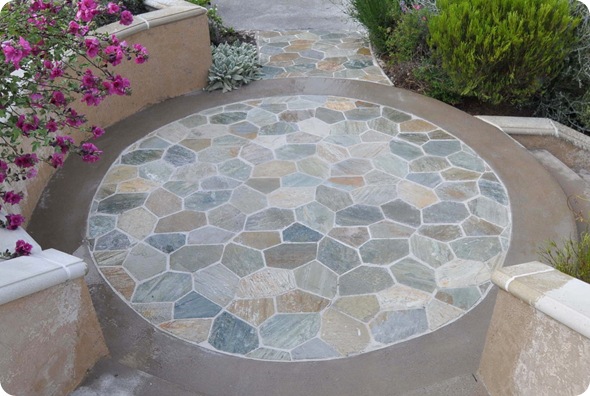
Today:
To the left, the stairs lead to a small lawn, and to the right the small walkway leads to our second patio. Up above are our grapes, growing happily in the sunlight. We’re going to wait a week to seal it to make sure any remaining grout residue embedded in those stones is completely gone.
What I love about these particular quartz stones is that they completely change color when wet! When they get rained on, or watered down, all the beautiful colors in each stone just pop, we love that.
These stones pull all the colors in our yard together, and that irregular pattern looks just like jewelry to me! Yes, that’s what I’ll call it, my ‘jeweled’ patio.
We’re mighty proud.
Next up in outdoor improvements, we’ll be working on the patio just beyond ~ the same one I mentioned a couple of weeks ago. We’re thinking of a cabana, some new cushions and outdoor pillows plus some colorful accessories, which will all make for a magnificent outdoor sitting area, so stay tuned!
Disclosure: I have been provided with 150,000 complimentary American Express Membership Rewards points and used part of them to install this outdoor stone patio.
.

This is magnificent – great, great job (but no wonder with such a helper)!! :-)
That is gorgeous!! Love the way the stones are laid out.
Wow Kate! That looks amazing. You must feel so good getting it off your to do list. You guys did a beautiful job.
I admire the work you did. Many people would have just given the orders and signed the check. I’ve worked with stone masons in the construction industry and I know they are some of the hardest workers out there. The patio looks marvelous. Be proud.
Gorgeous!
What a transformation! It really must have been hard work, and I am so impressed by you.
The finished result look amazing!
hi Kate! i absolutely love it. my dad was a real stone garden man. he loved making rock gardens and stone patios – he got all his stone and rocks from the bush -(ahhmm… slightly illegal but we lived in the country).
love what you’re done. and congrats on learning new skills
cheers Fiona
Stunning! I love it! Your back yard is really beautiful. I don’t ever see yards like yours. Beautiful! Great job on the stones.
I loved hearing about this project. What a great new space for a party. Turned out fabulous. I hope your back and hands are feeling better!
Absolutely beautiful! What a magnificent job.
Morning Kate,
Beautiful!!
I see many wonderful evenings with family and friends in your future.
Janet xox
http://theemptynest-janet.blogspot.com/
GORGEOUS !! Truly a wonderful transformation … enjoy your new space !!
Beautiful! I have walked by and looked at those same stones…we have a front walkway that needs to be done! You made it all look so easy peasy.
Now….where do I get ahold of those Amex bucks??? ;)
Wow that is beautiful!
Wow! It’s just gorgeous! You did a fantastic job.
Beautiful!! I love it!
It is so beautiful! Wow! Now you need a spa day. :) I can’t wait to see what you do with the other part of the patio.
I love reading about your adventures!!! The patio is gorgeous. First, there is a sealer you can put on that will make it the color it is when wet, if you are interested. Second, we put slate on the backsplash in the kitchen. It was way too rough for the grout tools so we used our fingers. Literally, the skin was rubbed off our finger tips. Pain and bleeding abounded. Gloves would have only torn. Never again. Good job.
You are so full of surprises. Your projects just keep getting more challenging. You all did a beautiful job. I love your landscape, the greenery, and grapes. It must be very peaceful there. Heaven!
That DOES look great! We’re doing some stone work here too and I know it’s HARD work. Your efforts have paid off for sure, it looks fantastic!
Absolutely stunning!!! You are really getting better and better with all your projects, I can’t wait to see what the future holds for you…tv show? :)
Stunning! I was thinking, “We could do that to the front walk!” … until I saw the knee pads… and remembered that I just turned 40. Ow. :-)
That’s gorgeous! I just finished tiling my fireplace, and it was a very tedious task, so I know tiling that was a bear!!!! It looks wonderful, and I LOVE the tile you picked out!! Nice work!
OK, I have two comments. First, as a civil engineer, I gotta tell ya’: It’s CONCRETE, not cement. Cement doesn’t have aggregate (sand or rock) or water in it. Anything that you’re pouring for a walkway would DEFINITELY be concrete. That whole cement thing drives me NUTS (they beat this into us in school, and now it makes me crazy).
Second, you definitely want to use gloves with any cementitious material, not just sanded grout. Mortar, concrete, grout, etc. all require the use of gloves. Cement is very basic and can actually cause chemical burns if you’re not careful or use it for a long time without gloves or some other protection.
Goregous! I love this & thought it would be so much harder. You make everything look easy :-)
You are the poster child for “getting it done.” If I quit waiting on my husband to work on stuff on our to-do list, I bet I’d get way more done. :s Your patio looks fabulous!!! Love the pattern you came up with!
Great job! You may already know this, but they make sealants that will give the stones that ‘wet’ look all the time. I think it would improve the look all the time (not just when it rains) to seal them at some point.
ohmygosh….this is something to be REALLY proud of! It is so beautiful—-you, the mister and your very cute little helper should show all pat yourselves on the backs. Makes me want to get out and find someplace to lay stone. :)
That looks fantastic! You guys did a great job. I’m sure cutting all those ends was a lot of work but at least you had help :) The colors look great!
I absolutely love the shape of those stones! And the color! Okay, I love everything about this!
That really looks fabulous!! Good job!!
I just saw those stones at Home Depot yesterday & loved them! Your patio looks beautiful now! Nothing better than crossing something off the “To Do” list that has been there for a while! (That’s the good thing about blogging…it’s forcing me to get stuff done!) Can’t wait to see your other patio project!
Please wear gloves ! I didn’t and burned off my finger tips. I could have robbed a bank and not been caught. (no finger prints) However, if you do get exposed to drying mortar or concrete or cement, rinse in vinegar. It helps to balance everything out.
A gorgeous result! I love the colours of the stone, and the cobblestone effect.
What hard work and so professional. You amaze me. Looking forward to patio just beyond. Beautiful stone.
Amazing!!!! I just love everything about it. Great job!
It looks wonderful! You guys did an amazing job!
I absolutely LOVE it!! It is the perfect look for that area. You should be very, very proud!
Fantastic job! I like that in the second “after” picture, the flowers in the back look brighter and cheerier too! It is almost as if they’re happy with the new patio as well!
Great job – love the choice of materials and it looks fantastic!
This came out gorgeous!! I love the color of the stones!
You’re amazing! My hero!
thank you Jenoside and Sarah R for the additional tips. kate, that’s just awesome! but the back thing was also my concern….
http://tree-shades.blogspot.com/2011/03/sandpapered-vintage-beauty-and-im-not.html
Thank you Jenoside and Sarah R for the additional tips. Kate and assistants – gorgeous!
What a gorgeous patio, Kate! Great job! We’re hoping to do something patio-wise under our grape arbor this year. I’m not sure if it’ll happen since we’re finishing up the kitchen but I’ll keep my fingers crossed. I like the stone option you chose! Beautiful!
That’s amazing! You did a great job!
I LOVE the stone. It looks fantastic!!
You’re an absolute pro, Kate! Looks fantastic. Also, your gorgeous mantel is featured here -thanks!
You are amazing!!!!! great job as always!
Jenocide, that is so funny!!!! You caught my typo, I must have been extra tired last night! I was telling my hub just that as he poured it out of the wheelbarrow. “Honey, that’s not cement, that’s concrete. Concrete has gravel, cement does not.” HA, good on you for catching that!!! Will update the post. :)
Kate
Gorgeous! Now go treat yourself to a wonderful mani/pedi for all your hard work.
I just showed these pic’s to some of my co-workers and they are just floored.
Absolutely gorgeous!!!! I LOVE it!
Beyond gorgeous – so worth all the hard work you guys did! Love the colors and the design. Thanks for sharing!
wow wow wow!!! THAT IS BEYOND GORGEOuS!! I would like to know where you get all your energy from?? I marvel at all that you accomplish and with children. You are my design mom hero!! ;0. You guys did a fantastic job!
That looks amazing, it does remind me as well of a jewel box! Congrats!
~Blair
Kate – it looks like an Italian villa – beautiful! I can only imagine what the cabana will look like!
I love your patio! It really looks great! That is a project I am hoping I will be able to do later this year or early next year. I like the cobblestone effect and think I would like that for my own yard.
Thanks for the inspiration!
~ Tracy
I looks great! I LOVE it :)
I Love this space! I have a thing for round patios anyway.. and being surrounded by vines, flowers and a cozy retaining wall makes it even better. What a lucky lady you are! And good work on that stone…perfect!
It’s beautiful, and your grapes…so jealous! You are lucky to have a backyard so stunning!
Your yard looks like a lovely park! I can see why you are so proud, the new patio is so pretty. You are very lucky to have that friend to help along with your hubby.
Absolutely AWESOME@!!!!!!!!!!!!!!!!!!!!!!!!!! Your hard work did, indeed, pay off, in a MAMMOTH way!!!
Hugs,
Lana In Italy
Amazing, Kate! Definitely looks like your hard work paid off!! I’m envious. Your yard is gorgeous!!
Aloha,
Charlie
AH. MAZING! Love this patio re-do, it is simply gorgeous. Those stones are just stunning, love the colors. You guys did a great job with this, it is so “finished” and perfect!
Best,
Kimberly
Very Pretty! I LOVE that stone! You could probably seal the stone if you want and have those beautiful colors all the time. Great job! :)
Gorgeous!!! xo, cbp
It’s stunning, and makes me want to rip up our patio and start all over again! I hate the brick pavers the previous owners left. The stones you chose are so organic, and make the space very cozy. I look forward to seeing what pieces you add!
Your patio is the BOMB! And gloves next time with no fail!!
You should be SO VERY proud! what a great job! Yard work is tough labor- but a nice, productive workout!
Wow, I love it! Nice work!
absolutely STUNNING! This is one of the best before and after patios I have ever seen! Nice job!
Looks great Kate! Jenocide’s comments are funny, cause its common to mix up the words, especially when you’re tired. I can’t believe how hands on you are. Well done!!
Oh, that is just too beautiful. I am so impressed. What beautiful grounds you have.
that looks gorgeous! Great job, I know it’s hard work!
This is absolutely stunning. I’m patting you on the back right now.
Now that girl gets ta work, lol!
Wow, Kate! Those turned out fantastic, I don’t think I’ve seen this product before. Perfect for your space. Looks wonderful & I know it had to be a lot of hard work.
This looks amazing!!! You guys did a great job!!!
Um…this is AHmazing. Seriously. I’m inspired!
The stones and the finish are gorgeous. Way to go, and looking forward to seeing the next part.
Beautiful..What a beautiful job!! Can’t wait to see what you do next!!
That’s your YARD?? It is simply unbelievable! I can’t believe the gorgeous work you did on that patio. It is stunning!!
Wow, you did a fantastic job!! It is GORGEOUS!!
Really beautiful, Kate. I love all the the various colors. Your backyard is lovely.
It looks gorgeous! You did such a great job!
Awesome! Love the look.
Wow, it looks so good!!
This is a work of art! It looks great!
Debbie
wow wow wow — kate, that is seriously gorgeous, and a serious amount of work!! weren’t you wishing it was a spray paint project about 30 mins in!? :)
This patio is absolutely phenomenal!! It’s so amazing that you did it all yourself! Congratulations!!
OMG gorgeous! What an amazing yard you have. Thanks for sharing!!! :-)
Okay, seriously, you seem like superwoman…what can’t you do???
Absolutely gorgeous! I’m a quilter and I see a quilt in everything – including your jeweled patio. Thanks for sharing!
Pretty fancy indeed. I really love it. Nice patio to welcome your guests. How to cut marble stones – this will be one of my summer projects this year.
You should really wear a construction gloves if you are to build something manly in your house or garden. I remembered last year me and my sister tried to patch up with some cement one of our fences. The result of us not wearing gloves? Blisters, blisters, and more blisters.
You, Kate, are my idol :) That looks fabulous. We finally finished our bathroom, here’s the link if you’d like to look! http://lazymomtofour.blogspot.com/2011/05/bathroom-remodel-part-6-it-is-finished.html
Wow – that is a fantastic job! I love it!
It turned out just incredible! I am so impressed with the end result! Now I want to make updates to ours! As always, thanks for providing such fantastic inspiration!
i absolutely love how easy your blog projects are to follow – why cant every project I do have instructions like these? (now if you have some stucco to repair on an outside wall i would love a guide :) )
It. is. AMAZING!
We will definitely be checking out that arctic white when it’s time to get started on our patio. Can I pretty please come hang out on your patio?
It’s really beautiful Kate! What a nice payoff for all of that hard work. Enjoy it!
What a gorgeous setting you have outside. I love your work on the patio and can’t wait to see what comes next out there!
I love how the patio turned out! Great pick on colors! Just in time for summer too! :-)
This is so lovely!
We bought the same stones for our backyard. So far we have completed 2 steps and they look fabulous (we are covering a 16ft diameter round patio once the weather cooperates). I was excited to see what it looks like on a bigger scale like your patio, it looks great! Are you planning on sealing them? My DH wants to seal ours so the colors are more vibrant, but I kind of like it the way it is.
love love love how your new patio turned out!
i’m planning on posting my latest garden makeover soon.
cheers!
Plunge and Scrub, plunge and scrub…until all your plunging and scrubbing is done! lol “Far and Away” the coolest patio ever!
Ok I totally have patio envy! Love the vineyard in the back…
Wow that really came out amazing! The cuts are what really add to the quality finished look. I did a few tile projects around the house and like you said, the worst part is the grouting…. It takes forever! Well worth it though on your project. It came out beautiful.
That is just gorgeous! I love it!
That is awesome! We are considering tackling a similar project in a back corner of our lot where the grass thins from all the shade. We are struggling with the material / stone to use…this just might have settled that for us. Thanks for sharing.
Great Job!! love the new look.
I love your ‘jeweled’ patio so much that I want to give it a try ourselves … but I am having a TERRIBLE time finding the product you used. Our local Home Depot was working hard to try to find some for me, but they say that more information would be very helpful! I don;t suppose you have brand name/manufacturer info after a year … but it never hurts to ask, right? Thanks so much!
We bought a similar flagston a while ago to do a patio in our backyard, but I was extremely frightened about installing it myself! This post gave me the extra push to get ‘er done! Thanks!
Very inspiration! I don’t know if I’ll be able to do this to my backyard however it’s worth trying! :D