I am in the middle of a remodel of my home office. I originally envisioned elegant window panels scaling the wall from floor to ceiling. But then I realized that if I am surrounding my window with cabinetry and shelving, then the idea of dramatic curtain panels had to go, well, out the window. But I still needed a touch of fabric to cover the less than lovely white blinds.
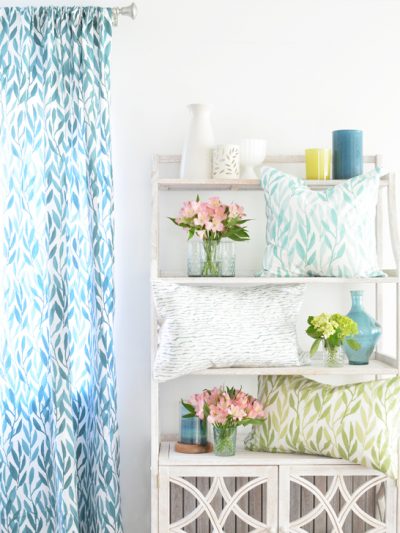
I’ve made window valances before so I constructed yet another valance for my home office with the same technique I’ve used before, but this time, I added a soft swag. I found this curtain on clearance at Lowes for $7.

How to Make a No Sew Swag Window Valance:
A note on fabric choice: Since you’ll be using a lined curtain turned on its side to construct your valance, choose a solid, or a pattern that looks good when you flip the pattern horizontal instead of vertical.
Supplies:
-
Curtain panel long enough to run width (not length) of window
-
Staple gun
-
Fusible web for bonding fabric (sold as Stitch Witchery or Heat-n-Bond at fabric stores)
-
1/2 inch x 2 inch thick pine, birch or poplar board from home improvement store, cut to length of valance
-
1.5 inch “L” Brackets
-
Iron
 .
.
Step One: Choose where you want your valance to sit above your window, then measure the length of fabric you’ll need to cover the top of the board, and hang down over your window. Cut fabric to chosen length.
.

.
Step Two: Trim side of curtain panel to width of valance, plus 2 extra inches on sides. Use the fusible web, a hot iron, and a moist cloth to bond your fabric together to form a clean hem.


.
Step Three: Press your fabric with an iron to remove any wrinkles, then staple it to the top of your wood board, leaving 2 inches overlap on each side. Trim off any excess fabric on the top.

.
Step Four: Wrap your fabric around the side of your board and secure side with a small staple.

.
Step Five: Locate studs on wall, then position your “L” brackets on your valance to match up to the wall studs. Screw valance into wall.

.
Step Six: To swag your valance, pinch your fabric together, then secure with a safety pin. If you experience too much “droop” in the middle of your valance, and it pulls away from the window’s edge, one trick is to secure your fabric to the wall underneath the fold with a small tack. It works !


Step back and enjoy your inexpensive and homemade swag valance.


Now I just need to install those gigantic cabinets!
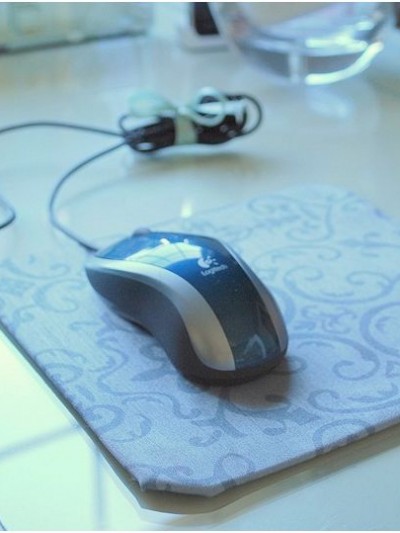

The valance fabric is really, really pretty! And um…*whispers* where on earth did you find that ironing board cover?! I hate mine!
What a great idea, I am going to do this in my kitchen!
It's so simple, I need to try it; I have so many windows to treat, and zero sewing skills. I feel guilty having my mother sew all of my curtains & valances, so this might do the trick in my family room.
Great project as always! Thanks!
Very pretty! I have pillows in that exact fabric. It's a lovely soft color. :)
steph–i bet she MADE that ironing cover. =oD
Great idea to use the curtain panel the other way around. I've had some good results using (fabric) shower curtains for other purposes; one of those might work well too.
Very nice! I like the pattern as well.
Looks so nice, and you made it look soooo easy!!!
Those are beautiful! I think I will try it out in my bathroom once I finally find the perfect fabric. Thanks for sharing! I am loving your blog so far!!
Ha! Bobbinoggin, I bet she did and if she did *ahem* I'd love to know how! :p
Where oh where did you get the fabric on your ironing board!?!?
I am looking for that exact pattern to add to the bottom of my dropcloth curtains!!
OK, friends, you win. I'll debunk the myth that I actually made that ironing board cover. I picked it up at Marshall's on clearance for five bucks earlier this year. It stopped me in my tracks, because of its price, and its fabric. But it wouldn't be that hard to make…. in fact, someone Google "DIY ironing board cover" right now . . .
I just bought those curtains at Lowes last week! I got them in the taupe color :)
your ironing board looks like my sheets on my bed I got @ Costco!!
Now that's my kind of valance!! Beautiful fabric. :) Bravo, Kate!
Now, that, I think I can do!! Looks really great!
m ^..^
Very pretty. Love the fabric
Oooh…that's pretty! Thanks so much, I'll be linking.
Very pretty. I like your swagger!
So pretty! I love this!
Any chance you remember the name of those curtains? I would love to get them for my dining room!
I got here through your office reveal (and quite the reveal. you are one talented chica!!!). This is exactly what I have been looking for! thank you!! I LOVE YOUR BLOG! YOu are way too talented.
I love, love, LOVE, window “mistreatments”. I thought I was one of the only people who did them until I started blogging recently. My Husband always cracked up at my “curtains”, but now I feel validated thanks to gals like you! I love your bare feet at the bottom of one of the pictures–I think that is too cute. I’m always bare foot at home doing projects too. :-) Anyway, I just wanted to compliment your post and tell you I think you did a fabulous job on the swag valance. And only $7?! Now that is a frugal AND crafty/creative DIY I can appreciate! Keep up the good work, girl.
Love, Laura
Every article gets better and better. I have no curtains in my D.R and adjoining L.R. because I have not been able to find valances I like. I love how you tell how to do, as well as what you need to make them yourself. I will be scouting the fabric store….clearance racks, of course.
I’m in a love with a no sew valance! Been wanting to do this in our bedroom. I came across your tutorial but unfortunately all the photos shows up with a “!” and black. It’s like they are missing and no longer linked. Is there anyway you could fix this so we’re able to see the full tutorial. I learn so much better with photos. Would love to try this! Thanks!
All fixed Kim!
Thank you Thank you!!!