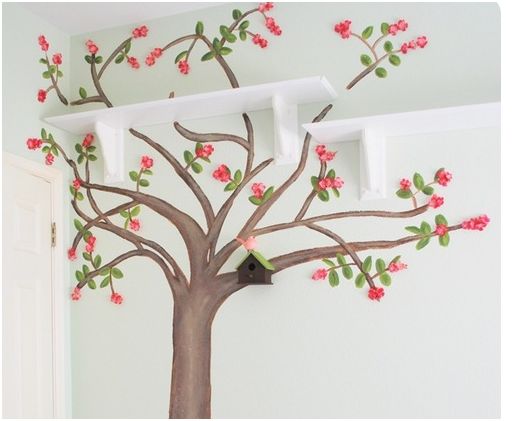
I am in the process of redoing my five year old daughter’s room, adding a little French garden inspired style to the space. All of a sudden I was struck with the grand idea to paint a tree on her wall to carry along with the jardin theme. What’s very strange is I don’t fancy myself a mural artist by any means, I typically shy away from wall murals as a bit “themey” and I rarely decorate with fake flowers. Which makes it all the more bizarre that I would take upon myself the task of painting a cherry tree mural on my daughter’s wall and then glueing fake blooms to the branches. Go figure. But it turned out pretty cute!
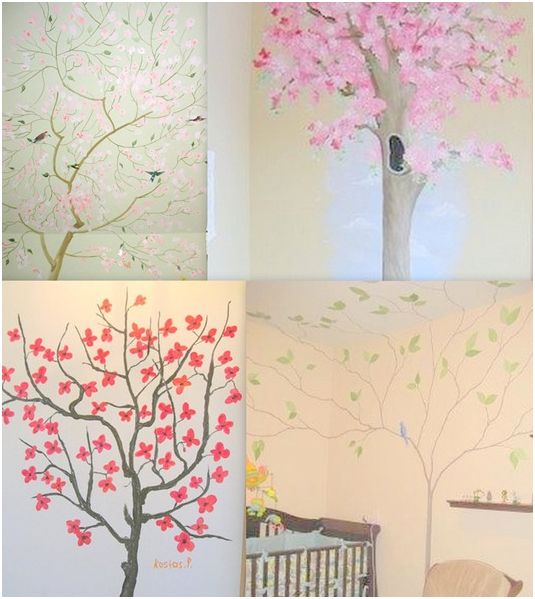
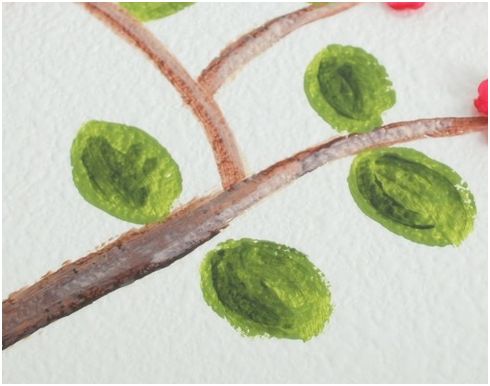
My inspiration came from these images:
For the task, I gathered up some supplies including:
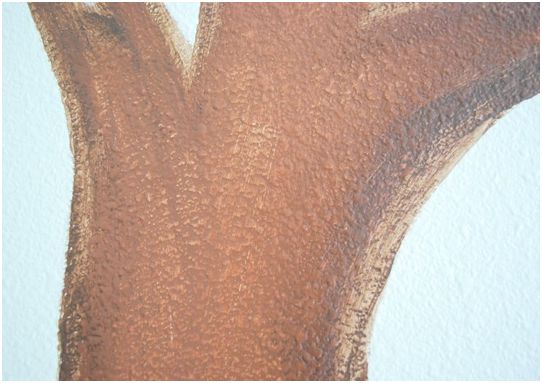
Follow up with your artist’s paintbrush to create finer lines around your edges. (It’s also a good idea to have your wall color paint ready in case you absolutely hate it. . . or just want to clean up the edges a bit more.) Paint over center of trunk and branches with medium color brown paint to add some depth. Note: all of you folks with ‘orange peel’ wall texture will appreciate the bark effect that results from the texture underneath. I didn’t paint it that way – it just happened.
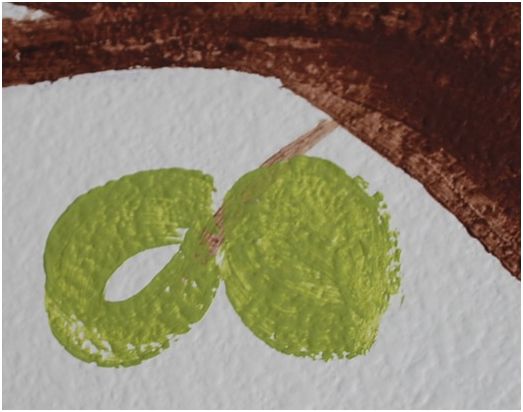
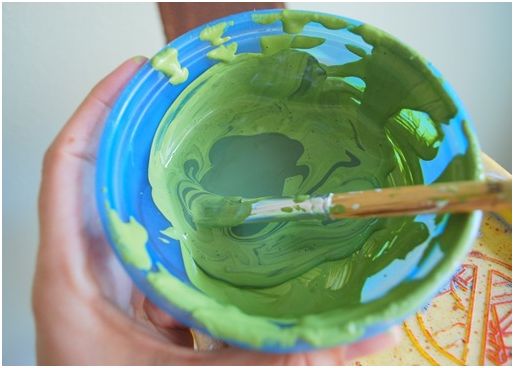
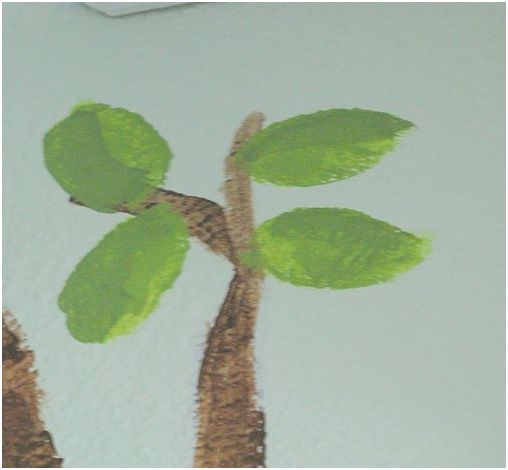
While the trunk dries, paint simple leaves with your medium sized paint brush and light green paint in a simple leaf shape.
Then add a lot of dark green paint to your leftover light green paint, mix it, then swipe the leaves on one side or another to give some shading.
You can even go back a third time with just the dark green paint to add more depth.
Return to your tree trunk with your lightest shade of brown/tan paint. Swipe the center of the tree trunk and the branches with your paintbrush using the paler color, then use a kitchen sponge to smooth it out. This gives the subtle look of light cast upon the tree trunk, and provides even more depth and shadow. If you’re sentimental like I am, carve a message into your tree trunk!
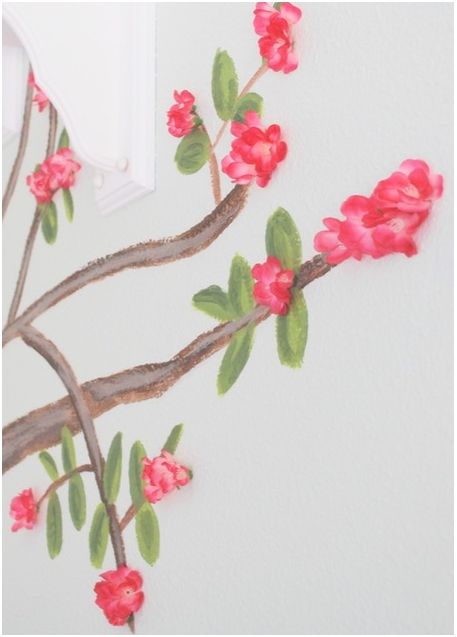
(if you dare to decorate with faux blooms): Pluck the bloom off the plastic branch, and trim the plastic bottom of the bloom so that your blossom will glue flat to the wall. Apply with hot glue to the end of your painted branches.
And in the end, this is the result!
So tell me readers, give it to me straight.
Is it a botanical beauty, or are you totally allergic?



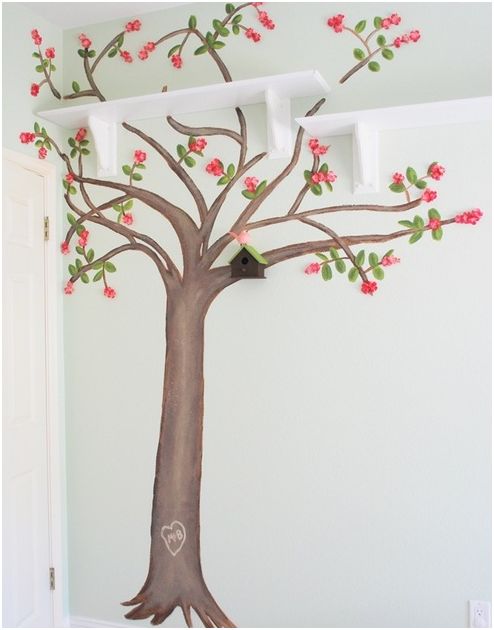

Oh my gosh! I LOVE it!!!
I love it…you did a great job! I would have been totally stressed. I really love the way the shelves tie in…so cute!
Wow, that is really neat! I’m doing my daughter’s room in an Asian theme (girlie Asian, not black/gold/red/dragons/etc.) and something like this would be a sweet touch. I’m sure I could easily find all of the supplies…..except perhaps, for the courage!
I. Love. It. Gorgeous!!!
that is soo clever, I can’t even believe it! I would never have thought of such a thing. I think it is totally cute! thanks for stopping by my blog!
I think this is gorgeous! I would like one for my room…
I think it is super cute for a little girl’s room and the flowers really give it dimension. I also like how the shelves are around it. Great job!
I think your daughter and mine are twins separated at birth – lol – the meerkats! She was CRYING yesterday after the zoo field trip b/c the chaperone didn’t take her to see the baby leopards (and now I have a trip to the zoo to make). I am so NOT showing her this post! Have I told you about the dinosaurs I stenciled around the top of her room 2 years ago?? It looks terrific, you must come by your artistic talent naturally :-)
You must have some artistic talent because that looks fantastic. My daughter would be thrilled beyond belief to have a wall like that in her room!
i absolutely loooove it!! you did a great job! i would of never thought of the faux flowers!
This is great! I love it!
This is darling!! Seriously, seriously cute. I’ll have to be thinking about ways to make paint 3-d in my home now.
This is so very adorable!
I’m not a fan of murals, but I LOVE this idea!
love it!!!!!!!!!!!!!!!!
especially the 3-D. I am saving a bookmark and will copy it someday.
Totally a botanical beauty!
My daughter Katie mentioned your tree on her blog ~ I’m so glad I stopped by to see it!
Just stunning!!!! You did a fantastic job……….I may have to try it out in my own little Bella’s room.
That is stunning. I hope your daughter loves it becuase it is wonderful! You may claim to bot be an artist, but that tree says otherwise.
You are an artist! I love it. Girly girly!
LOVE IT! Soooo fabulous!
Really gorgeous – your daughter is one lucky little girl!!
Absolutely fantastic.
Um, not an artist? I beg to differ. It looks AMAZING, and the faux flowers really make it. Love the initials in the tree too. So sweet! Also, the shelves and the lovely items on them are the crowning touch.
Genius!
jbhat
love it!
It’s beautiful. I like the 3-D flowers. You have found an appropriate use for fake blooms!
Beautiful! She is a lucky little girl to have you as her mom ;)
Totally CUTE!!! You are truly talented, and I love all your projects! I’m a recent subscriber to your blog, and loving it!!!! Very inspirational ideas!!! CHEERS!
I think it looks great!!
Absolutely adorable–I love it!
I couldn’t love this more! If I owned our current home, I would do this! I loved what you did more than any of your inspiration pictures! Well done! I love your blog and I never miss a post. You don’t disappoint!
LOVE IT! Thank you for the step-by-step directions. Even the paint colors and size of brushes. It made feel like I could do this. I am not a painter/artist at all. I would love to do this in my girls room, but we just painted her walls pink. What can you do with pink walls???
Oh where were you when I was painting my daughters nursery (she’s 9 now)…That would have been beautiful…I did however paint a giant sun with face…but as “cute” as it was…THIS is breathtaking!!
It’s incredibly sweet and pretty. Alas, my daughters are now teens, and not into this kind of decor anymore. : (
Not an artist?!?! Oh I beg to differ. In fact, I’ll fight you over that. =) This is gorgeous! I’ll be linking.
i can’t get over you and your talent. where oh where do you find the time for all these projects! i need to hire you!
Love it! That is absolutely adorable. I wish I was that creative.
I LOVE IT! I agree with the person above—the shelves look perfect in it. At first I was wondering why you kept them and now I am in love. I also like that you did it in a corner. Almost makes me want to pop out a kid….but I’m pretty sure the husband rather wait.
I am new to your blog and I am SO glad that I found you! I just wanted to let you know that your mural was gorgeous!! I paid for a artist to come and paint a tree (sort-of) like yours and paid her $500!! I’m so mad!! I could have done it myself! You should really think about doing that as a side business. I bet your little bella is thrilled! Can’t wait to check out all of your other projects!
Absolutely, positively beautiful!! Do you mind if I mention this on my blog?
I LOVE IT!! That would have been SO FUN to have in my room when I was little!! I’m totally jealous now! :)
That is so gorgeous! I love it and my daughter would go crazy over something like that. Unfortunately, we’re not allowed to paint in our rental. It makes me REALLY jealous. Fabulous job! I love your blog and all the photos. It’s definitely eye candy ;)
Great blog! Definitely inspiring, I want to do more DIY!
that is absolutely beautiful!! your daughter is so lucky to have such a beautiful wall.
That looks great! So much easier than painting flowers!!
Reminds me of a tree our client painted in her baby’s nursery. We made a custom rug for her and she just sent us a photo. You can see it here:
http://ourcreativelife.blogspot.com/2009/05/sweet-nursery.html
God Bless!
Darlene
Creative Carpet Design
http://www.creativecarpetdesign.com
blog: http://www.ourcreativelife.blogspot.com
This is beautiful! And how inspiring…as soon as we get into a larger house, it was my dream to dedicate a wall to our “family tree”. I thought about a solid color (like a celadon or cornflower blue) and painting a white silhouette of a tree. Instead of labeling names, I wanted to strategically hang photos of our extended family in either matching black frames or random hodge-podge of frames :) Now I’m even more excited!
ARE YOU KIDDING ME?!?!?! this is amazing. you are TOO good.
Totally fantastic tree!
I absolutely LOVE it!! What a great idea. Thanks for sharing. I am inspired by your idea, and if I duplicate, I will send you my link. ☺
oh.so.charming!! Love it!
Suzanne
I love the initials in the heart! :)
This is THE most amazing project I’ve ever seen. You make it look so easy. So easy, in fact, I might even try it myself. Thanks for the instructions and inspiration!
I love this tree. I am not even sure how I stumbled upon this… glad I did! It inspires me to do this in my girls’ rooms. They would love it. Great job!
Glenyce
awesome!!! quick question though…does the hot glue do anything to the wall?
Lovely tree! I invite you to visit my blogs:
http://mapiurka.blogspot.com/
YOuy can see my vinyl wall decals collection.
Thanks, Maricel
I absolutley love it! Def a must try!
Thank you so much for the lovely inspiration .. though my girl is 7 .. she loved the idea .. n its going to be done in her room as her christmas present.
You’re amazing! I showed this entry to the Youth and Young Adult committee at my church (I’m a youth pastor) and we’re using your ideas to redecorate our Atrium classrooms. Our only difference is we’re using olive trees and grape orchards. Thank you so much!! I love your posts!
Have been waiting 6months to copy your idea for my daughters room, she wants pixie hollow, so after the tree is finished I’ve been comanded to paint fairies in it…..wish me luck!
Holy crap! I want to do that in my room and I’m 25! I’M OBSESSED!
Hey this is fantastic! I totally wanna do this to my room :) stumbled on your website by accident, but I love it haha
Where’s the birdcage from on the shelf of the cherry blossom wall, it’s so cute!
xo
that is amazing! Wow! Looks great.
I, too, am curious about the later effects of hot glue on a wall…but, in the meantime, the tree is beautiful :)
Looks lovely! You did a great job!
Awwwwww! I luv it !
:( all the photos are broken! I loved the thumbnail I clicked on to get here and would love to see all the photos. You are awesome. I’ve spent half an hour perusing your stuff. Thanks for being cool!
Fixing them this weekend Alesha!
Hi, I love this project as well. I have been planning on doing a mural like this in my daughter’s room for about a year and haven’t started because I’m not an artist and have no idea what to do. Are you still planning on fixing the photos? I’d love to see exactly how you did this. Thanks!
Working on it Casey, it takes a lot of time and there are several dozen to repair!
Kate